


Understanding how users progress through various steps to complete key actions on your website is crucial. These steps, or flows, are known as a website funnel. With Microsoft Clarity now supporting funnel analysis, I decided to explore and share my findings on this feature (there is a lot to unpack here, above just using the feature).
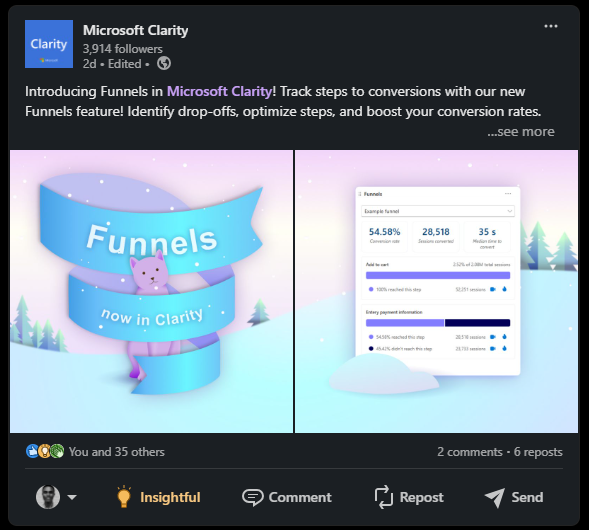
Last week, Microsoft Clarity announced on LinkedIn that it now supports “Funnel” analysis.
Additionally, I observed that the “Content Insights” card has started populating with data in some of the Clarity projects I manage.

Funnels represent an ordered sequence of user actions expected to achieve an end goal. They provide a clear view of user progression through each step, highlighting how each step performs and identifying where users drop off or require further investigation. This insight can help improve your website’s conversion rates.
In this article, I’ll not only explain how to create a funnel in your Clarity project but also share some hidden insights based on my findings, including how to analyze funnel performance using Microsoft Clarity.
Where to Find Funnels in Microsoft Clarity
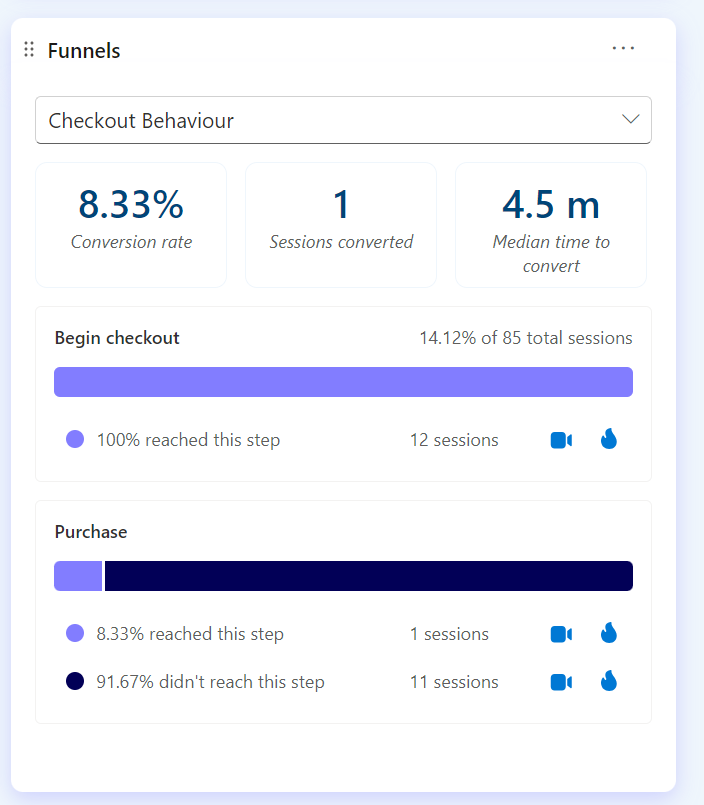
When you navigate to the Microsoft Clarity dashboard, you should see a card labelled “Funnels,” displaying a report of the funnels you’ve created. Your report should look like the example below if you’ve created a funnel.
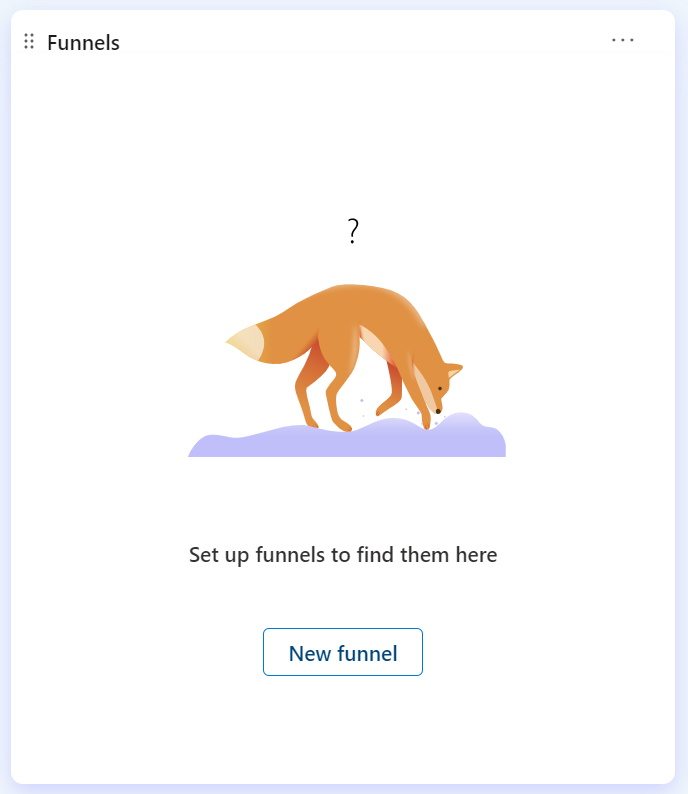
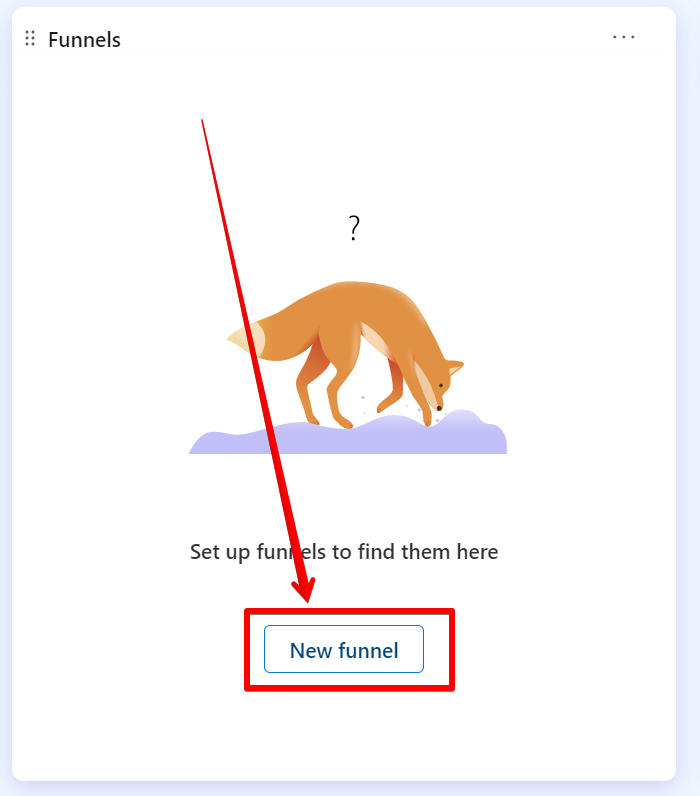
And, if no funnels have been created in your project, you’ll see an empty screen like the one below.
Additionally, by navigating to the “Settings” tab in your Microsoft Clarity project, you can find the “Funnels” section, which holds all the funnels you’ve created.
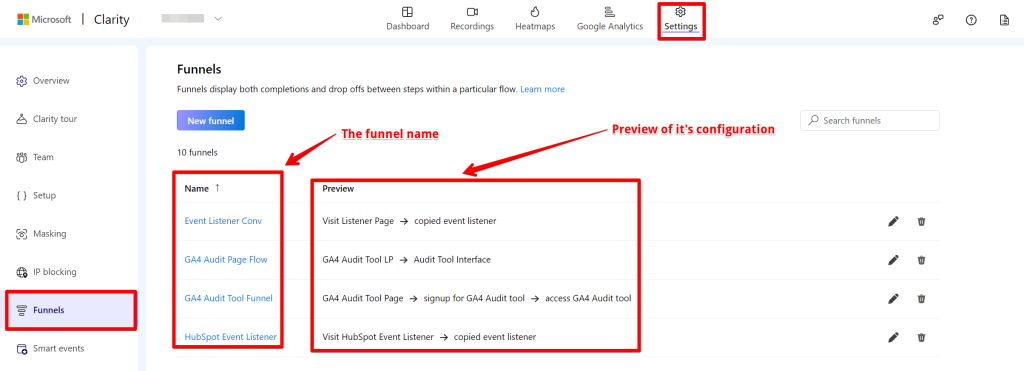
It will show the “Funnel Name” and a preview of its configuration.
Before exploring the details of creating a funnel in Microsoft Clarity and other important aspects of this feature, it’s essential to understand the metrics reported in the “Funnel” report and explore other ways to explore the data more deeply.
Understanding the Microsoft Clarity Funnel Metrics
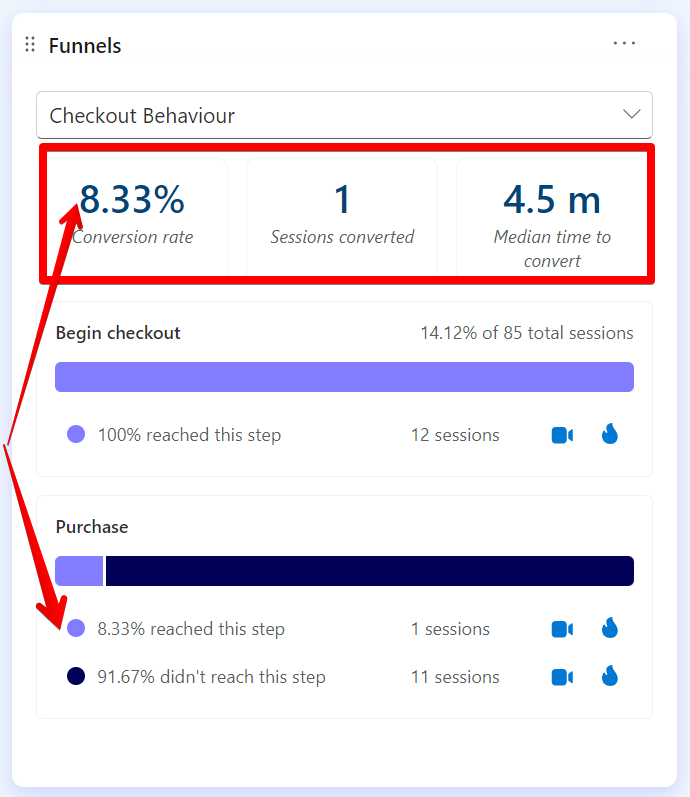
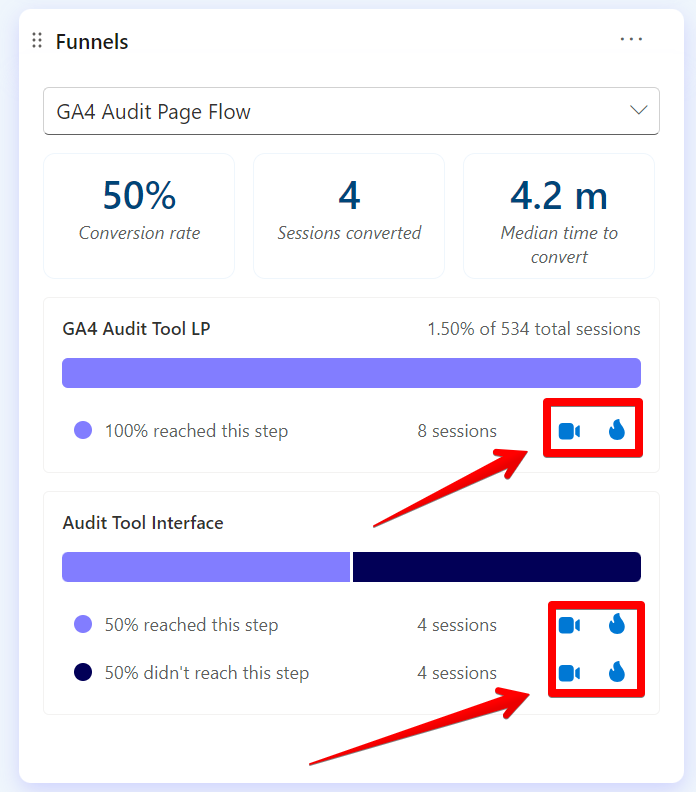
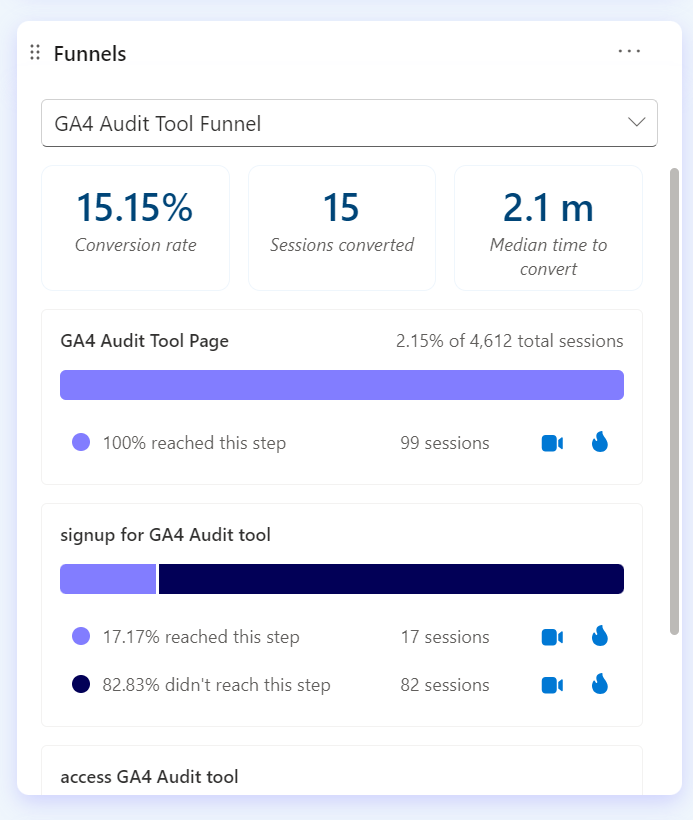
Once you create a funnel in Microsoft Clarity, you can view it in the dashboard. Here, you will see three key metrics and the funnel chart itself.
The top-level metrics displayed in the Microsoft Clarity “Funnels” card for each funnel are:
- Conversion Rate: This represents the percentage of sessions where all the steps in the funnel were performed. Microsoft Clarity calls it users, which might be misleading. The Microsoft Clarity team updated this after this guide was published.
- Sessions Converted: The number of sessions that completed the entire funnel.
- Median Time to Convert: The median time it took to complete the funnel.
The “Median Time to Convert” is calculated using the middle value of the time taken for all user sessions to complete a conversion, indicating the typical time to conversion. The time used is from when the user starts the session to when they complete the final step in the funnel.
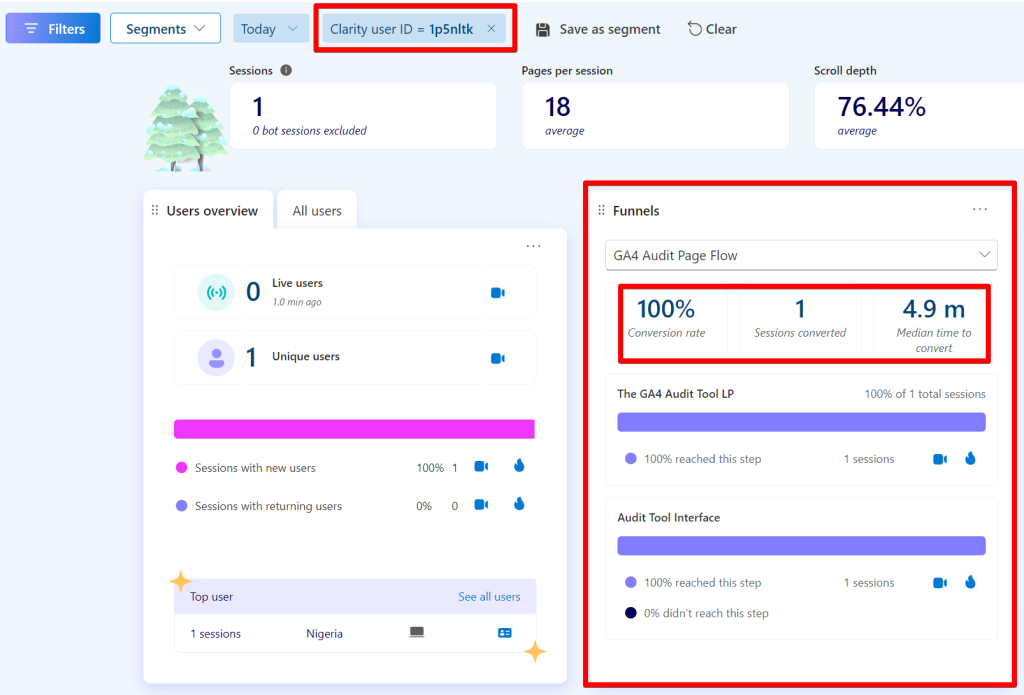
The image below shows that the “Median Time to Convert” in the funnel card, filtered for a single user’s visit, is reported as 4.9 minutes.
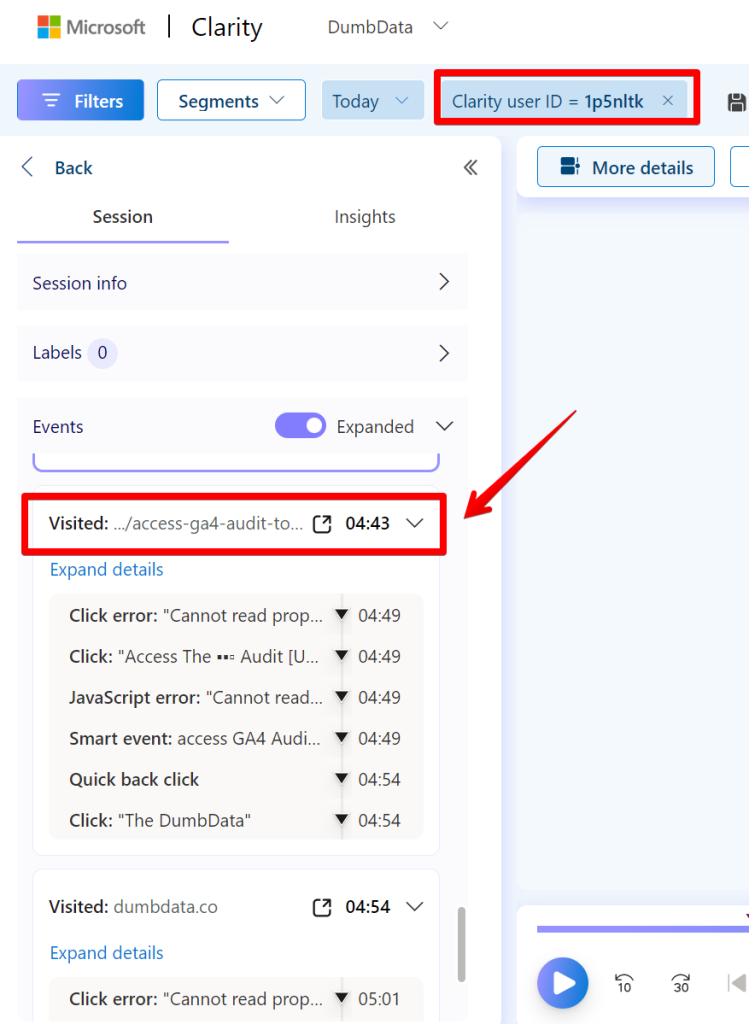
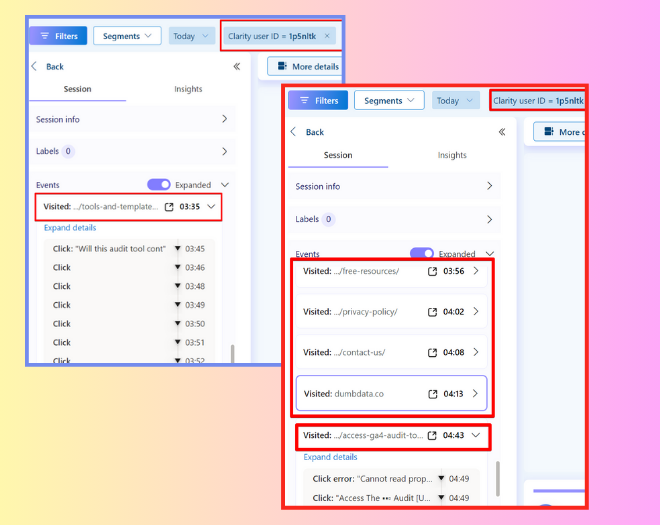
In the session recording detail tab for the same user, you can see that the user completed the last step in the funnel flow at a similar time.
It’s important to note that Microsoft Clarity uses a session-based approach similar to Google Analytics (GA4) session conversion rate.
It means that it reports on sessions, not individual users. For instance, if a user has five sessions and completes a funnel flow in three of those sessions, Microsoft Clarity will report all three sessions in the report. There is still a way to get this data, and I showed further in the blog.
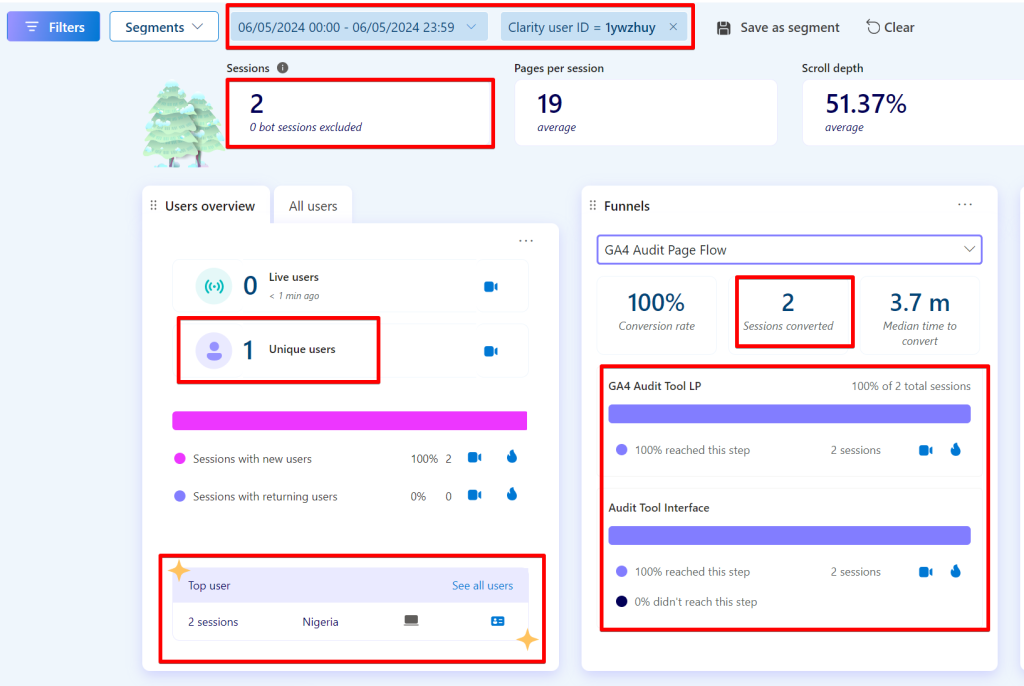
In my case, I had two sessions in a day (5th of May 2024), and in both sessions, I completed the goal for the same “GA4 Audit Tool” funnel; you can check out the FREE Google Analytics Audit tool here.
When I filter by my “Clarity User ID” (you can use a Microsoft Clarity custom identifier for your test), Microsoft Clarity reports one user and two sessions, with the funnel reporting both sessions.
For each step in the Microsoft Clarity funnels, you will see the number of sessions that did or did not reach it. However, you cannot determine the number of users who complete the funnel. I have a workaround for this, so keep reading.
Additionally, you can view heatmaps and recordings at each step for more detailed analysis by clicking the fire icon and camera icon, respectively.
You can select your preferred funnel from the dropdown menu if you have multiple funnels created in your Microsoft Clarity project.
How You Can Create a Funnel Report in Microsoft Clarity
This section will show you a step-by-step guide to creating a funnel in Microsoft Clarity. I’ll provide the basics now and cover additional findings and insights later in the guide.
1. Start by navigating to the Funnels tab in the “Settings” view in your Clarity project.
2. To begin the funnel creation process, click the “New Funnel” button; this will open the funnel creation interface.
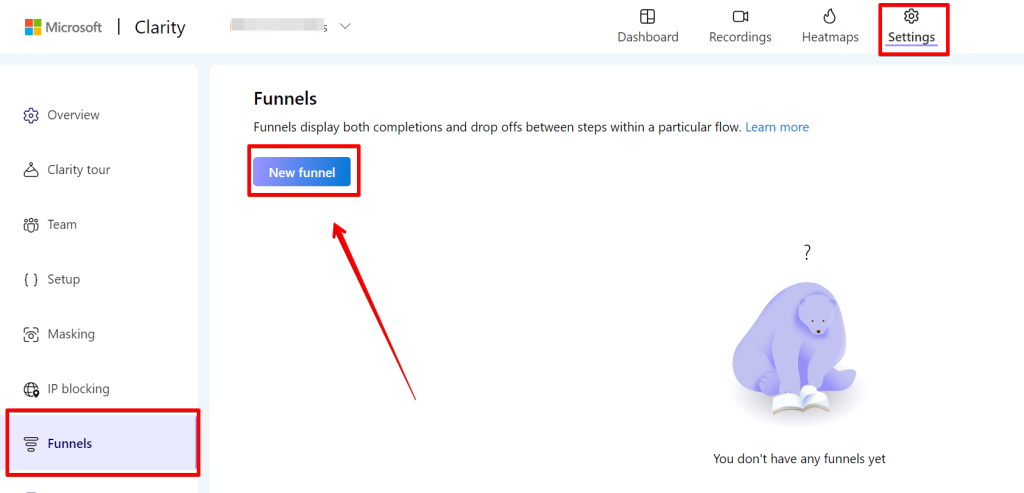
If you haven’t created one before, you can also get to this point by clicking the “New Funnel” button in the “Funnels” card displayed on your Clarity dashboard.
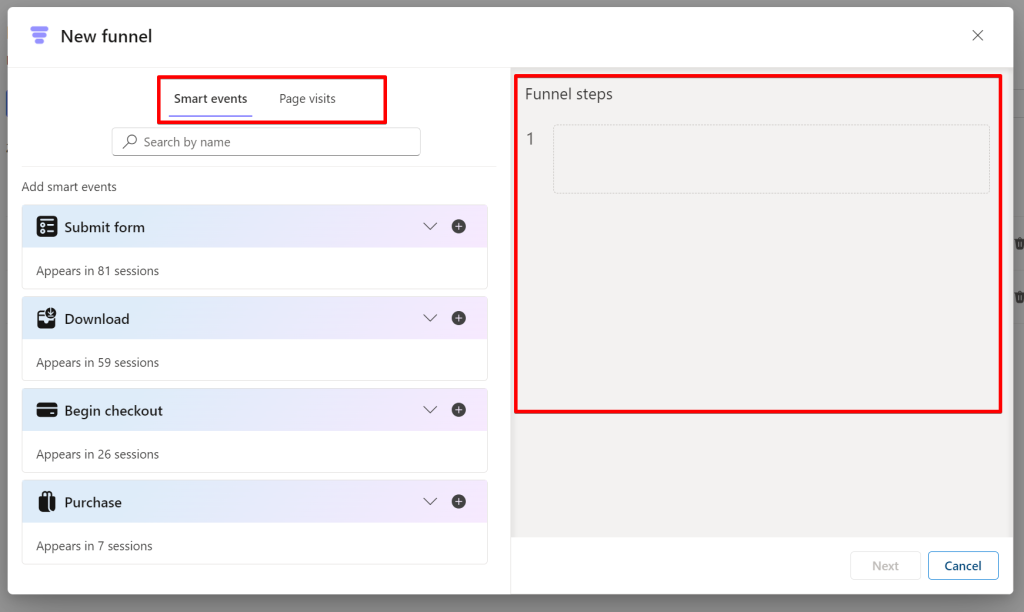
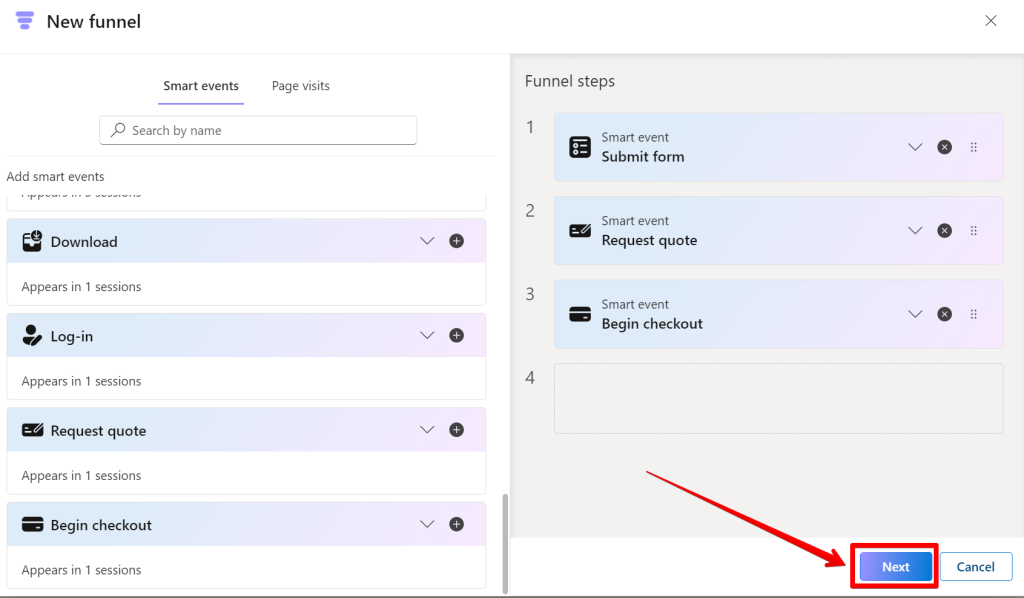
3. In the funnel creation modal view, you can configure your funnel by adding steps.
In the right panel, drag and drop “Smart Events” or “Page Visits” from the left panel to add them as steps in the funnel.
If you don’t know what “Smart Event” is, check out my detailed guide with documented findings of the Microsoft Clarity event tracking capability.
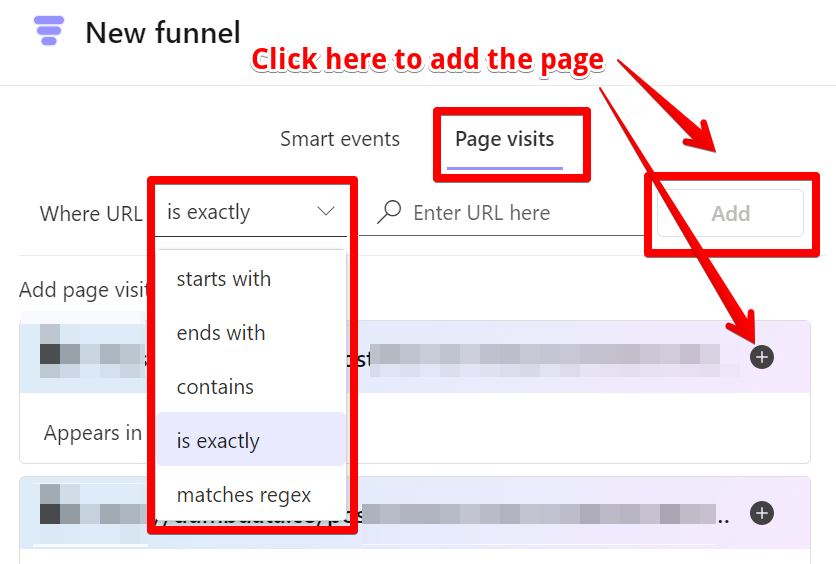
While in the Page Visit, you have the option of using different conditions when adding a page URL to the funnel flow, such as;
- Starts with
- Ends with
- Contains
- Is Exactly
- Match Regex
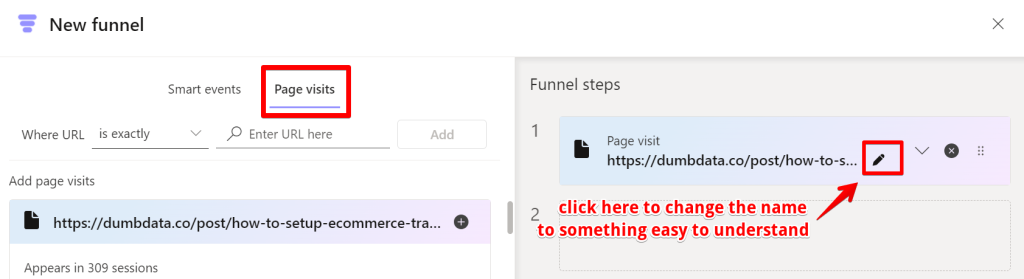
You can rename a page visit funnel step to make it clearer and easier to understand, but you cannot rename an applied “Smart Event” step in the funnel.
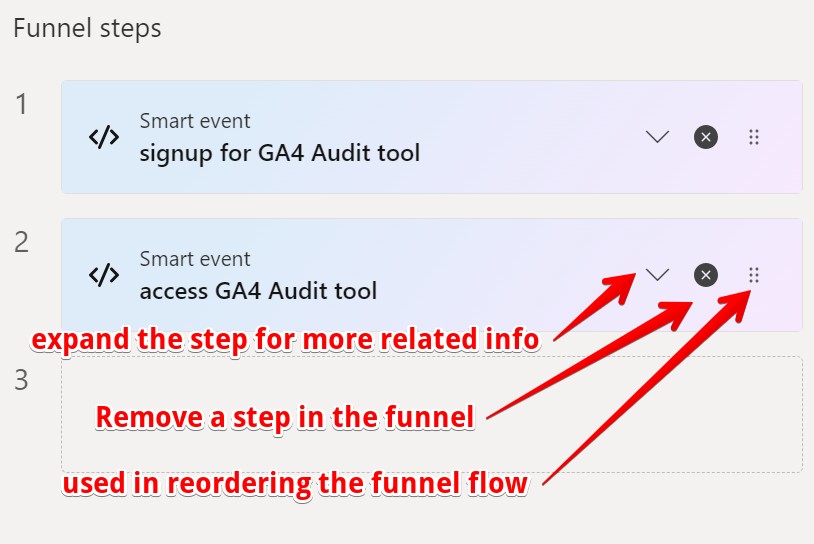
You can also rearrange the order of the events and page visits by dragging and dropping them within the funnel. While creating a funnel, you can remove a step by clicking the “x” icon.
You can mix “Page Visits” and “Smart Events” in your funnel configuration in Microsoft Clarity.
Note that you cannot edit the condition of a page visit step directly; if changes are necessary, you’ll need to remove the step and add it again.
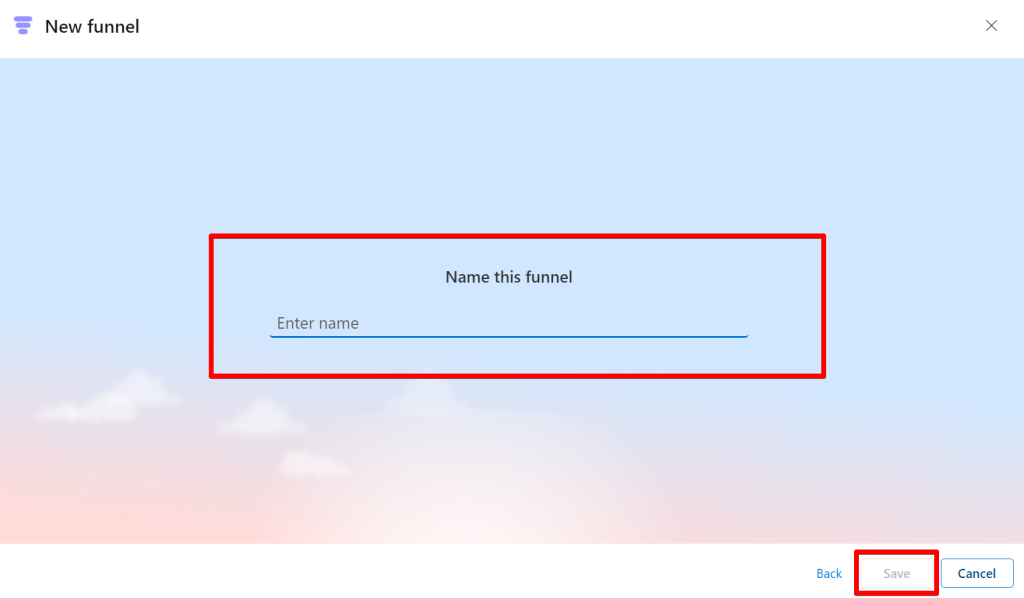
After adding all your steps, click the “Next” button. This will present you with a screen where you can name your funnel.
You should click “Save” to finalize and save your newly created funnel.
You can view your funnels in the Settings -> Funnels page. However, funnels will appear on the dashboard once users engage in the defined actions.
Editing Funnels in Microsoft Clarity
After creating a funnel, you can edit it by changing the steps or flow or changing the funnel’s name.
You can start the editing process from the dashboard interface; click the dropdown and pencil icon on the “Funnels” card.
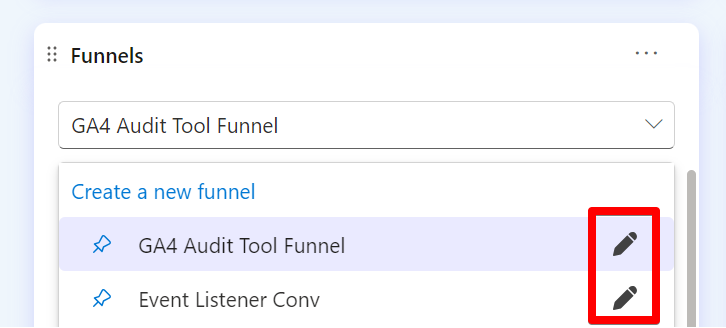
Alternatively, navigate to the “Settings” tab, select the “Funnels” section, and click the pencil icon beside a funnel.
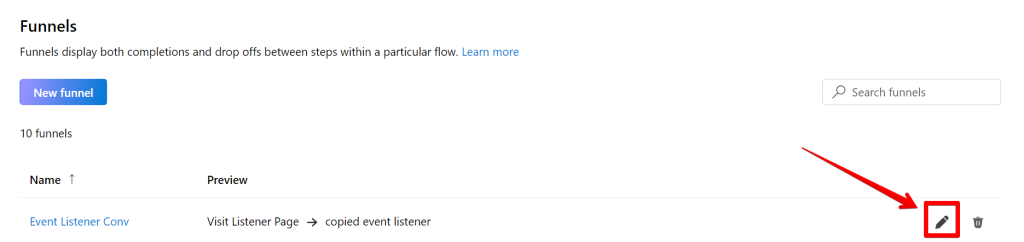
Both methods will take you to the funnel creation modal view, where you can edit the funnel’s name or rename page visit steps by clicking the pencil icon beside the “Funnel Name.”

You can’t edit a “Page Visit” condition; you must remove and re-add the step.
Another edit you can make is to remove or add new steps to the funnel.
After making the necessary changes, click the “Save” button to update your funnel.
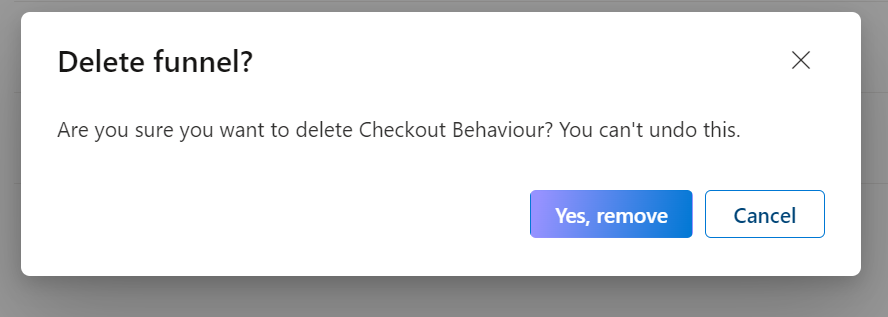
Right from the “Funnel” tab in your project settings, you can delete a “Funnel” that you no longer need by clicking the waste bin icon beside it.
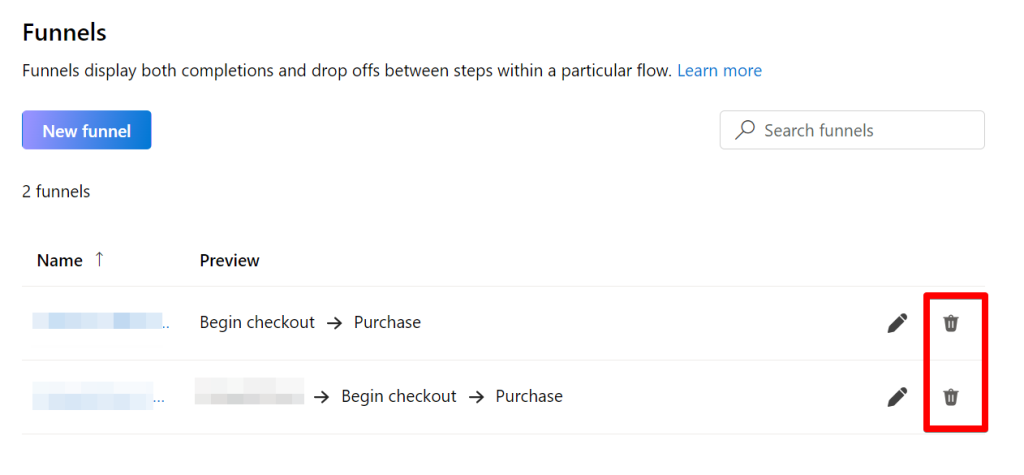
You’ll be presented with a screen to either cancel the deletion process or continue with deleting the funnel in your Microsoft Clarity project.
Additional Ways to Use Funnels in Your Clarity Project
Besides using the reported metrics to understand how your website visitors progress through each flow or evaluate your conversion funnel’s performance, Microsoft Clarity funnels can also help investigate conversion friction in the following ways:
1. View Heatmaps and Recordings:
You can view heatmaps and session recordings for any funnel step directly from the “Funnels” card in the Clarity dashboard.
Clicking the icon for any of the icons for heatmap or session records allows Clarity to automatically create a filter with conditions that provide session recordings or heatmap behavioural data for the selected segment, aiding in more detailed analysis.

2. Manually Set Up Filters:
You can set up a detailed analysis filter using funnel information by opening the filter modal.
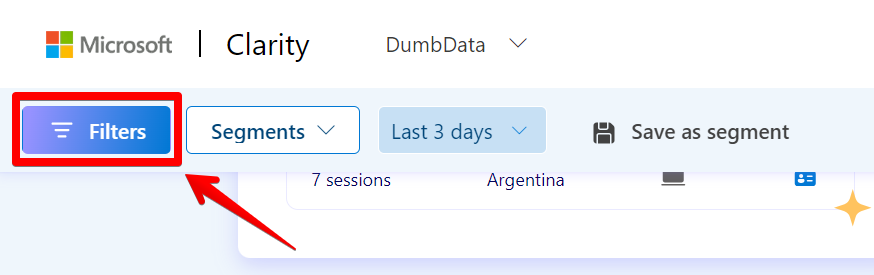
Navigate to the “User Actions” category and find the “Funnels” filter option.
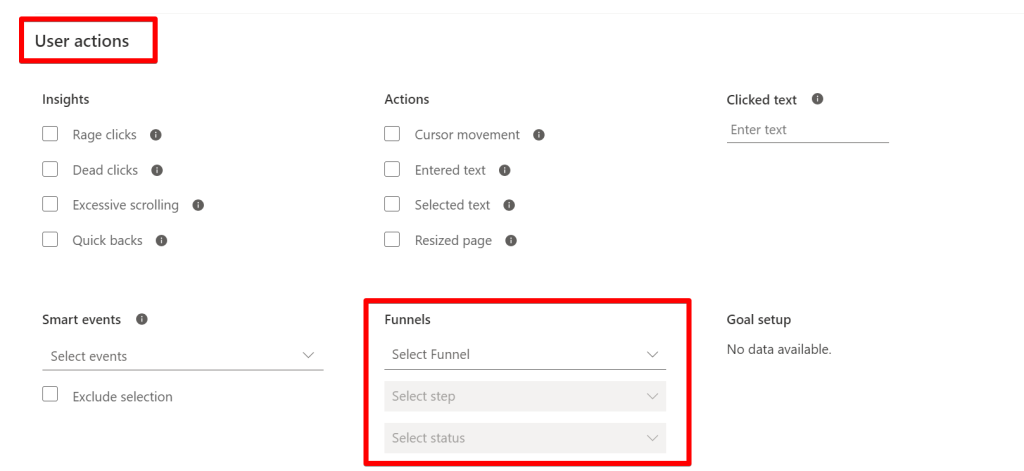
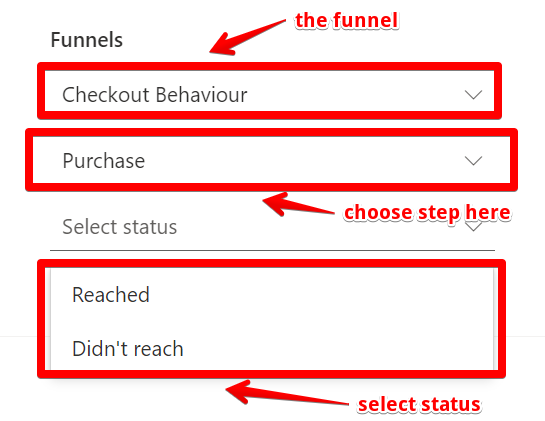
First, select the funnel. In the next dropdown, choose the flow in the selected funnel, and then select a step where you want users to either:
- Reach
- Not reach
Note that only one funnel filter can be applied at a time. You can also include other filter categories and this filter can be used to watch recordings or analyze heatmap behaviour for sessions that match the flow.

3. Save as a Segment:
After applying other filter conditions to your configuration, you can save it as a segment.
Click the “Save as a Segment” option and name the segment for easy and convenient future reference.

4. Use With Other Filters for More Segmented Insight:
You can also apply other non-funnel filters or segments. These filters will define the data segments on which your Microsoft Clarity reported funnel data will be based.
Using these methods, you can gain deeper insights into user behaviour and identify areas of friction within your conversion funnel, ultimately helping to improve your website’s performance.
For example, if you want to understand how mobile users move across the funnel or visitors from a particular market region or experiment, go through your website funnel.
Key Things to Know About Funnels in Microsoft Clarity: Limitations, My Findings and Other Details
Understanding the limitations and functionalities of Clarity’s funnel feature is crucial. Here are some essential points:
Retroactive Reporting:
Microsoft Clarity’s funnel report is retroactive, which basically means that it will report and include data from before the feature’s launch.
Adopted Type Of Funnel Used:
Clarity uses a closed funnel approach. This means that once a user session satisfies the first step, they must satisfy the subsequent steps.
Sessions that skip the first step will not be included, even if they join the funnel later.
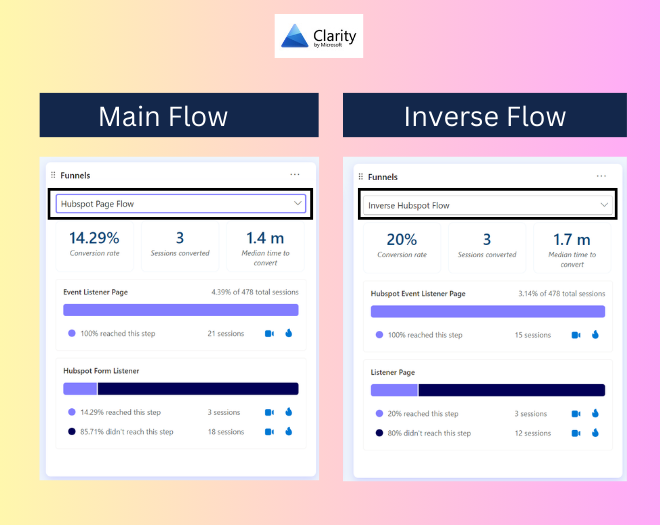
To test this, I created two funnels with inverse steps. The differing numbers confirmed the closed funnel approach.
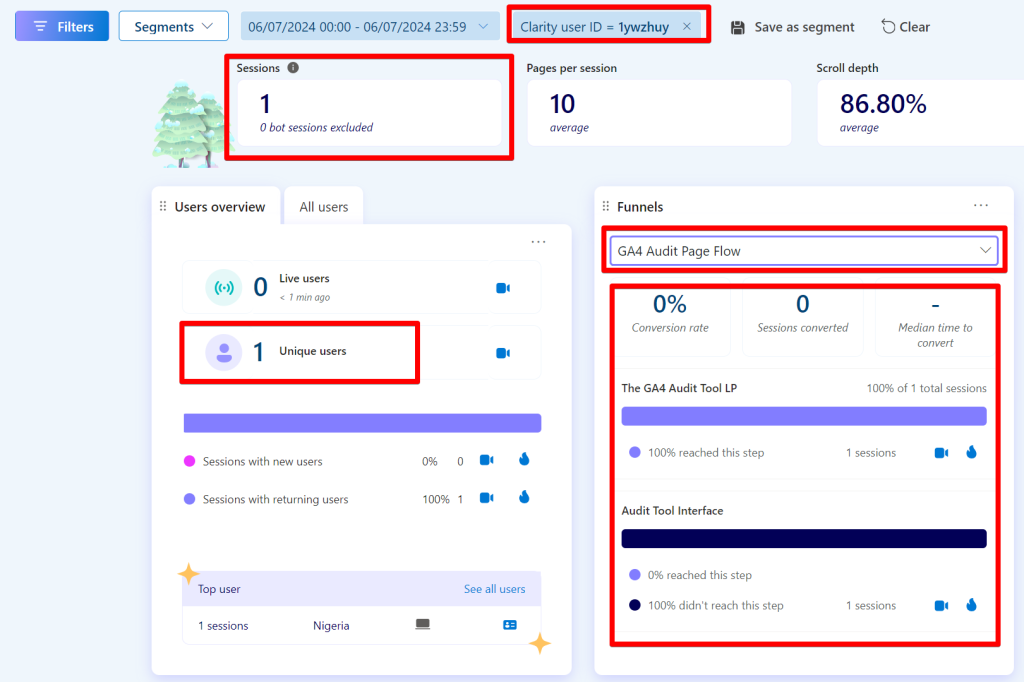
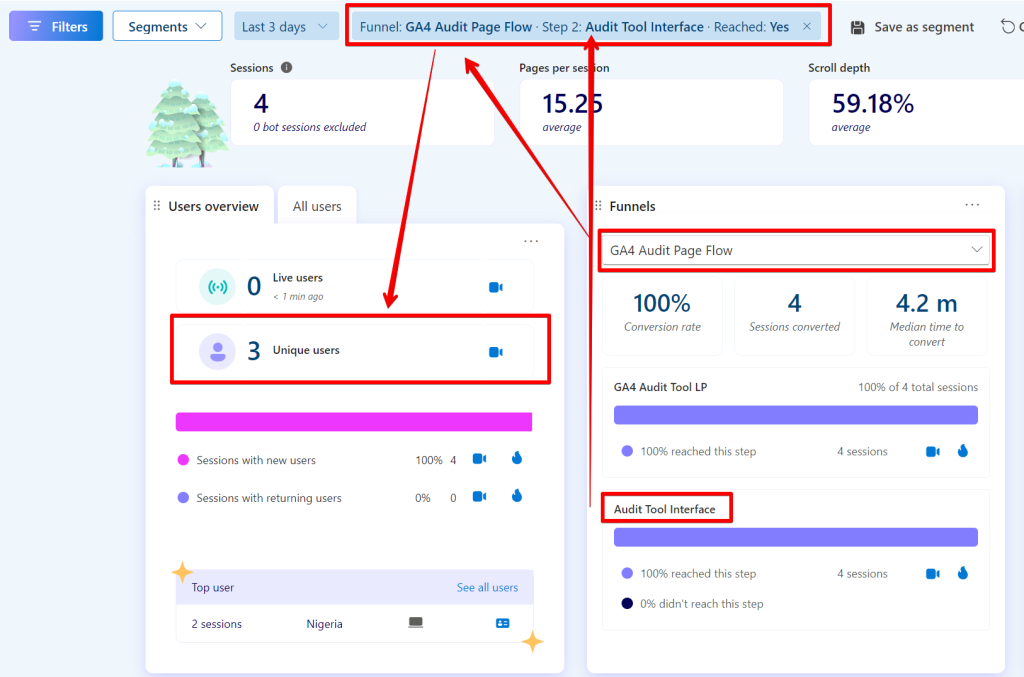
To verify this, I visited the website and filtered by the ID. As shown in the screenshot below, it indicates that I entered the funnel but did not complete it, which is inaccurate.
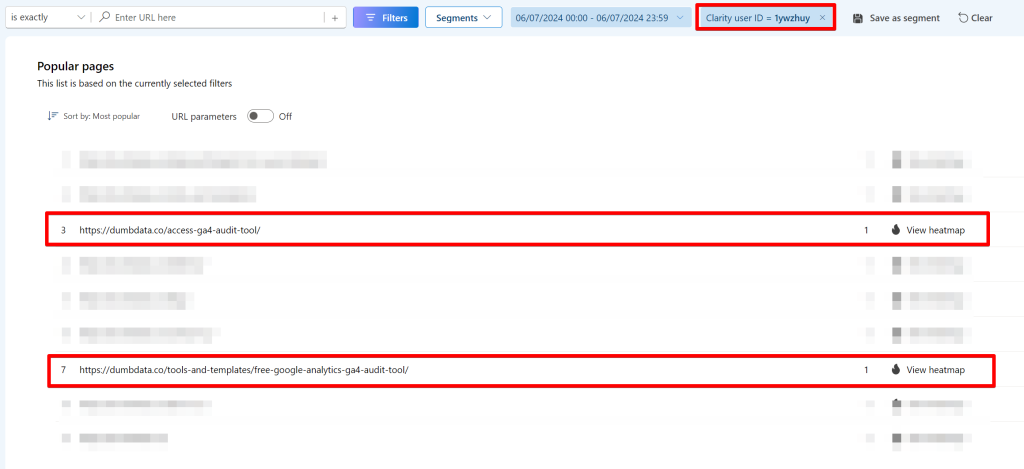
However, when you navigate to Microsoft Clarity’s “Heatmap,” you can see that in that session, I did visit both pages that make up the funnel configuration.
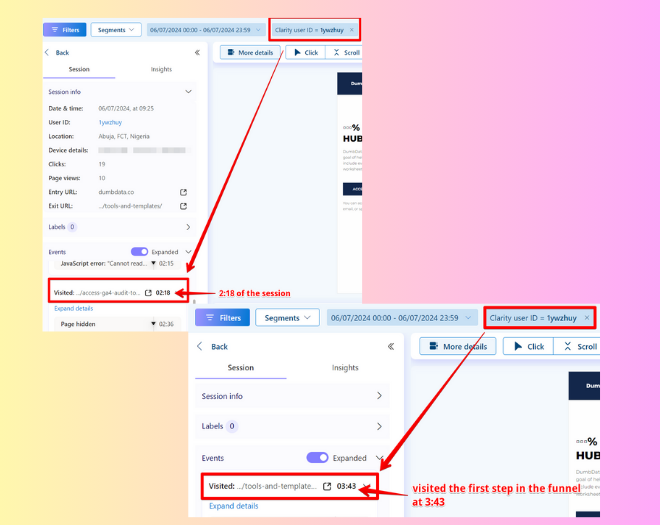
In the “Session Recordings” tab, you can see that during that session, I visited the “Audit Tool Interface” step, which is the “Access the GA4 Audit Page,” before visiting “The GA4 Audit Tool LP,” which is the “GA4 Audit Tool Landing Page.”
It also uses an indirect funnel flow.
It is important to note that Microsoft Clarity does not enforce a strict sequential funnel flow. Users are not required to complete each step in a direct sequence without any interruptions.
Users do not need to move directly from one step to the next in a user session. They can perform other actions or visit different pages as they progress through the funnel.
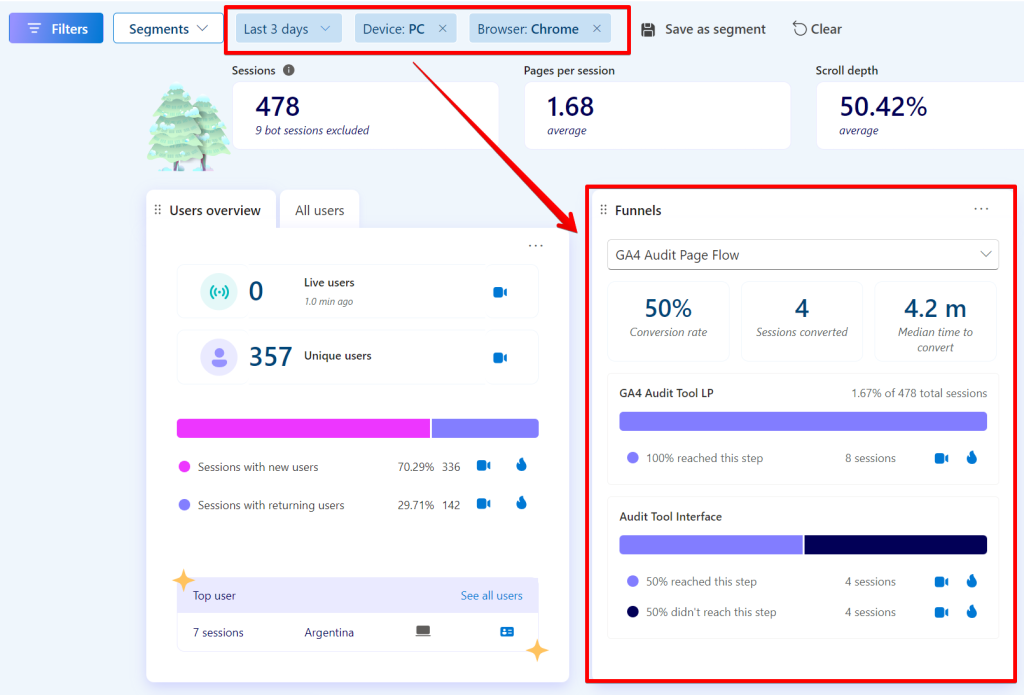
For instance, during a test visit, the funnel showed that I had entered and completed it, as depicted in the image below.
Despite not moving directly from step A to step B and beyond and visiting other pages along the way, my session still counted as a session that started and completed the funnel.
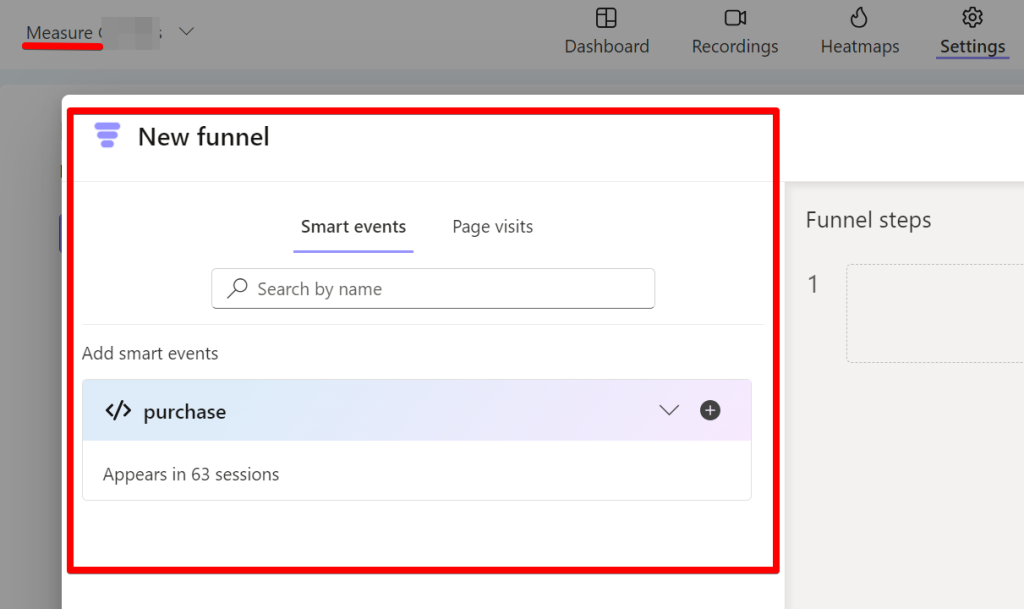
Flexibility to Mixing Conditions:
Currently, you can mix “Smart Events” (API Events, Auto Events, etc.) and “Page Visits” in a single funnel configuration, as shown in the image below.
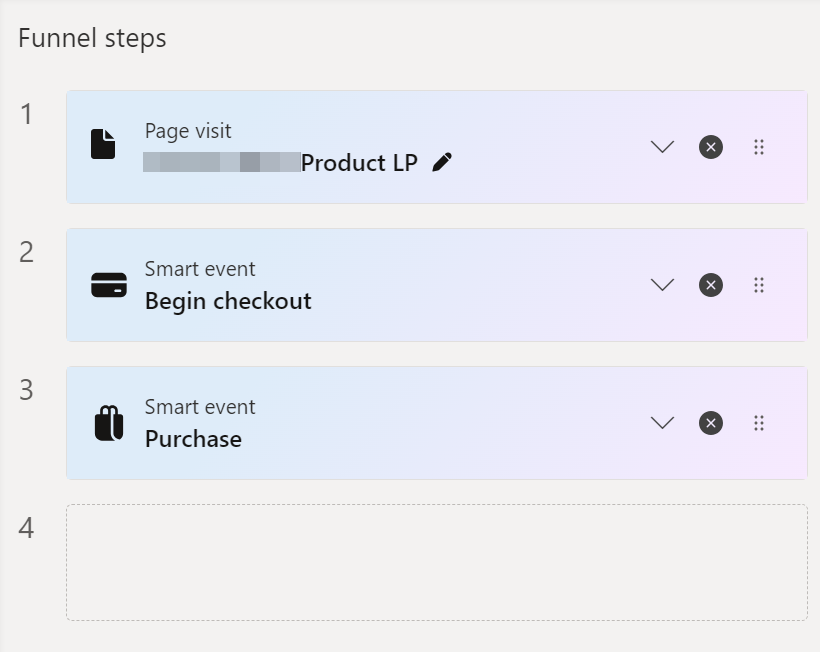
You can see how I used it in my configuration, and it reports how users move from a product page, initiate a checkout and place an order on the website.
Session-Based Reporting:
The Microsoft Clarity report on “Funnels” is based on sessions, not users.
To see the number of users who completed a funnel, create a filter using the last step of the funnel with the status “Reached” and save it.

Doing this will allow Microsoft Clarity to show the number of users who completed the funnel.
Be cautious when determining the number of users who drop off using the above approach, as creating your filter condition to rely on just the first step in the funnel may not reflect the actual users who entered the funnel flow.
It’s better to use the steps below the first flow to get accurate drop-off data, though it may sometimes report no data.
No Documented Limit on Number of Funnels Per Project:
There is no official limit on the number of funnels you can create, although one might exist unofficially.
Funnel Data and Microsoft Clarity’s Copilot:
Funnel data isn’t used to train Microsoft Clarity’s Copilot, the AI feature. Creating a filter based on funnel data and using Copilot’s session recording summary won’t yield insights on improving the funnel.
“Smart Event” Lifespan Impact:
The lifespan of “Smart Events” can be a challenge when creating funnels.
I noticed that if an event hasn’t been recorded recently, it won’t appear for use in funnel configuration.
This issue is common with “API Events,” a type of “Smart Event.” In my project, I have about eight “API Events,” as shown in the screenshot below.
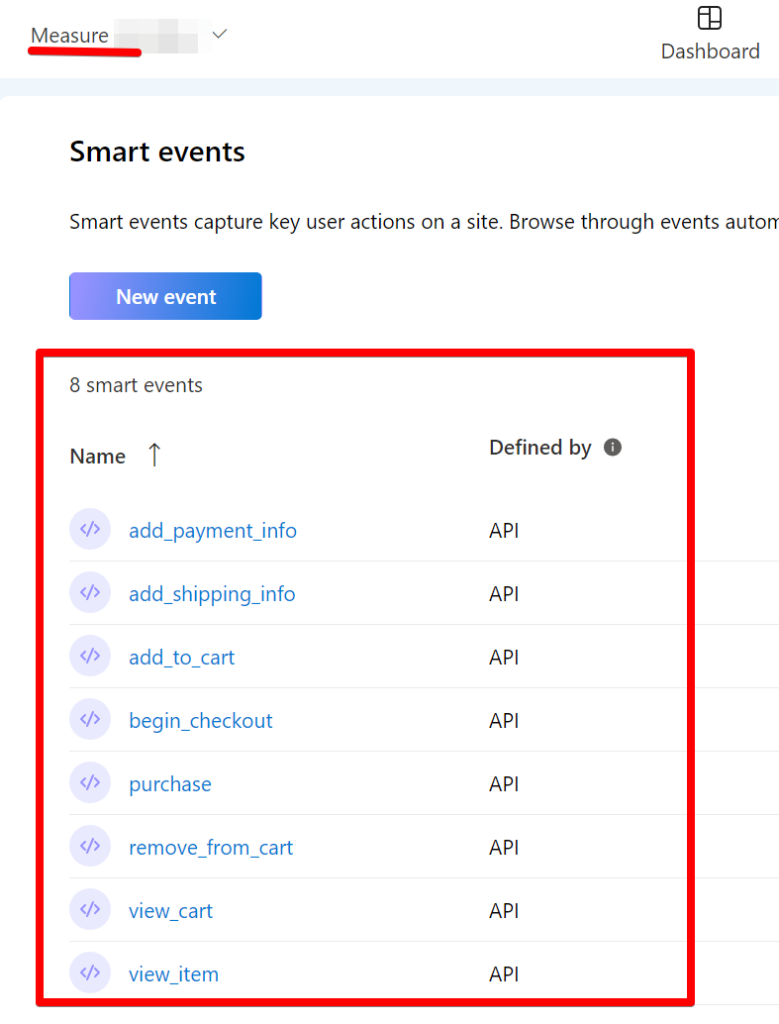
However, only one out of eight “API Events” was available for use in a funnel.
API Events In Clarity’s Funnel Performance Report:
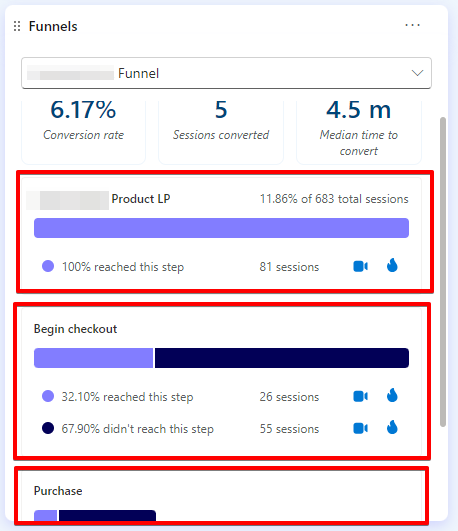
It appears that the bug that prevents your funnel from reporting any data when you use Microsoft Clarity “API Events,” a type of “Smart Events” that I recommend you use when setting e-commerce and purchase tracking in Microsoft Clarity, as explained in my guide about e-commerce tracking in Microsoft Clarity, has now been fixed.
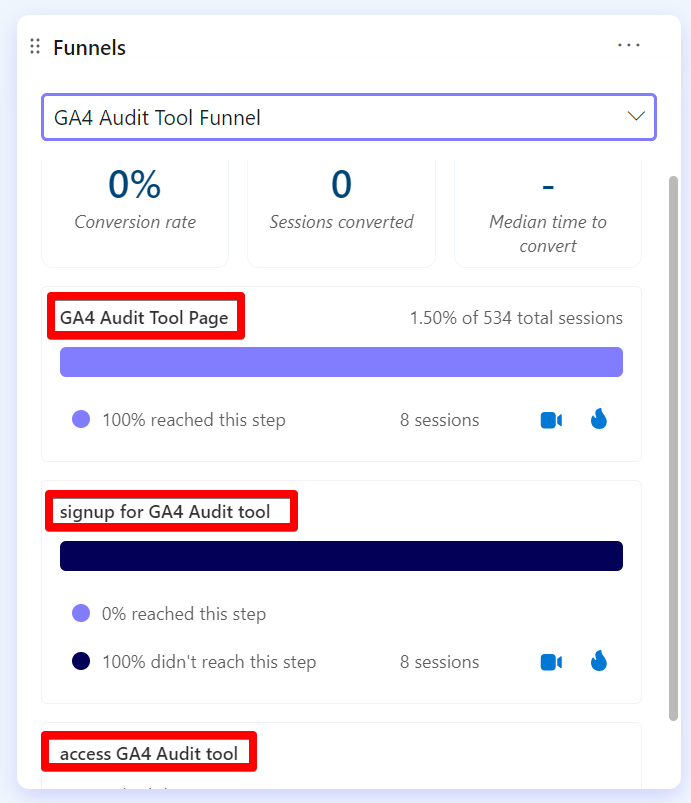
Instead of showing no data, as shown in the image above, it now shows data.
Custom Tags Not Currently Supported:
When creating a funnel in Microsoft Clarity, you cannot use “Custom Tags”, for example, to correctly categorize a group of pages a user should visit before performing a Microsoft Clarity event or navigating to another “Custom Tagged” page type in your website funnel flow.
Microsoft Clarity’s “Custom Tags” is a powerful feature, which I have discussed in this guide and in another guide covering innovative ways to use Clarity custom tags.
Only Supported on Website Projects:
Microsoft Clarity funnels are currently supported only for “Website” projects and not for “Mobile App” projects. This means you cannot measure your app’s funnel performance at this time.

However, this may change in the future, and I will update the blog post accordingly when it does.
Closing Remarks
In this guide, we’ve covered the newly added funnel feature in Microsoft Clarity, including how to create a funnel, read the metrics, understand the limitations, and other key details.
I’d love to hear what you’ve learned and if you’d like to explore Microsoft Clarity more. Check out the DumbData blog for more Clarity-related articles. For feedback, help, or questions, feel free to reach out via LinkedIn or the email address on the DumbData contact page.
If you think I missed something, you can also reach out using the same medium, and until then, I am happy to finding Clarity in your business.


