


Installing Piwik Pro on your website is an easy process, and I’ll walk you through it in this guide, regardless of the CMS you use or the technology your website runs on.
This article will not cover account creation or best-practice configurations (you could reach out if you feel stuck and need help). Instead, I will focus on providing a comprehensive resource outlining various installation methods and the steps involved in each.
This includes implementation on popular CMS platforms such as WordPress, Squarespace, Wix, Drupal, Shopify, and others.
There are several ways to install Piwik Pro on your website:
- Direct Hard-Coded Implementation
- Installing Piwik Pro Using Google Tag Manager (Using Custom HTML or the Piwik Pro Analytics GTM Template)
- Native CMS Integrations (e.g., WordPress Plugin, Drupal Module, etc.)
- Integration with Third-Party Customer Data Platforms (CDPs)
Additionally, the installation methods covered in this guide will enable you to set up either the Piwik Pro Analytics Suite alone or the full Piwik Pro Container, which includes the Tag Manager and Consent Management suites.
Direct Hard-Coded Implementation:
This method works for any website or CMS and allows you to manually add custom JavaScript like the Piwik Pro tracking script to your site.
Even if your CMS offers a native plugin or extension for Piwik Pro integration, you can still opt for this manual approach.
The likely first step for this method is to copy the tracking script from Piwik Pro’s interface.
Step 1: Get the Tracking Code
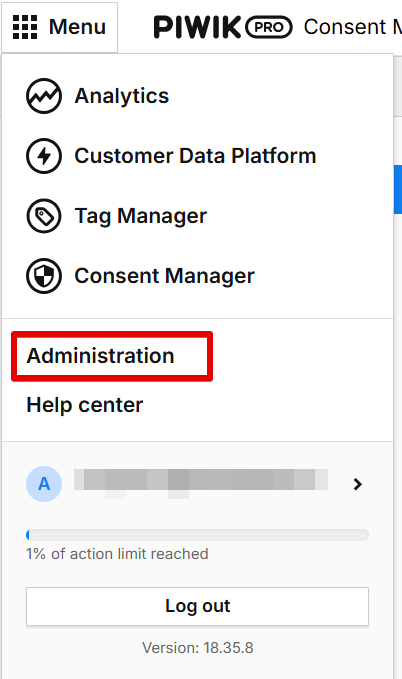
Click on the menu button and select “Administration.”
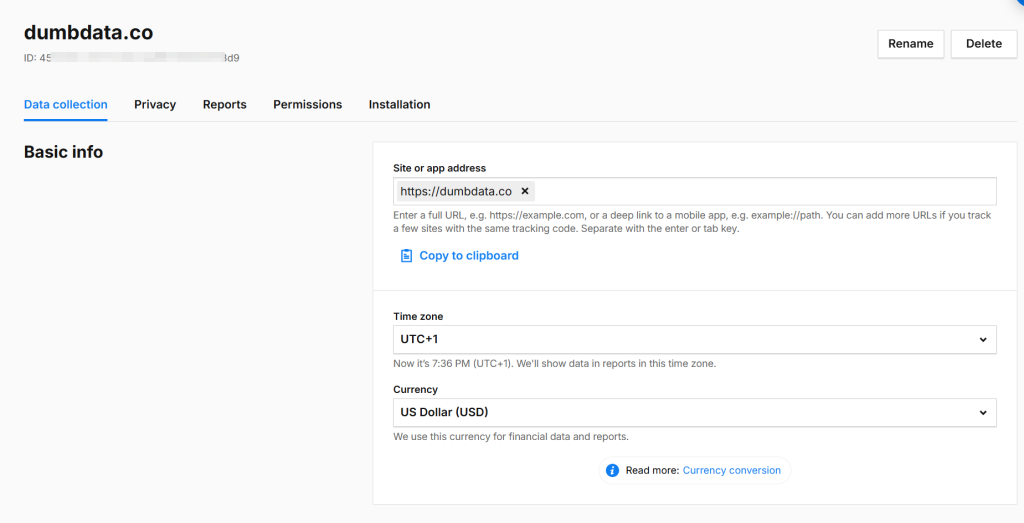
In the Administration section, select the appropriate “Site”; this represents the analytics property you want to use for data collection.
Within the Site settings, navigate to the “Data Collection” tab. Here, doublecheck that:
- The correct page URL(s) have been entered.
- The correct currency and timezone settings are selected.
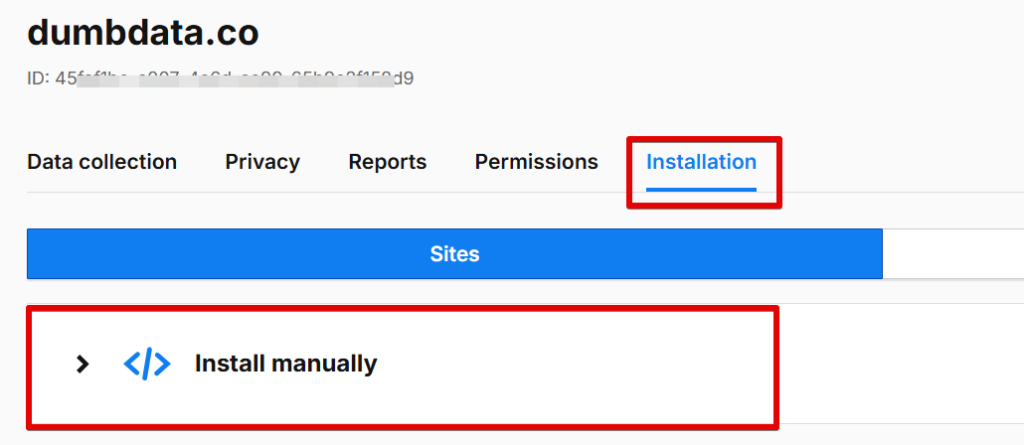
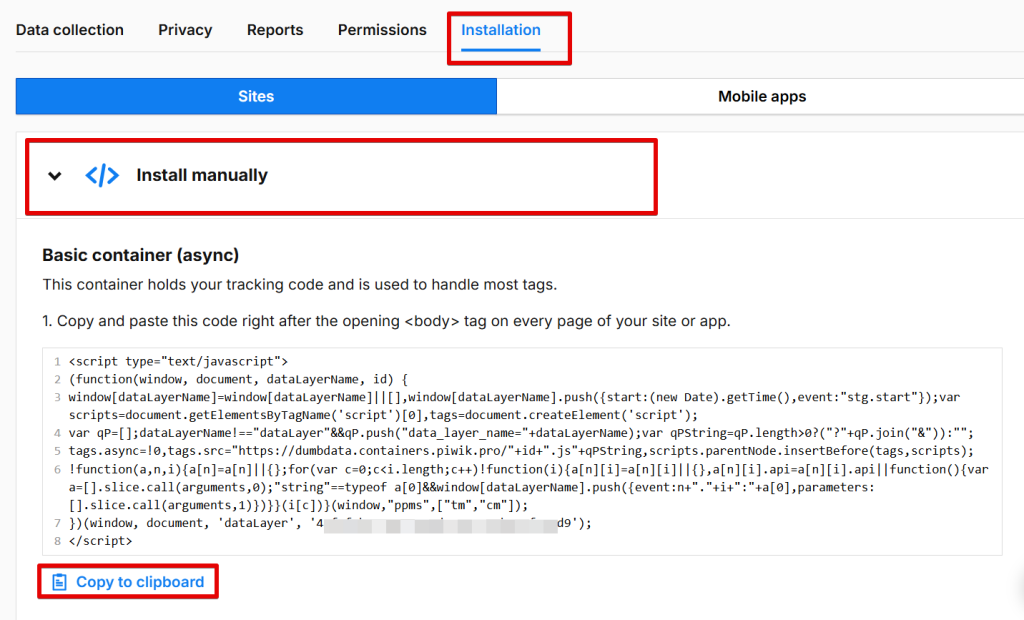
To copy the Piwik Pro tracking script, go to the “Installation” tab and select “Install manually.”
Click “Copy to Clipboard” to copy the tracking script.
Step 2: Add the Tracking Code to Your Website
According to Piwik Pro’s documentation, the tracking script should be placed immediately after the opening <body> tag across all pages you want to track.
However, you can also install it within the <head> section if you prefer it to load earlier. While I have done this in the past, I did not test for potential performance implications.
Piwik Pro recommends placing the script in the <body> tag because:
- The Piwik Pro tracking script includes the Piwik Pro Tag Manager.
- It supports both asynchronous (loads from <body>) and synchronous (loads from <head>) tagging, which is now deprecated in January 2025.
- This allows you to use both asynchronous and previously supported synchronous tags in Piwik Pro Tag Manager for more flexibility.
Now, let’s explore how to implement this method for different CMS platforms.
Hard-Coded Piwik Pro Installation for WordPress:
To manually install the Piwik Pro tracking script on your WordPress website, follow these steps:
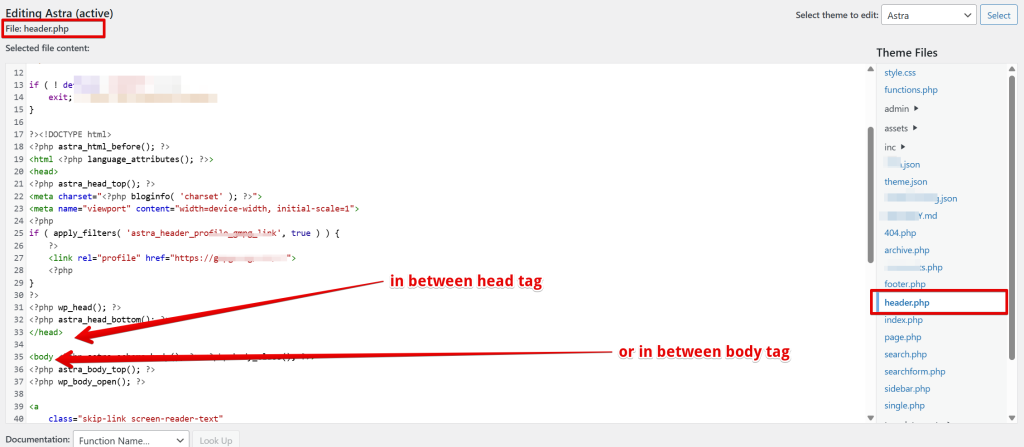
Navigate to your theme editor in WordPress.
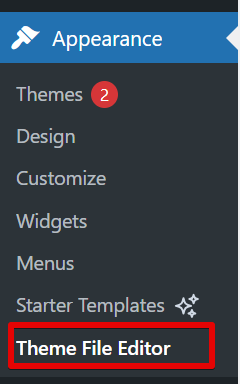
Insert the tracking script in [header.php] file, either the header or body section.
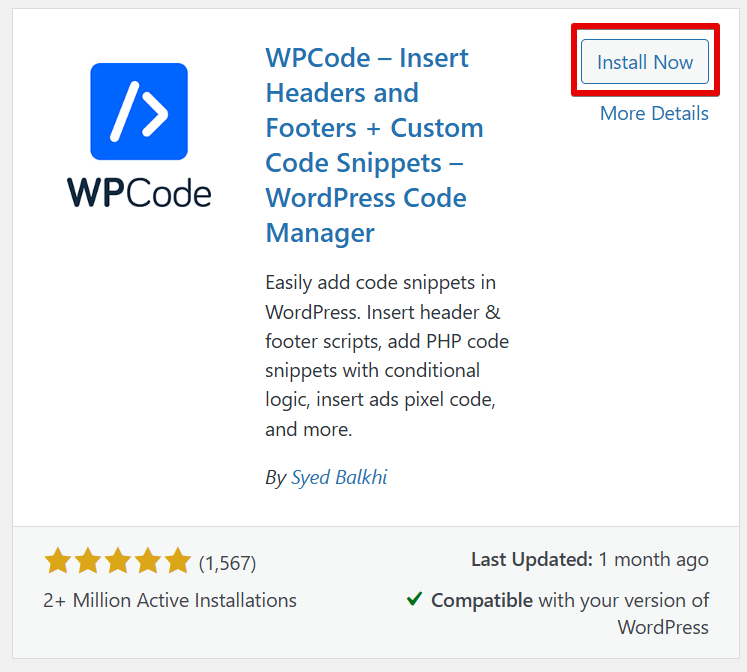
If you prefer not to modify theme files directly, there is an alternative option where you can use a WordPress plugin to insert the tracking script.
You will install the “WPCode – Insert Headers and Footers + Custom Code Snippets – WordPress Code Manager“ plugin.
After installation, navigate to the plugin tab and choose the “Header & Footer” option to insert the script in the head or body section.

Save your changes, clear your cache if necessary, and then use the Piwik Pro Tracker Debugger to verify that tracking data is being collected.
Additionally, you can validate your tracking using the Piwik Pro debug mode, which is useful when troubleshooting your implementations in the Piwik Pro tag manager.
Hard-Coded Piwik Pro Installation for Squarespace:
In Squarespace, you can add tracking scripts using the Code Injection Tool.
The Squarespace Code Injection Tool is a premium feature available only on Business, Commerce, Professional, and Premium plans. If you’re on a free plan, this feature may not be accessible.
Open the Squarespace admin interface and click on “Website” to access your settings. Or click here to get to the “Code Injection” screen.
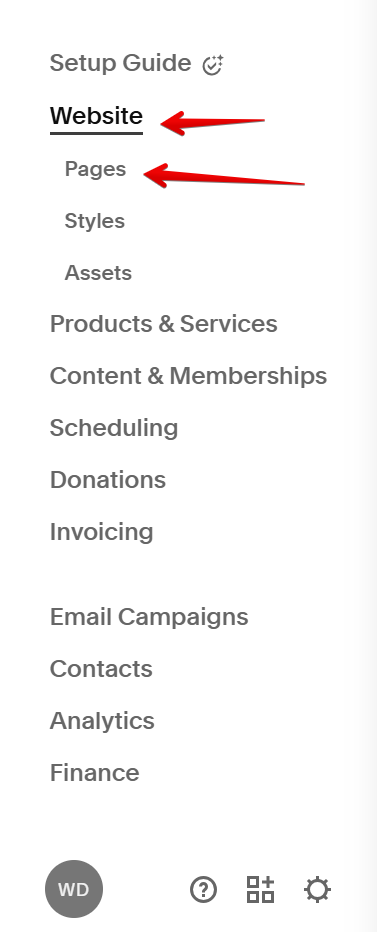
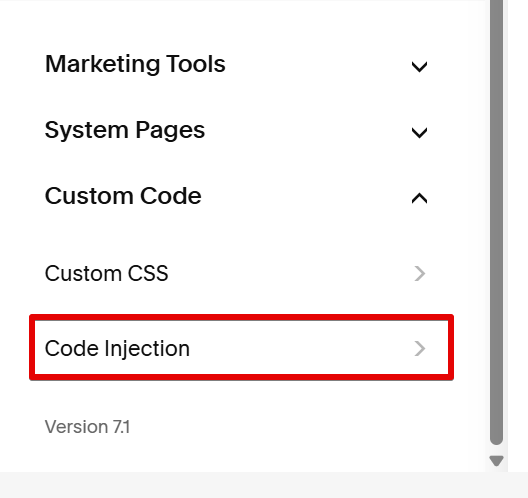
Navigate to “Website”, and select the pages option and expand the “Custom Code” option.

Next, click the “Custom code Injection.”
In the Code Injection section, insert the Piwik Pro tracking code into either the header or footer field.
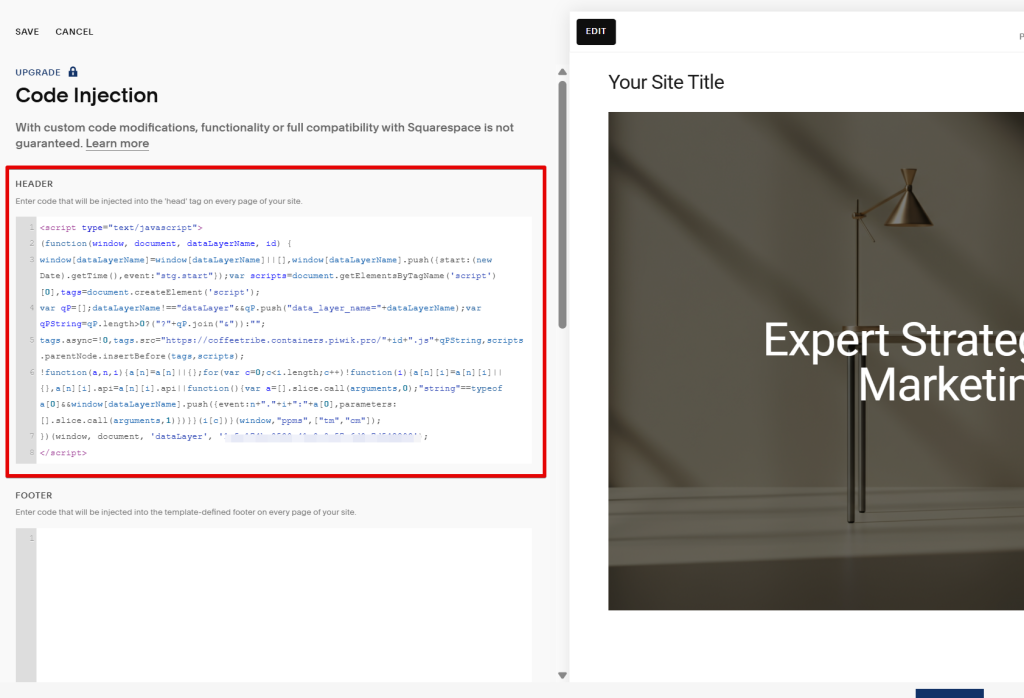
Click “Save” and then visit your website to verify the installation.
Hard-Coded Piwik Pro Installation for Wix:
Adding the Piwik Pro tracking script is also easy if you’re using Wix.
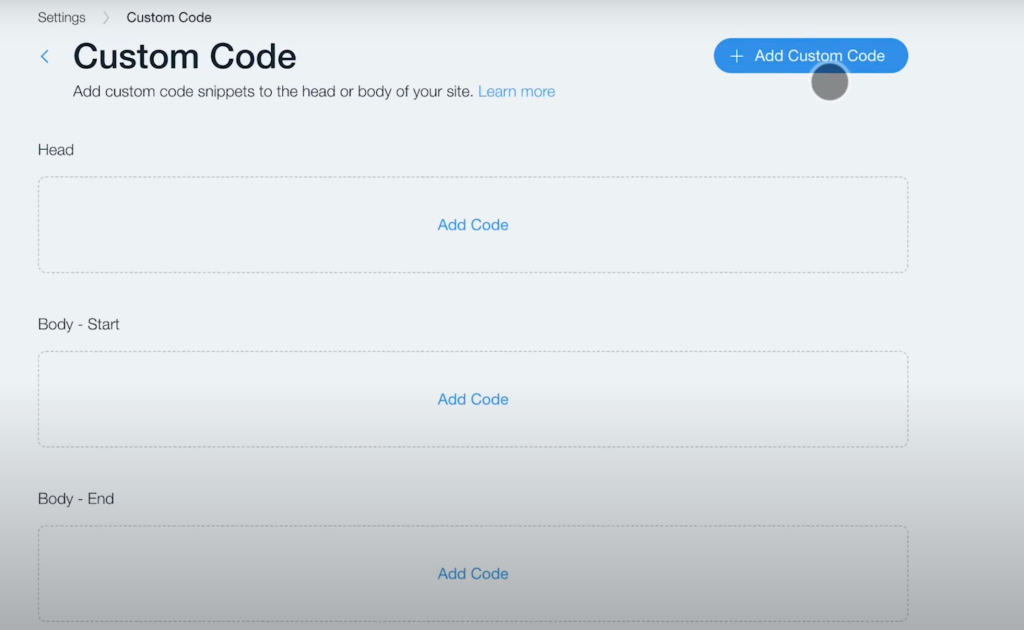
You’ll have to do this from your Wix dashboard, go to Settings and select “Custom Code” under the Advanced section.
Click “Add Custom Code” or select the HTML tag section where you want to place the script.
Click “Apply” to save your changes.
Or watch the embed video below.
Applying Similar Methods to Other CMS Platforms:
For other CMS platforms or custom websites, follow a similar approach:
- Look for settings that allow custom code injection in the header, body, or footer.
- If direct editing isn’t an option, check for available plugins/extensions that support code insertion.
Verifying Data Collection in Piwik Pro:
Once the script is installed, you can check if data is being collected in Piwik Pro:
Navigate to Analytics Settings and select “Tracker Debugger” from the left-hand menu.
If no data appears, refresh your web page and check again. You should start seeing visitor data, as shown in the image below.

If you still don’t see data or need further troubleshooting, check out this article on debugging and troubleshooting in Piwik Pro.
Additionally, you can set up real-time dashboards in Piwik Pro for instant insights into visitor activity.
Installing Piwik Pro Using Google Tag Manager:
There are multiple ways to implement Piwik Pro on your website using Google Tag Manager (GTM).
Your chosen method will determine if only the Piwik Pro Analytics suite will be set up or if other suites will be included.
In this section, I will explain how to install Piwik Pro on your website using a GTM Custom HTML tag.
Method 1: Using a GTM Custom HTML Tag
First, copy the Piwik Pro tracking code, following the steps I have covered earlier in this guide.
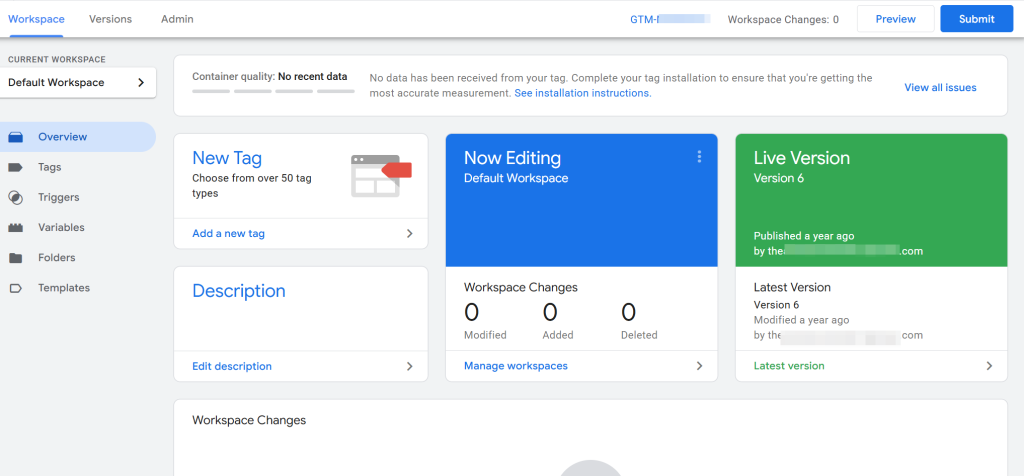
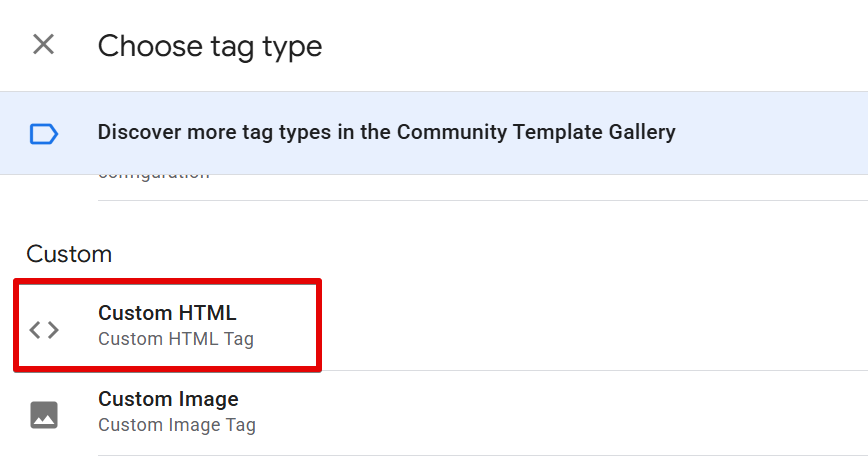
In Google Tag Manager, create a new tag and select “Custom HTML” as the tag type.
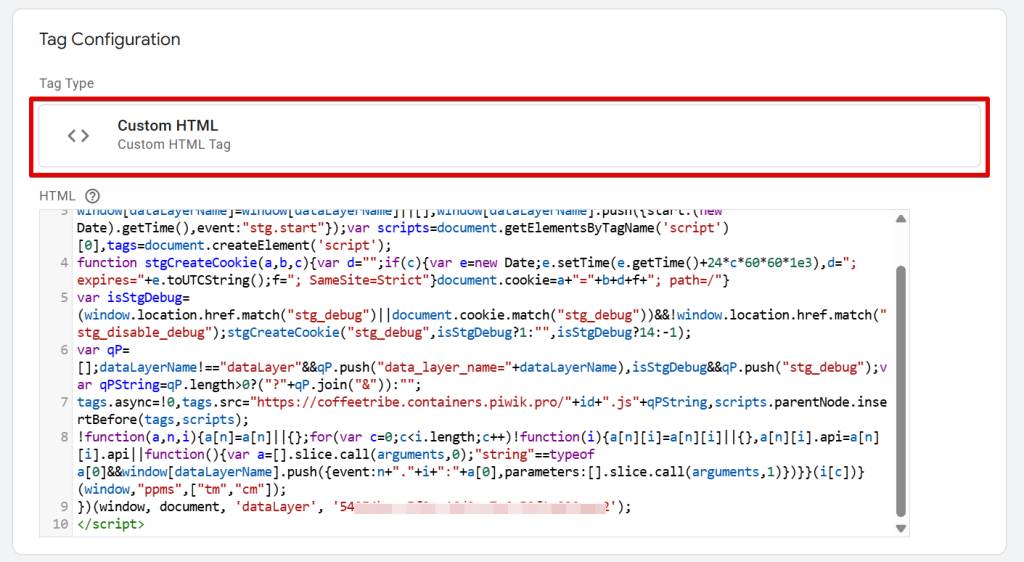
Paste the Piwik Pro tracking script into the HTML field of the tag.
Configure the tag settings and apply a trigger that determines when the tag should fire.
Test your setup to ensure data is being collected correctly, then publish the changes.
This approach allows you to install Piwik Pro Analytics and other modules such as Consent Manager and Tag Manager.
It’s important to note that the Piwik Pro script will be inserted at the end of the <body> tag rather than immediately after the opening <body> tag. This behavior is standard for Google Tag Manager, as it executes code injected via the Custom HTML tag type in this manner.
Method 2: Using the Piwik Pro Analytics GTM Template
If you prefer to continue using Google Tag Manager but don’t want to use the Custom HTML tag, you can utilize the Piwik Pro Analytics GTM template.
Here are the steps to install Piwik Pro on your website via Google Tag Manager using the Piwik Pro Analytics custom template;
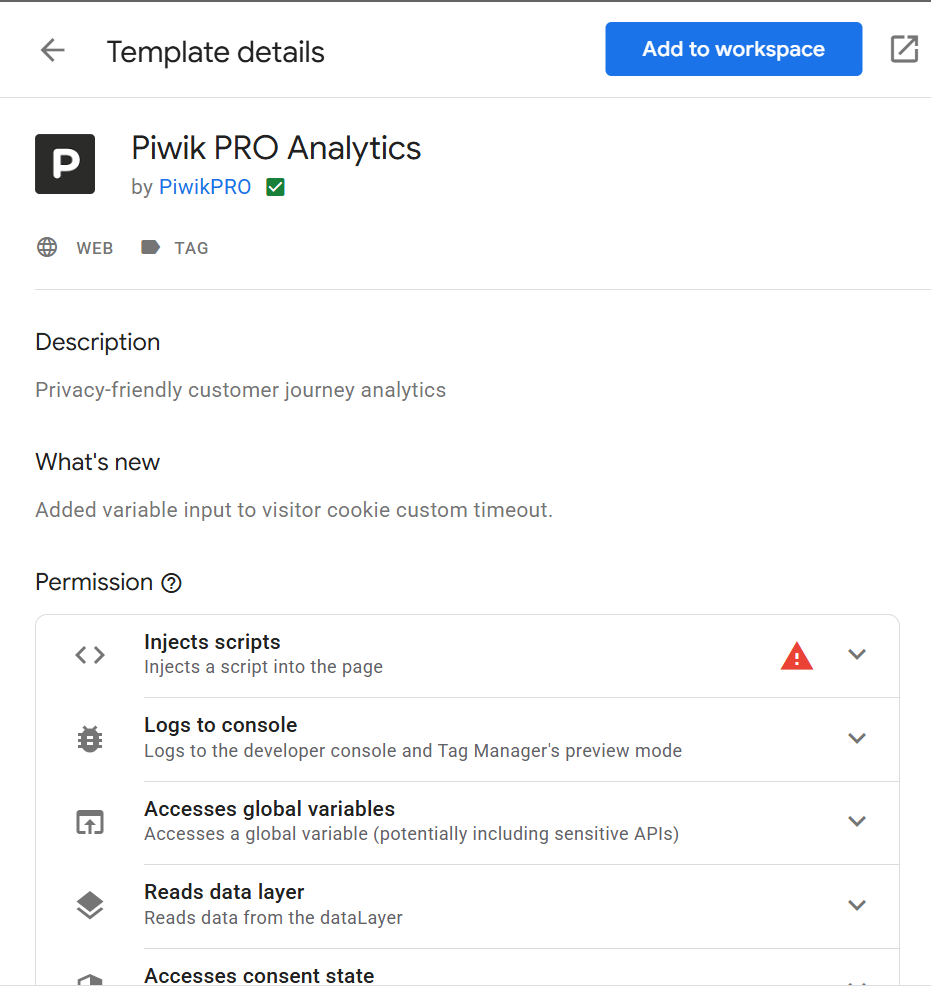
Add the “Piwik Pro Analytics” tag template in Google Tag Manager.
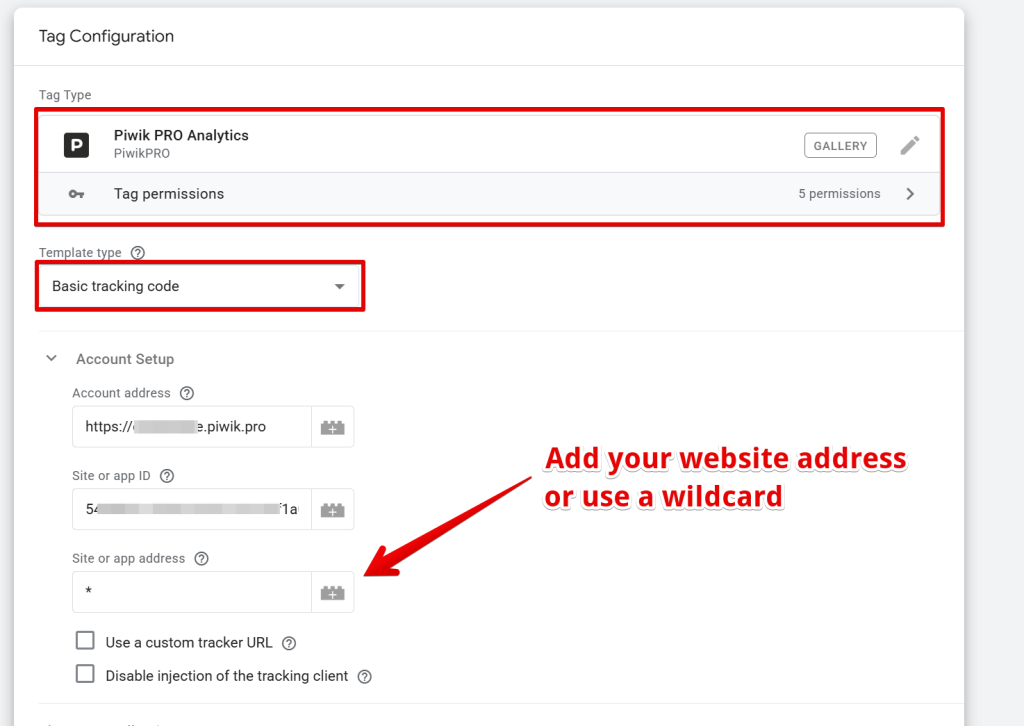
After adding the custom tag template, proceed to configure the tag.

If you only need to install Piwik Pro Analytics (without the Piwik Pro Tag Manager or Consent Manager), select “Basic Tracking” from the Template Type dropdown.
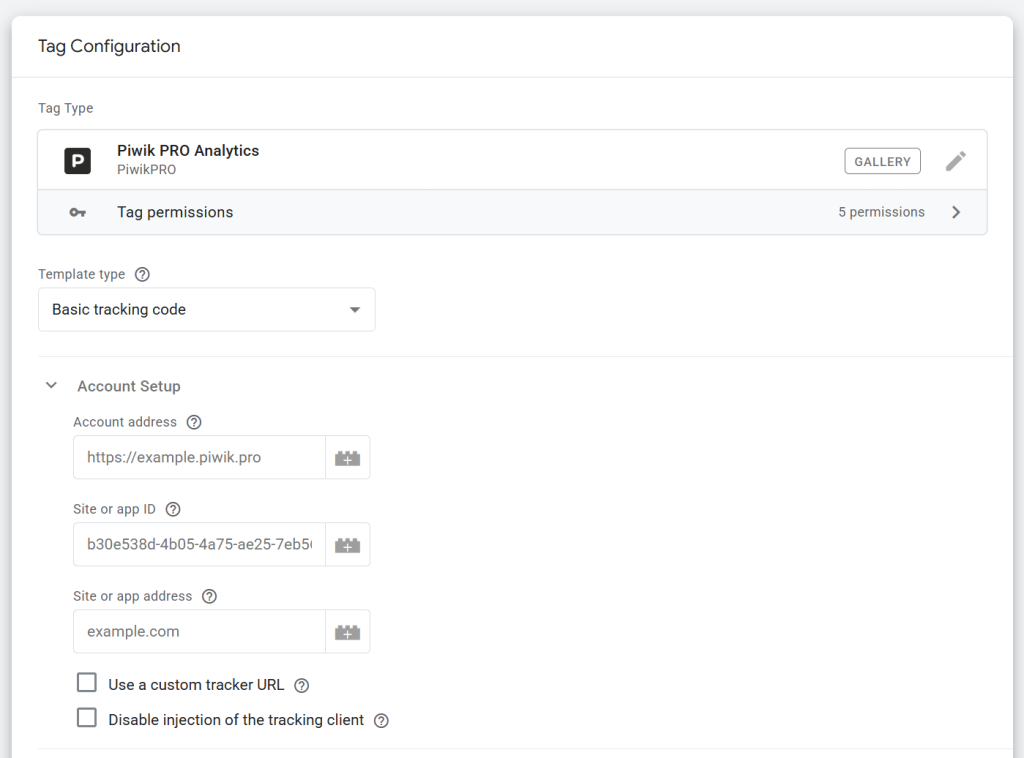
And you’ll have to enter the following required details:
- Account Address
- Site or App ID
- Site or App Address
Attach an appropriate trigger to ensure the tag executes correctly on your website.
The Piwik Pro Analytics GTM template offers other configuration options, such as eCommerce tracking, which may be useful in specific scenarios.
However, this guide does not cover all available configurations.
For more details, refer to the official Piwik Pro guide.
Always test your setup to ensure proper tracking regardless of your implementation method. You can verify data collection using:
- The Piwik Pro Tracker Debugger
- Analytics Debugger Chrome extension
- Other debugging tools mentioned earlier in this guide
Another GTM approach I won’t cover here is implementing Piwik Pro using Google Tag Manager’s server-side tagging (sGTM). This method helps collect data via a server-side setup.
The process for setting up Piwik Pro with sGTM, along with the various implementation options, is thoroughly covered in this guide. I also have this article about the options available for server-side collection in Piwik Pro.
Keep in mind that server-side tagging primarily configures the Piwik Pro Analytics suite, though there are workarounds available to integrate the Consent Manager suite as well.
Using CMS Native Integration (WordPress Plugin, Drupal, Shopify, etc.)
Piwik Pro also offers a Drupal module that allows you to implement Piwik Pro tracking on your website. While I won’t go into detail on configuring it, you can find a step-by-step guide here.
Using the Piwik PRO Shopify App:
Piwik PRO now offers an official Shopify integration app, which I’ll guide you through setting up.
However, I personally recommend considering Elevar’s Piwik PRO integration instead. It offers more advanced features, integration capabilities, and excellent support. But let’s first walk through the setup process for the official app.
The official Piwik PRO Shopify App only integrates the Analytics and CDP modules. It does not include the Consent Management or Tag Manager modules.
Step-by-Step Setup Guide
1. Install the App:
- Go to your Shopify admin panel and open the App Store.
- Search for “Piwik PRO Analytics”.
- Alternatively, you can use this direct link.
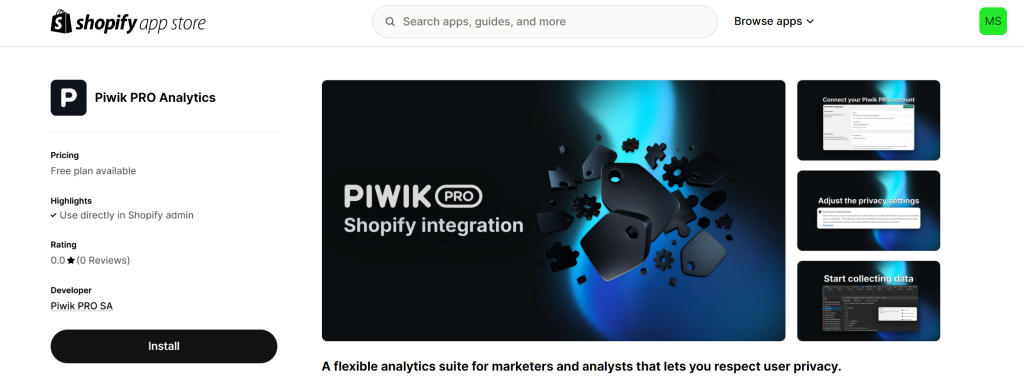
- Click the Install button. Make sure you’re logged into the Shopify store where you intend to implement Piwik PRO.
- The next screen you see should be an additional integration step, where you’ll need to click another “Install” button.

2. Connect Your Account or Create One:
- You’ll see two options: Connect an existing Piwik PRO account or Create a new one.
- For this guide, we’ll focus on connecting an existing account.
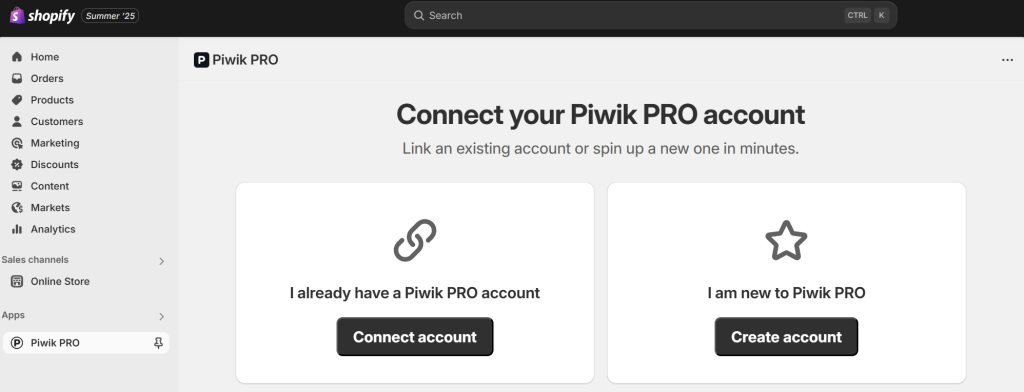
- Click Connect account. You’ll be redirected to Piwik PRO to log in and authorize the connection.
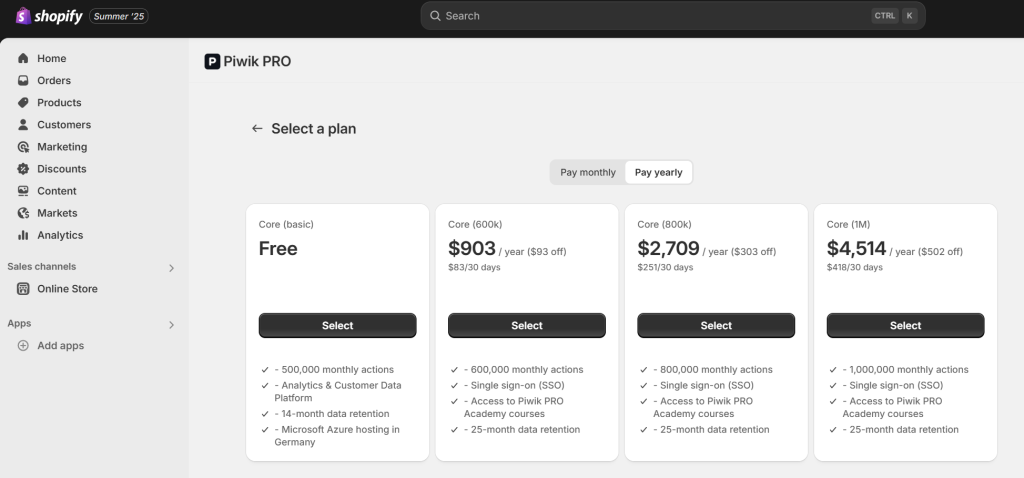
3. Choose a Plan:
- After logging in to your Piwik Pro, return to your Shopify backend, where you’ll have to select a Piwik PRO plan.
- Select the option that best suits your needs.
4. Piwik Pro and Shopify Integration Modal:
- You may see a screen like the one below with further instructions.
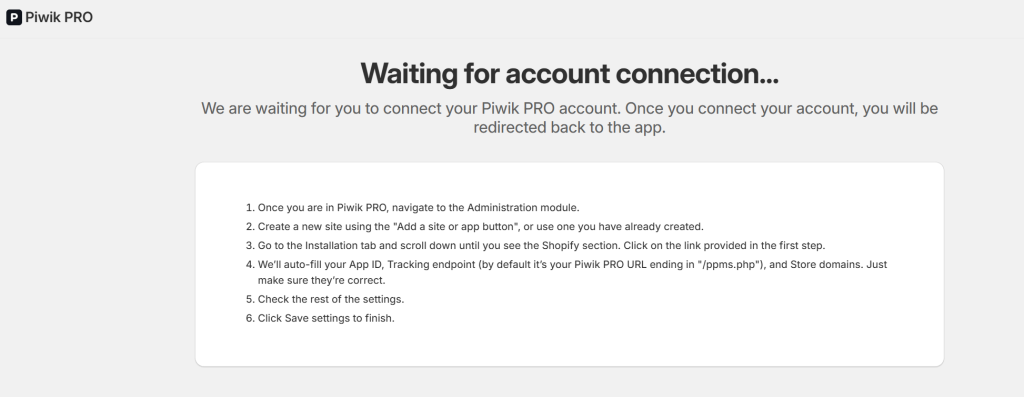
- Don’t worry. It outlines the next steps you need to complete in your Piwik PRO account.
5. Select a Site in Piwik PRO:
- In your Piwik PRO dashboard, go to the Administration section from the main menu.
- From there, select the site or instance you want to connect to your Shopify store.
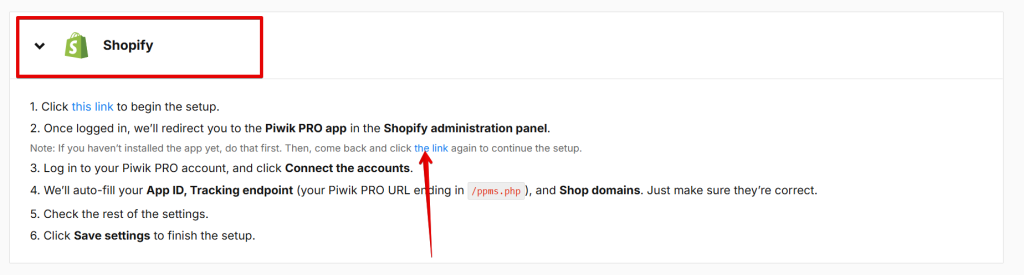
6. Navigate to Installation Settings:
- In the selected Piwik PRO instance, go to the Installation tab.

- Scroll down to find the Shopify installation method and click the provided link.
7. Finalize the Configuration in Shopify:
- This will return you to the Piwik Pro Analytics Shopify app configuration screen of your Shopify store.
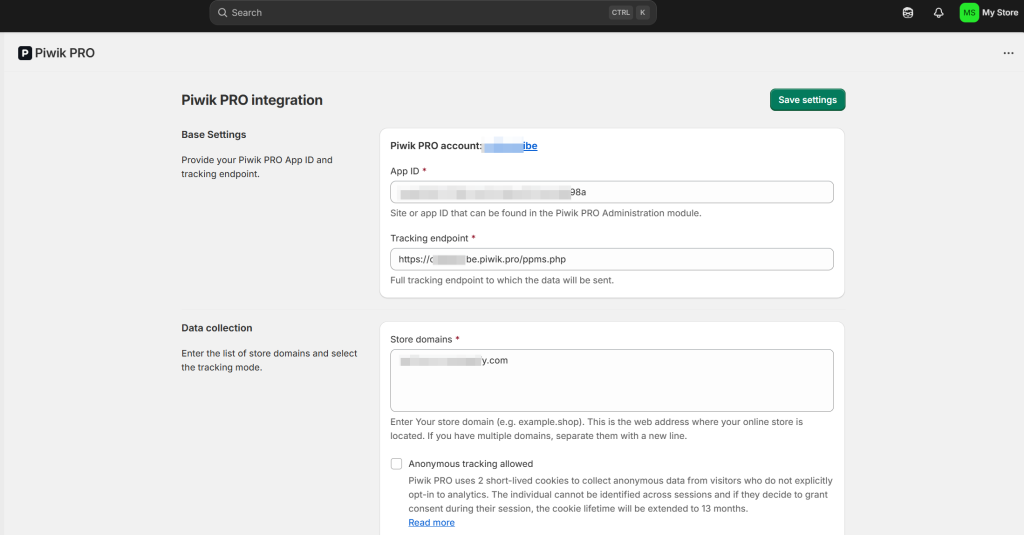
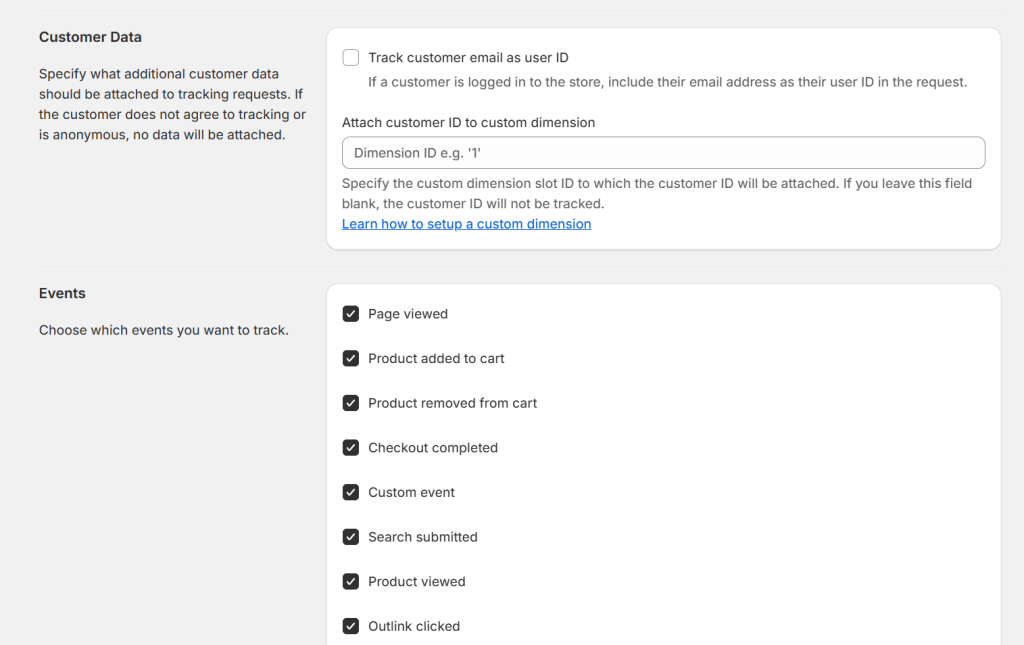
- Here you can configure:
- Anonymous tracking
- Shop domains
- Piwik PRO User ID tracking
- Ecommerce event tracking
8. Save Your Settings:
- Once you’ve completed the setup, click Save at the top of the screen.
When implementing Piwik Pro on your Shopify store using the native app, be sure to take note of the following, which could cause integration challenges;
- Make sure you’re using the same browser (and browser account) throughout the process.
- If you’re logged into different browsers or accounts for Piwik PRO and Shopify, you might encounter connection issues during setup.
For the next section, I’ll focus on the WordPress CMS plugin and how to implement Piwik Pro using this integration method.
Using the Piwik Pro WordPress Plugin:
If your website runs on WordPress, you can use the official Piwik Pro plugin to install Piwik Pro on your WP website instead of manually adding the tracking script.
This official plugin, managed by Piwik Pro, simplifies the process by automatically embedding the Piwik Pro container (including the tracking code) on your website, making visitor data collection seamless.
Additionally, if your WordPress site has a WooCommerce store, the plugin automatically tracks eCommerce events, such as product views and purchases.
However, note that you have limited control over customizing your Piwik Pro analytics e-commerce tracking implementations.
To install Piwik Pro using the WordPress plugin, here are the steps involved;
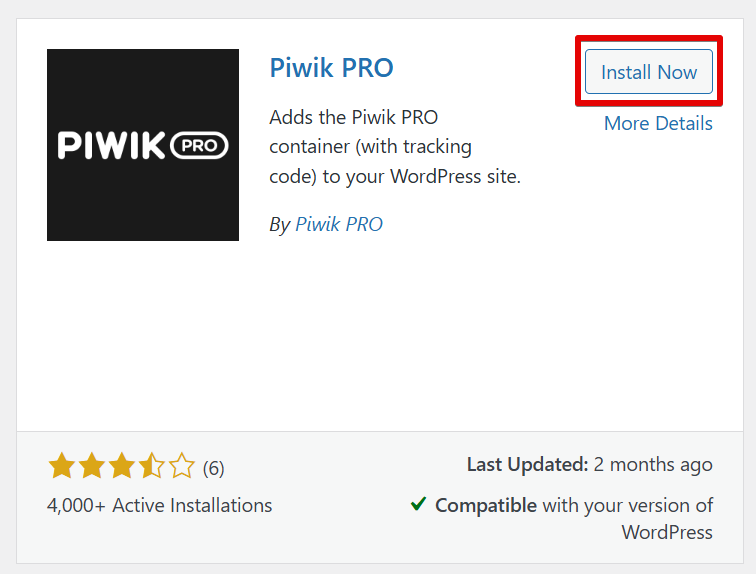
Start by installing the Piwik Pro Plugin:
- Go to the WordPress Plugin Store
- Search for Piwik Pro
- Click Install & Activate
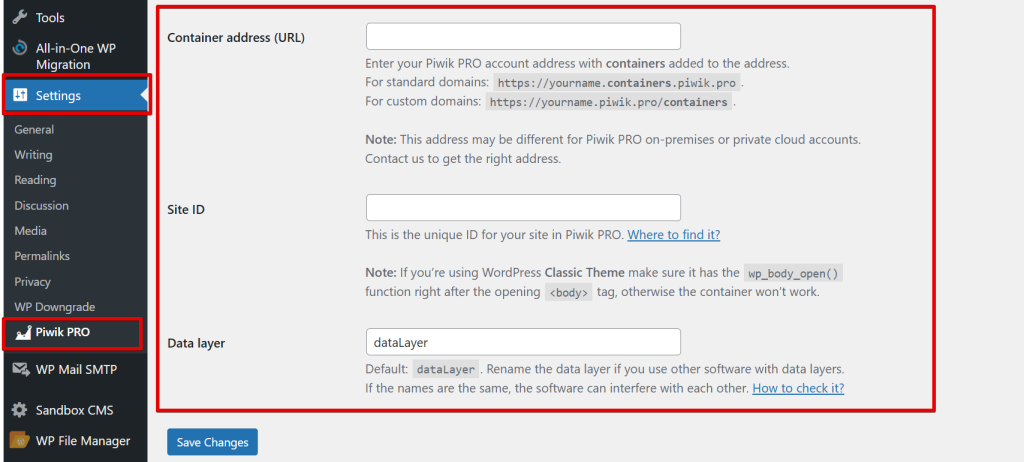
Configure the Plugin:
- Navigate to the plugin settings
- Enter your Piwik Pro site instance details, including:
- Container URL
- Site ID
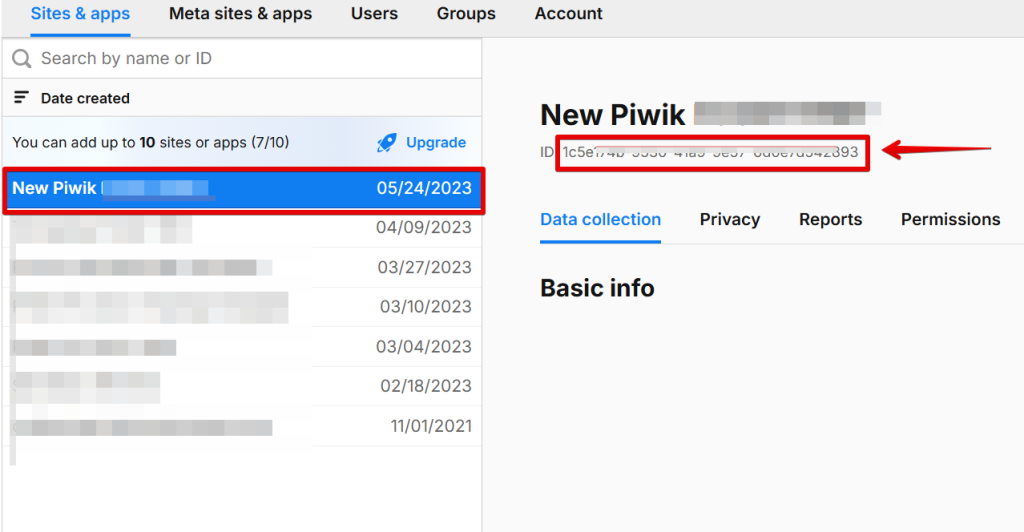
Find Your Site ID & Container URL:
- The Site ID can be found in the Administration section of Piwik Pro
- The Piwik Pro Container URL can be copied directly from your browser’s address bar
The plugin also includes optional configurations, but you may not need to adjust them for basic tracking.
Using Third-Party CDPs
Piwik Pro does have its CDP, but you can use it to install the Piwik Pro on your website, so in a situation where your organization or client is already using a Customer Data Platform (CDP) such as CommandersAct to collect and distribute data across multiple destinations, you can also use it to implement Piwik Pro tracking on your website.
However, the key difference with this approach is that instead of using the JavaScript Tracking API, this method relies on Piwik Pro’s WEB API for server-side tracking.
Even though this approach focuses on server-side data collection, it does not prevent you from using JavaScript tracking on your website for client-side interactions, such as clicks and page views.
If you are considering server-side tracking, you can explore the other implementation options I’ve covered in my Piwik Pro server-side tagging and tracking guide.
Here are a Few Considerations when Choosing a Piwik Pro Implementation Method:
When selecting the most suitable Piwik Pro implementation approach, it’s important to evaluate the following factors:
- Flexibility and Customization: How much control do you need over configuring your Piwik Pro setup?
- Data Quality: Consider the potential impact each method may have on the accuracy and quality of your data.
- Privacy Compliance: This should be a priority and not an afterthought. Ensure the method you choose aligns with privacy laws and best practices.
- Ease of Use Isn’t Everything: A method being easy doesn’t necessarily make it the right one for your needs.
- Requirements and Use Cases: Consider whether the approach supports your intended use of Piwik Pro features, such as the Tag Manager and Consent Manager modules. These requirements will directly influence which implementation method is best for you.
Conclusion
The Piwik Pro container tracking code enables you to install and configure different Piwik Pro suites, including:
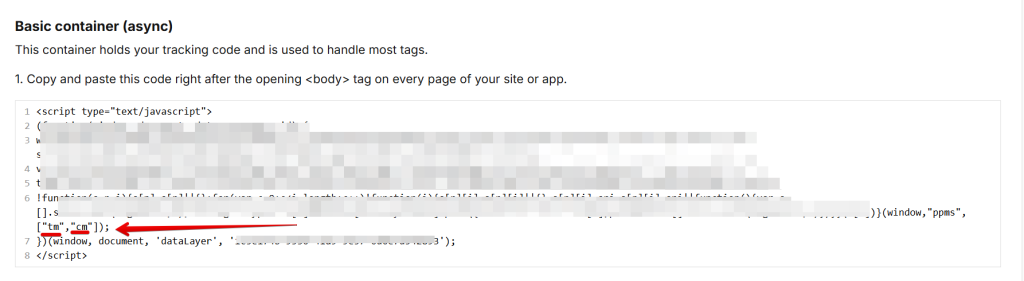
- Consent Manager (controlled by the “cm” parameter)
- Tag Manager (controlled by the “tm” parameter)
- Analytics
- Customer Data Platform (CDP)
Now that you understand the various installation methods, the next steps include:
- Event Tracking
- Goal Tracking
- Integration with your MarTech stack
- Reporting and activating the data
- Proactively redacting Personal Identifiable Information (PII) in Piwik Pro if you are like data minimization.
- Exploring and configuring the Piwik Pro privacy options covered here.
Regarding reporting, you can read this guide to see the available reporting options when using Piwik Pro for data collection.
Feel free to reach out here or write to us if you encounter any challenges or need assistance.
Additionally, you can explore free Piwik Pro resources available in the DumbData worksheet collection or check out our blog for detailed Piwik Pro guides, such as site search tracking and reporting.
Until then, happy measuring!


