


Conversion tracking is one of the ways of measuring business success, and if you have Piwik Pro installed on your website, you can use the tool to measure micro and macro website conversions.
In this article, you’ll learn how to set up goals in Piwik Pro and some of the best practices for goal tracking.
Here are a few things to know about goals in Piwik Pro;
- Conversion data is not retroactive.
- By default, if a user converts multiple times for a particular goal in a single session, only one conversion will be recorded (you can change this if you want).
- In the “Goals” tab of Piwik’s UI, you’ll see a path analysis for each conversion in the user flow report, which works in a non-strict mode.
- You can delete a goal if you don’t need it anymore, but you can’t pause it from recording conversions.
- You can modify the goal configuration even after you’ve created the goal.
- Change from manually tracking to automatic tracking.
Like every analytics tool, the creation starts in the product user interface and here is where to start from;
In the Piwik Pro analytics suites, click the “Goals” tab to view the goal section.
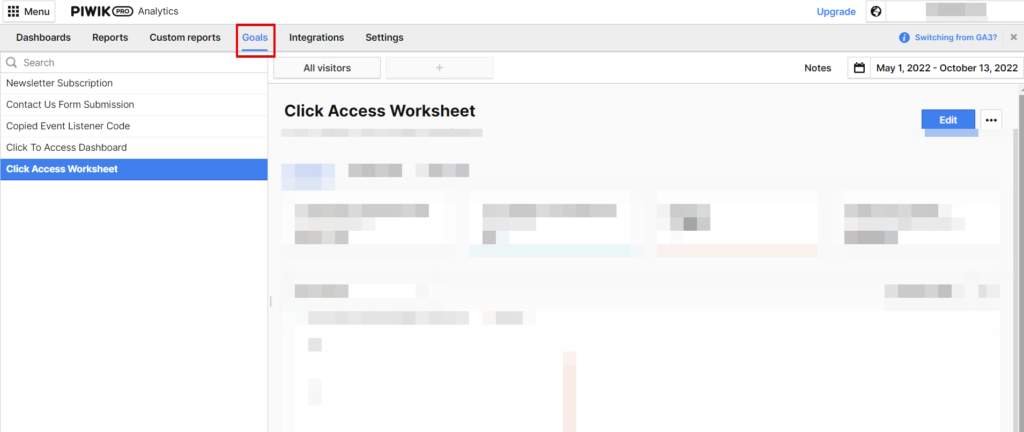
In this tab, you’ll be able to do the following;
- Create new goals
- See all goals created for a site/instance
- Analyze your conversion data for each goal
- Make modifications to previously created goals
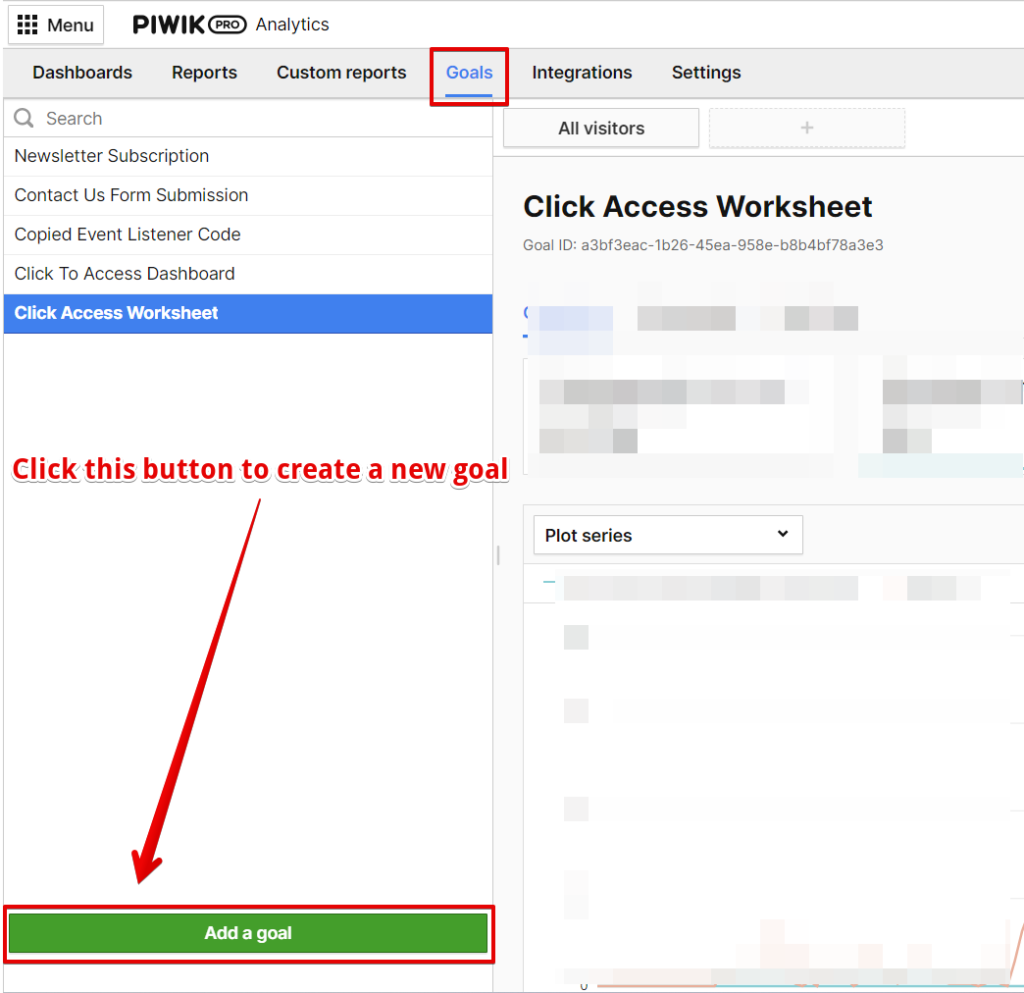
If this is the first time you’re creating a goal in that property, you should see this screen
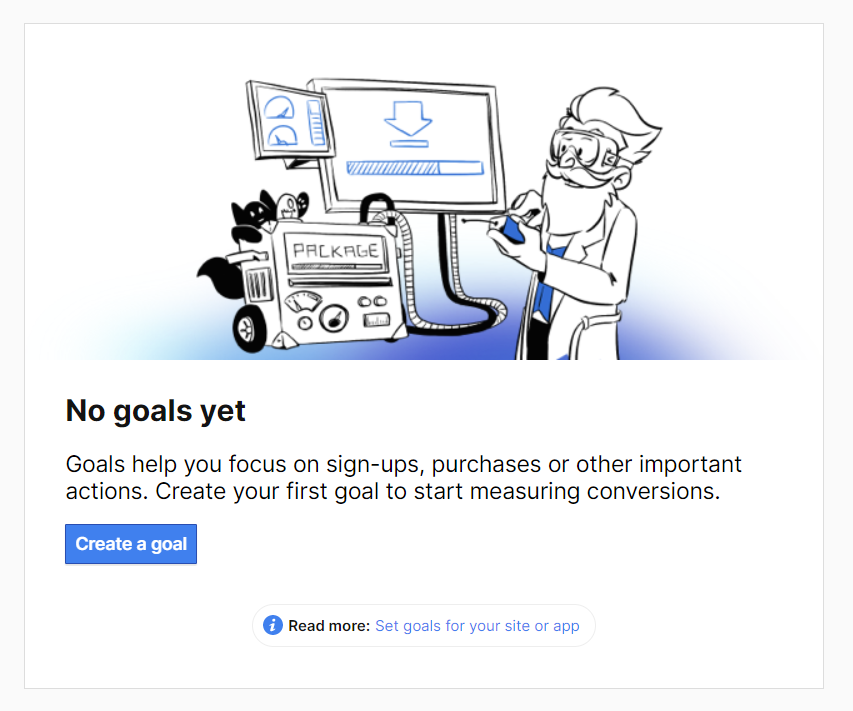
To create a new goal, click the green “Add a Goal” button, which allows you to start the conversion-creation process.
A new screen opens, where you’ll have to add the goal name and select how you’d want to track this conversion.
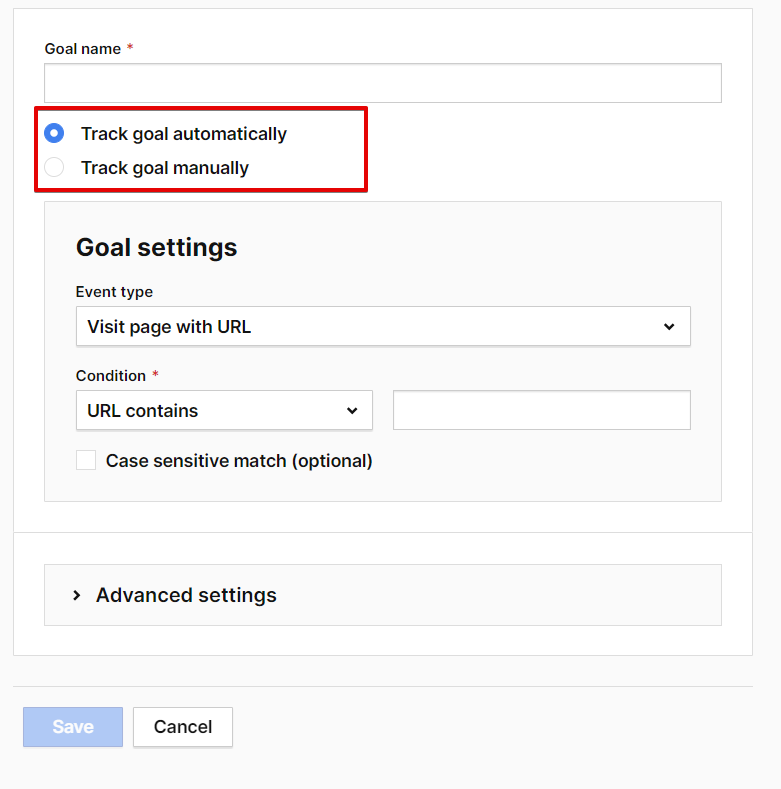
Currently, In Piwik Pro, you can either track a goal manually or automatically and here is a quick explanation of what both options mean.
Track your goal automatically;
It means you’ll be creating the goal using the information that you’re sending to your Piwik Pro analytics, and these are;
- The page URL
- the title of the page
- custom event information
- automatic tracked file downloads data
- outbound link data
Track goal manually;
It doesn’t rely on the data points received by Piwik Pro. Instead, it’s a goal configured on the occurrence of the conversion action.
The goal is instrumented directly on the website or using a tag management system like Piwik Pro tag manager or Google Tag Manager.
Keep reading to find more information on how to set up manual goals using Piwik Pro tag manager, Google Tag Manager or directly to the website source code.
Tracking Goals Automatically in Piwik Pro
If you select to track goals automatically, the next step is the goal configuration in the “Goal settings” section.
Goal Settings;
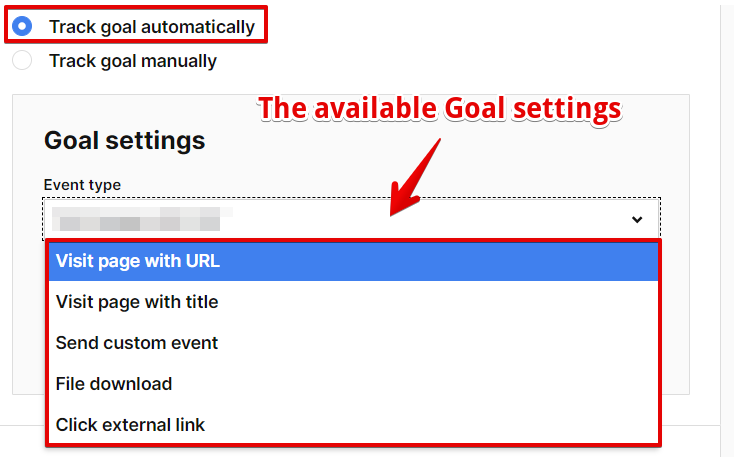
The first setting is selecting the “Event type“, which can only be one of the following;
- Visit the page with the URL
- Visit the page with the title
- Send custom event
- File download
- Click external
Based on the selected event type, the available condition option changes, and you can only add one condition. There are three condition types for all event types;
- Contains (the value should include your input)
- Exactly (the event type value should be exact)
- Matches the expression (Regular expression)
Here is a breakdown of what it looks like;
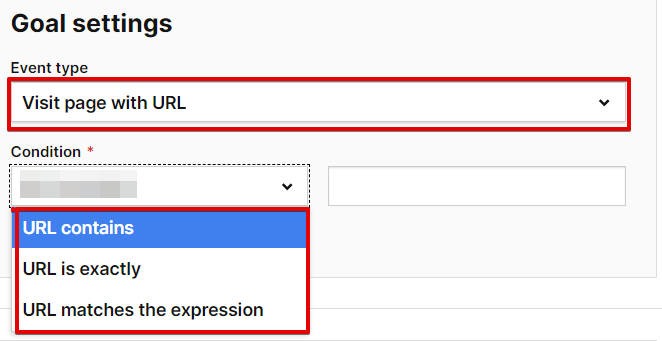
Event Type: Visit page with URL
Condition:
- URL contains – (the URL should include what’s in the input field)
- URL is exactly – (the URL should be the same as what’s in the input field)
- URL matches the expression – (the URL should match the regex in the input field)
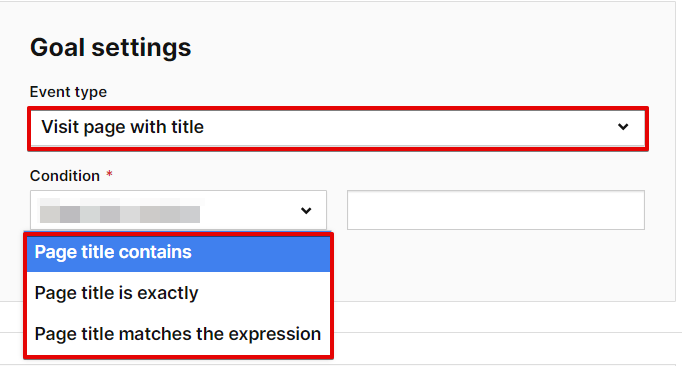
Event Type: Visit page with title
Condition:
- Page title contains – (the page title should include what’s in the input field)
- Page title is exactly – (the page title should be the same as what’s in the input field)
- Page title matches the expression – (the page title should match the regex in the input field)
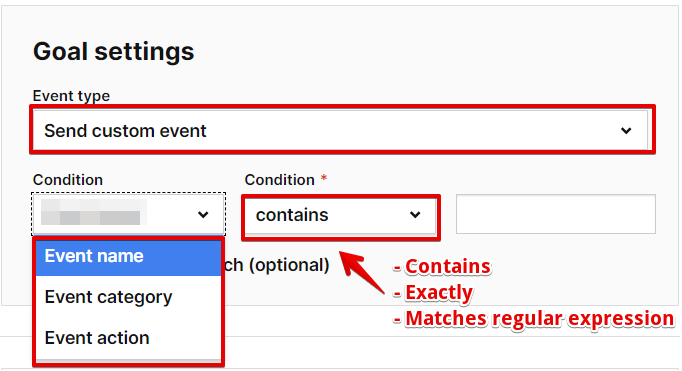
Event Type: Send custom event
Condition 1:
You’ll have to select which part of the event data points you’ll be using to build your conversion condition;
- Event name
- Event category
- Event action
Condition 2:
- contains
- exactly
- matches the expression
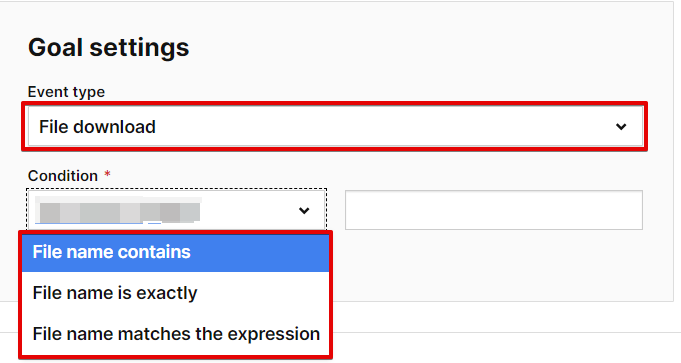
Event Type: File download
Condition:
- File name contains – (the file name should include what’s in the input field)
- File name is exactly – (the file name should be the same as what’s in the input field)
- File name matches the expression – (the file name should match the regex in the input field)
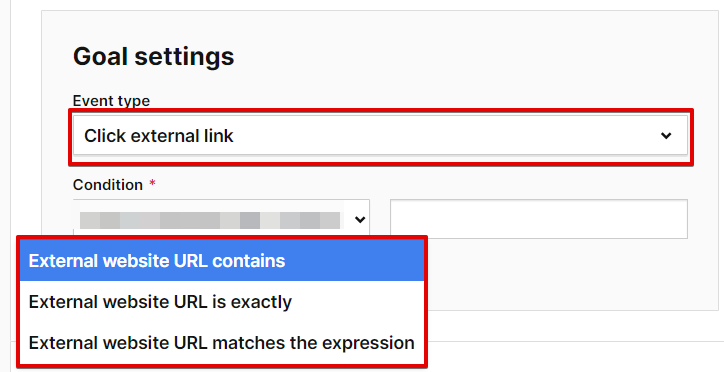
Event Type: Click external link
Condition:
- External website URL contains – (the external website URL should include what’s in the input field)
- External website URL is exactly – (the external website URL should be the same as what’s in the input field)
- External website URL matches the expression – (the external website URL should match the regex in the input field)
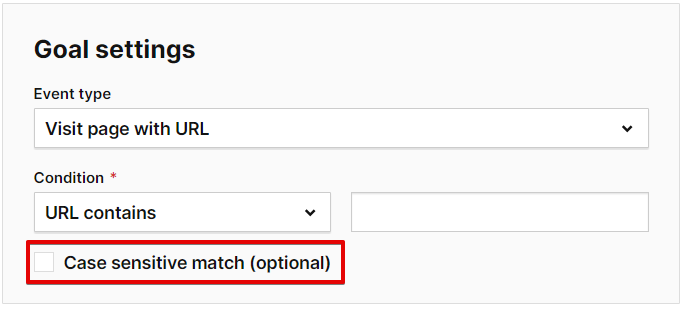
By default, your conversion conditions are case insensitive, but you can change this, and to do this, you’ll have to tick the checkbox “Case sensitive match”, which is optional.
Advanced Settings;
Whether you’re tracking conversions in Piwik Pro automatically or manually, the two settings in the Advanced Settings tab will be available when creating the goal.
In this tab, you’ll be able to do just two (2) things, which are;
- Assign a revenue to your conversion.
- Allow Piwik Pro to count multiple user conversions of the same goal reached in a single-user session.
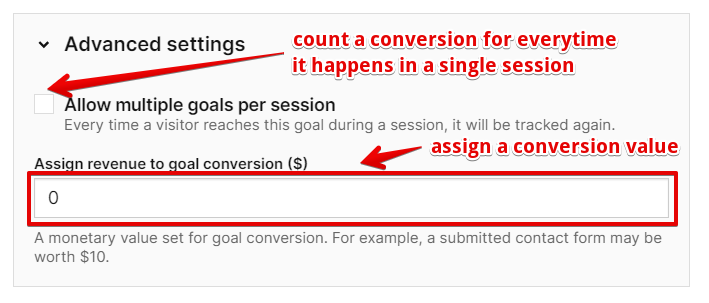
By default, in a single session, if a user converts more than once for a particular goal, only one conversion will be recorded, which is very helpful when creating pageview conversions.
For conversions like add-to-cart events, you’ll have to enable this setting when creating your goal to record all add-to-cart conversions that happened in that single user session.
For your goal creation to be successful, click the save button.
How To and Why Track Goal manually in Piwik Pro?
If you’re wondering why you’ll want to track conversions manually, here are some of the reasons;
- If you dynamically want to assign revenue to your conversion.
- Tracking conversions that are not possible with automatic goal tracking.
How do you create and implement this kind of conversion?
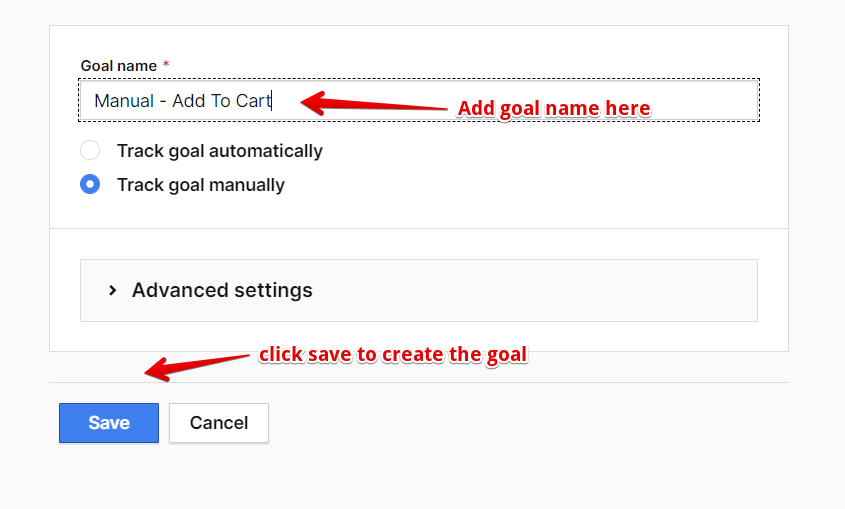
- Add your goal name, select track goal manually, and click the save button.
- In the conversion, you just created, copy the goal ID (it’s a unique string specific to each goal)
- Use Piwik Pro Tag Manager, Google Tag Manager or directly on the website method for the manual goal instrumentation.

Configuring your manual goal in Piwik Pro Tag Manager;
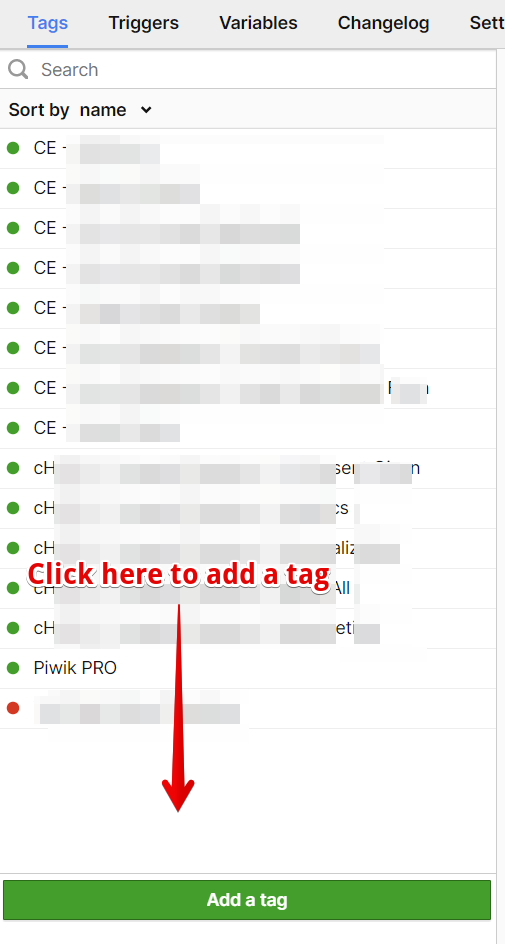
Navigate to the tag manager in Piwik Pro, and add a new tag by clicking the green “Add a tag” button.
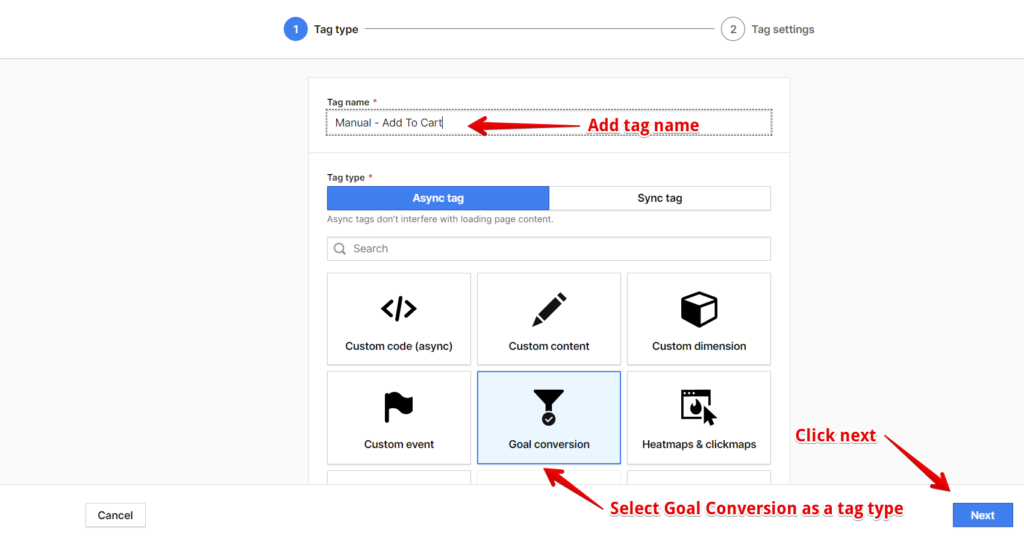
Let your tag type by Async and “Goal conversion”, add your tag name and click the blue “Next” button to configure the goal tag.
On the next screen;
- You’ll add the goal ID you copied,
- Add a static or dynamic revenue by adding a variable to pull the data from
- Add your privacy configurations
- Apply custom dimensions on the user performing the conversion action
- Add a trigger on when to fire the conversion tag
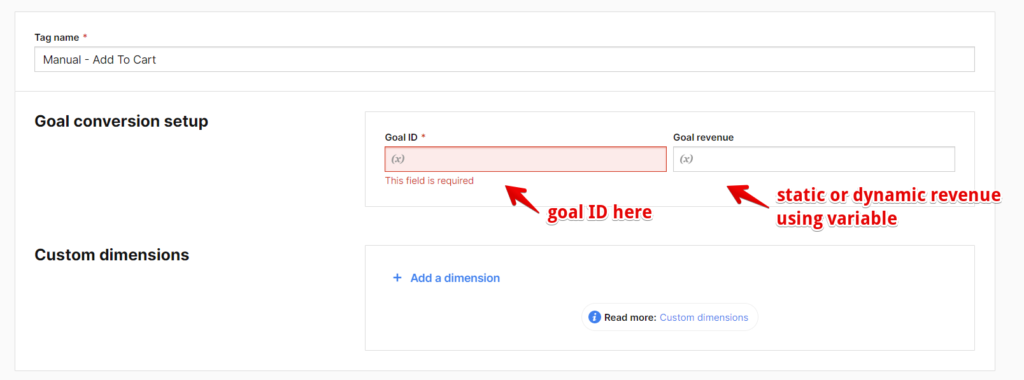
NOTE: remember to debug and publish your container after you’ve completed your implementation.
Using Google Tag Manager Or directly implementing on the website code;
If you’re implementing in Google Tag Manager or directly on the website code, all you’ll have to do is fire the code (use custom HTML tag type in GTM) below when the conversion happens.
<script>
_paq.push(["trackGoal", "goalID", conversionValue]);
</script>
What you’ve to change in the JavaScript code is the goal ID and the conversion value, which is optional.
- goalID (string) – Required Goal ID (if it’s a number, use the alternative method)
- conversionValue (number) – Optional Conversion value (revenue)
Here is a finished example;
<script>
_paq.push(["trackGoal", "3ce3bd57-de85-4edb-83e8-be4f5be1527c", 25]);
</script>
Alternatively, you can use the goal number, which is the order in which you created the goal;
<script>
_paq.push(["trackGoal", goalNumber, conversionValue]);
</script>- goalNumber (number) – Required the order the goal was created, starting from 1
- conversionValue (number) – Optional Conversion value (revenue)
Here is a finished example;
<script>
_paq.push(["trackGoal", 4, 25]);
<script>
Applying Custom Dimension to a Conversion
To add a custom dimension when the conversion happens, you’ll have to use the code;
<script>
_paq.push(["trackGoal", "goalID", conversionValue, {"dimension3": "dimensionvalue"}]);
<script>
Here is a sample of what your implementation should be when using goal ID
<script>
_paq.push(["trackGoal", "3ce3bd57-de85-4edb-83e8-be4f5be1527c", 25, {"dimension5": "paid customer"}]);
<script>
If you want to use the goal number, here is the code
<script>
_paq.push(["trackGoal", goalNumber, conversionValue, {"dimension3": "value here"}]);
</script>
Here is a sample of what your implementation should be when using goal number
<script>
_paq.push(["trackGoal", 4, 25, {"dimension5": "paid customer"}]);
<script>
Debugging your implementation;
You can check if your conversion implementation is working by using the “Tracker debugger” feature of Piwik Pro analytics.
It’s useful in debugging all implementation methods (manual or automatic goal tracking). It can help you to determine if your conversions fire multiple times when it’s not too.
Final Word;
In this article, we went through the technicality of goal tracking in Piwik Pro, the two tracking types of goals and their settings.
In manual goal tracking, we explored the different available methodologies, debugging and best practices.


