

A detailed guide on using Termly Consent Manager with Piwik Pro
You might have Google searched for “How to Integrate Piwik Pro and the Termly CMP” to stumble on this article; well, this is a continuation of a privacy-centric series on the DumbData blog about Piwik Pro Analytics.
The series started in 2023, and during each series, I introduced three Consent Manager integrations (Osano, CookieFirst, and CookieYes) with Piwik Pro, enabling you to use a custom consent banner with Piwik Pro suites (Analytics, Tag Manager, etc.)
In today’s guide, I will explain how to integrate the Termly Consent Management Platform (CMP) with Piwik Pro.
This initial part of the 2024 series will teach you how to integrate Termly CMP with Piwik Pro, provide information about the steps involved, and give you access to the solution. This solution will assist you in using Termly’s consent banner as a custom consent banner on your website while still integrating it with Piwik Pro suites using the “Consent Manager JavaScript API.”
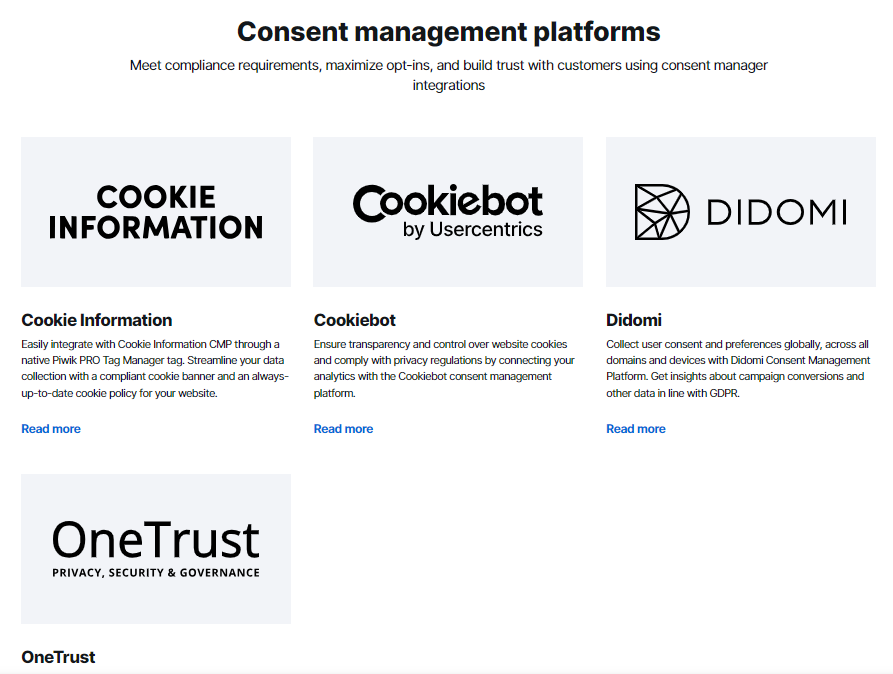
Although Piwik Pro already integrates with several CMPs, as outlined on its integration page, it does not encompass all CMPs. This gap prompted me to develop integrations for Consent Management Platforms that are not yet supported to ensure seamless use of Piwik Pro Analytics if your organisation has chosen Termly as its CMP vendor.
As this blog post focuses on privacy, you can check out my article on integrating Google Consent Mode v2 with Piwik Pro.
With the primary focus of this guide outlined, apart from providing you with the JavaScript-based Piwik Pro and Termly integration, you will also learn about the implementation hierarchy and some prerequisite steps.
But first, let’s examine the benefits of integrating both tools:
1) It ensures compliance, maximises opt-ins and builds trust with your website visitors by using a consent manager vendor of your choice that gives you more design/configuration options while still effectively and compliantly collecting data.
2) It preserves and allows you to continue using the extensive privacy control settings in Piwik Pro’s tag manager when deploying Piwik Pro tags and other third-party tags or pixels.
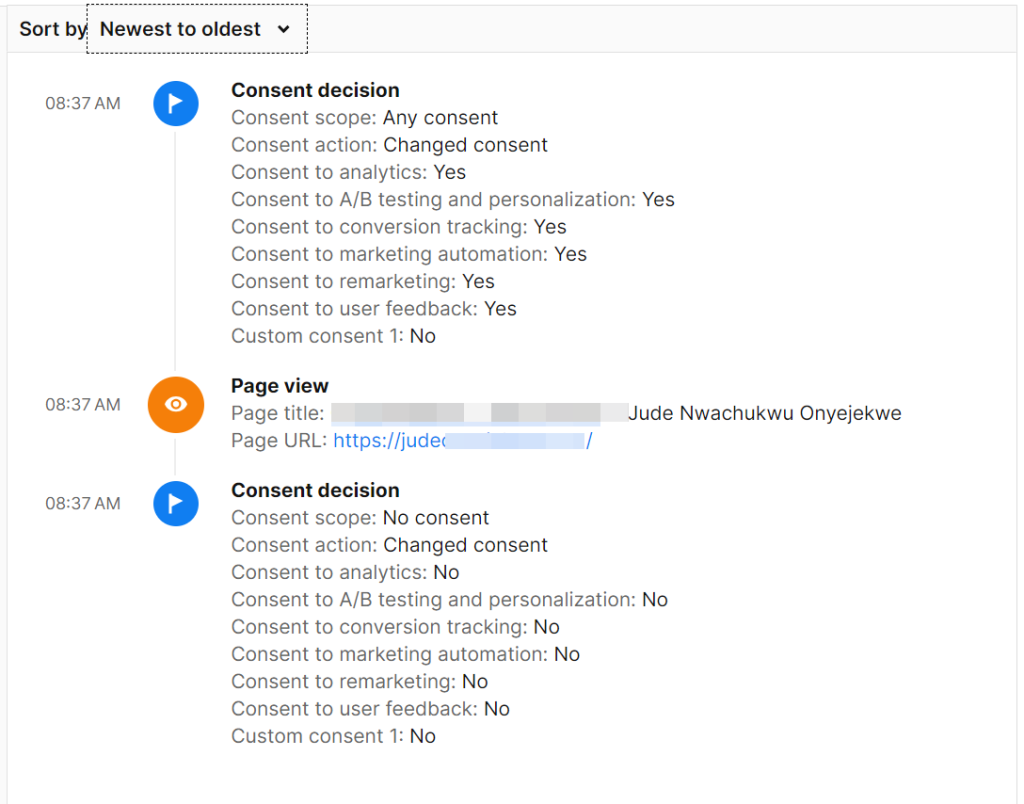
3) It enables access to consent reports in Piwik Pro Analytics, providing valuable insights into how users make their privacy choices and interact with the consent banner. The report helps you understand the specific types of consent granted by users through your Termly consent privacy banner.
4) It removes any barriers to using Piwik Pro on your website with a custom consent banner.
Now, let’s review the steps involved in integrating Piwik Pro and Termly:
Steps for Integrating Piwik Pro and Termly:
- Enable consent and select the custom consent banner option.
- Choose an implementation hierarchy, which I will discuss shortly.
- Implement the solution, conduct testing, and perform quality assurance.
- Go live by publishing your changes.
Whether you use Google Tag Manager or not, the solution shared in this guide applies universally. The key to successful implementation lies in ensuring the correct hierarchy of instrumentation.
Let’s now take a deeper look at each of these steps.
Step 1: Enabling Consent and Selecting a Custom Consent Banner Option
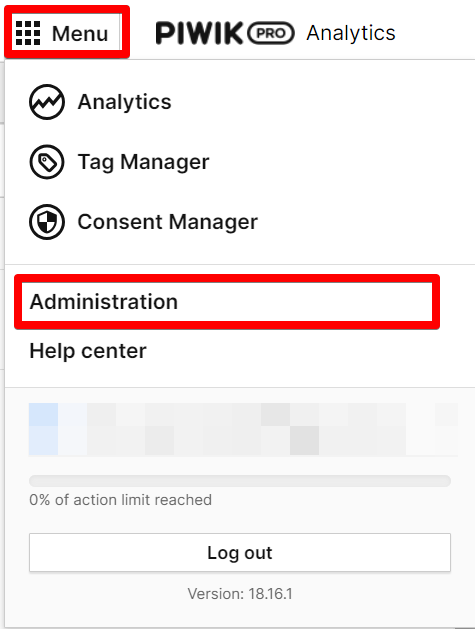
To begin, you must access the Piwik Pro “Administration” panel. Click on the menu hamburger icon and select “Administration.”
This action will display a view listing all the projects (also called “Sites”) associated with your account.
Select the relevant project and navigate to the “Privacy” tab. Ensure that the “Ask visitors for consent” option is activated here. If you don’t have it enabled, please do so.
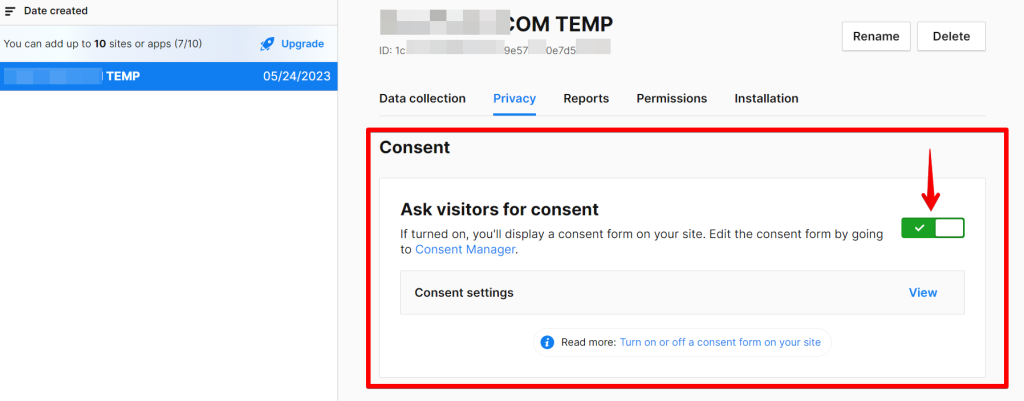
Once enabled, adjust the configuration settings appropriately from the consent settings. Finally, activate the “Use a custom consent form” option, which allows you to implement the Termly consent banner on your site.

Step 2: Hierarchy of Implementation
Understanding the importance of hierarchy in integrating the Termly consent manager and Piwik Pro is crucial to ensuring that the code shared in this guide functions efficiently.
Below, I have outlined the possible hierarchical approaches you can adopt based on your technology stack and current method of implementing Piwik Pro.
Instances Where You Didn’t Use Google Tag Manager To Implement Termly or Piwik Pro Tracking Code
To ensure seamless integration of both tools without complications, please follow these hierarchical steps for scenarios where you didn’t use Google Tag Manager (GTM) in implementing either Piwik Pro or Termly:
- Place the Termly consent banner script above the Piwik Pro tracking script.
- Immediately after the Piwik Pro tracking script, insert the provided JavaScript integration code from this blog.
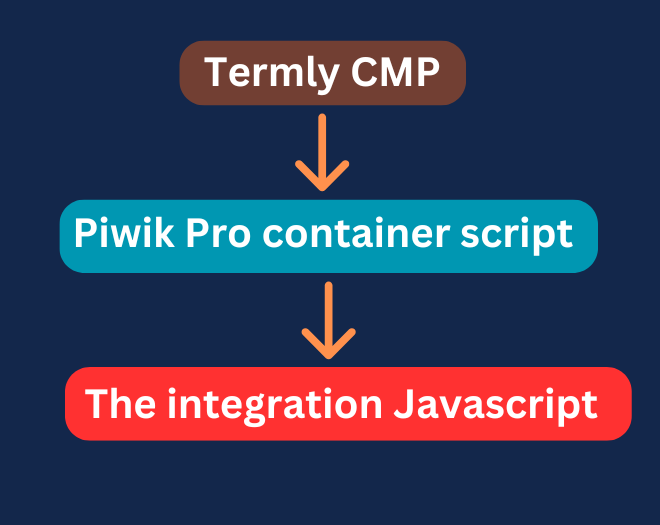
The above instrumentation order facilitates both tools’ smooth and error-free integration, ensuring effective communication between the Termly consent banner and the Piwik Pro script on your website.
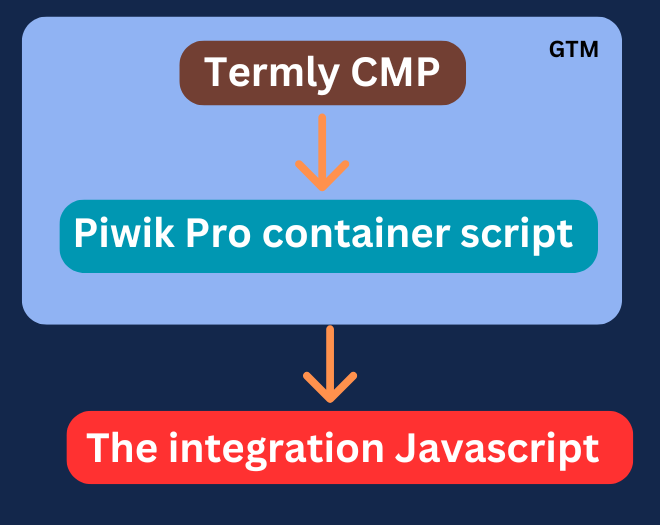
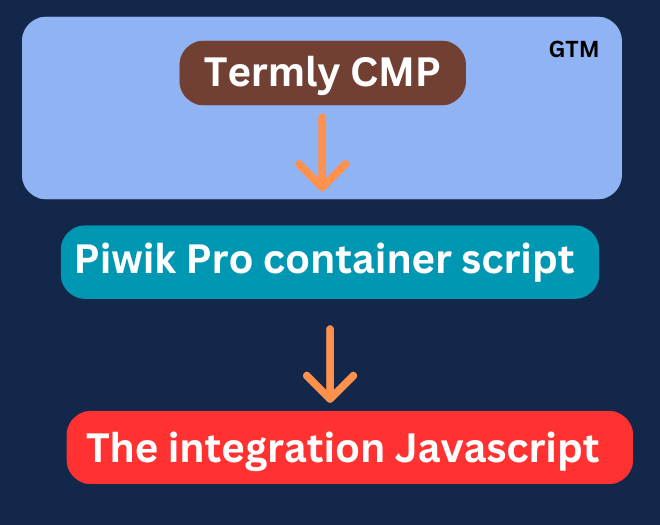
Instances Where You Might Have Used Google Tag Manager for Implementing Termly or/and Piwik Pro
For scenarios involving Google Tag Manager in the implementation of the Termly consent banner script and/or Piwik Pro instrumentation, follow this alternative hierarchy to ensure proper instrumentation and seamless integration:
- Place the GTM container script at the top of your website’s code to ensure it loads first.
- If you have implemented the Piwik Pro container through GTM, configure the Termly script to fire before it. You can achieve this by utilising tag sequencing or the tag priority feature in GTM.
- Install the JavaScript code provided in this blog immediately after the GTM container code to facilitate integration between Termly and Piwik Pro.
- However, if Piwik Pro is installed directly on your website without GTM, deploy it after GTM. Then, place the JavaScript code shared in this blog below the Piwik Pro tracking script.
Here is a visual explanation of the hierarchy where the Termly consent manager script and Piwik Pro config script got implemented inside Google Tag Manager.
Here is another visual illustration hierarchy for scenarios where only the Termly consent banner is deployed on the website using Google Tag Manager.
Depending on your setup, choose a hierarchy that aligns with your current structure to ensure that the integration of both tools works efficiently without any issues. This will enable effective data collection management and privacy control on your website.
Step 3: Integrating Termly and Piwik Pro with The Custom JavaScript Code We’ve Prepared
ChatGPT greatly aided the development of this JavaScript code. However, I can guarantee that It underwent extensive testing and phases of improvement to ensure it functions flawlessly, which is the version I have shared below.
I personally dedicated numerous hours to debugging and testing this JavaScript code in a test website environment.
The rigorous testing and debugging are because I want to ensure the solution’s effectiveness in integrating the Termly consent banner with Piwik Pro analytics on a website. The final version of the code, which you will find below, is the result of these efforts.
Utilise the code below to integrate Piwik Pro and Termly seamlessly.
<script>
// Function to handle updating Piwik Pro consent settings based on Termly consent data
function updatePiwikProConsents() {
    if (typeof Termly !== "undefined" && typeof Termly.getConsentState === "function") {
        var consentData = Termly.getConsentState();
		console.log('Termly consent data accessed');
		console.log('The Termly consent data:', consentData);
        if (consentData) {
			console.log('Piwik Consent Settings Mapped');
            var settings = {
                consents: {
                    analytics: {
                        status: consentData.analytics ? 1 : 0
                    },
                    conversion_tracking: {
                        status: consentData.advertising ? 1 : 0
                    },
                    remarketing: {
                        status: consentData.advertising ? 1 : 0
                    },
                    ab_testing_and_personalization: {
                        status: consentData.performance ? 1 : 0
                    },
                    user_feedback: {
                        status: consentData.performance ? 1 : 0
                    },
                    marketing_automation: {
                        status: consentData.performance ? 1 : 0
                    }
                }
            };

            // Check if Piwik Pro API is available and then set compliance settings
            if (typeof ppms !== "undefined" && ppms.cm && typeof ppms.cm.api === "function") {
                ppms.cm.api('setComplianceSettings', settings,
                    function() {
                        console.log('Piwik Pro consent has been set');
                    },
                    function(error) {
                        console.error('Error setting Piwik Pro consent settings:', error);
                    }
                );
            } else {
                console.log("Piwik Pro API is not available.");
            }
        }
    } else {
        console.log("Termly consent information is not available.");
    }
}

// Execute the update function with a 2 millisecond delay on script load
setTimeout(updatePiwikProConsents, 1);

// Custom dataLayer.push method that listens for the "Termly.consentSaveDone" event
window.dataLayer = window.dataLayer || [];
window.dataLayer.push = function(event) {
    Array.prototype.push.call(window.dataLayer, event);
    if (event && event.event === "Termly.consentSaveDone") {
        console.log("Consent Updated Now.");
        setTimeout(updatePiwikProConsents, 1); // Adds a 1 millisecond delay for this specific call
    }
};
</script>
You could test your setup using the Piwik Pro “Tracker Debugger,” a feature I’ve extensively covered in a guide about debugging in Piwik Pro Analytics.
Step 4: Publish Your Setup
Once you have added and thoroughly tested the code, ensuring everything works as expected, you are ready to go live. Publish your implementation to make it available to website visitors.
Final Conclusion
If you have any questions, encounter difficulties with this process, or need assistance with Piwik Pro, please feel free to contact me via LinkedIn, email on the contact page, or the contact form on that page.