
Detailed Guide on How To Sync Piwik Pro with Consent Manager CMP
In this final episode of our 2024 series on integrating Piwik Pro with third-party consent management platforms, I’ll guide you through integrating the “Piwik Pro” suite with the “Consent Manager” CMP.
Last week, I covered Piwik Pro’s integration with Cookie-Script, and Termly CMP a week before. Today, I’ll walk you through the steps of integrating Piwik Pro with Consent Manager CMP, enabling you to utilise their custom consent banner alongside Piwik Pro suites (Analytics, Tag Manager, etc.).
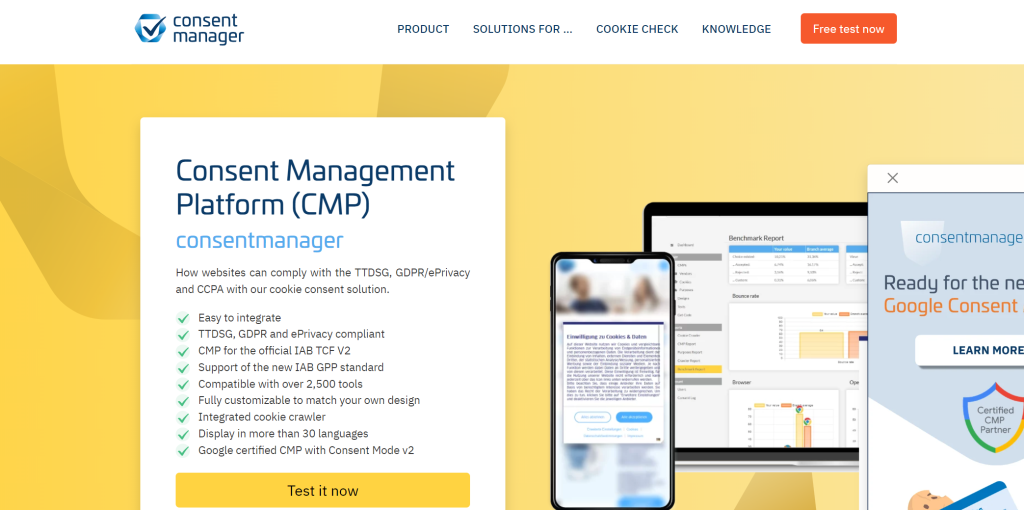
Consent Manager CMP is a vendor specialising in compliance and privacy management solutions through tools like consent banners.
This privacy-focused series began in 2023, providing step-by-step solutions for integrating Piwik Pro’s Consent Manager suite with CMPs such as Osano, CookieFirst, and CookieYes.
While Piwik Pro natively integrates with various CMP vendors, my focus has been bridging the gap for other vendors, which it doesn’t support using the list of CMPs on the integration page.
Given our privacy focus, I’d like to introduce our guide to integrating Google Consent Mode v2 with Piwik Pro.
Now, let’s briefly explore the benefits of integrating Consent Manager CMP and Piwik Pro:
1. Doing this allows you to use the consent management vendor of your choice to ensure compliance, maximise opt-ins, and build trust with visitors. These vendors usually offer greater design/configuration options while ensuring compliant data collection.
2. It helps preserve and allows you to utilise the comprehensive privacy controls within the Piwik Pro tag manager when deploying Piwik Pro and third-party tags or pixels.
3. Provides access to consent reports in Piwik Pro Analytics, offering insights into user privacy choices and interactions with the consent banner. These reports help understand specific consent types granted by users.
4. Facilitates seamless use of Piwik Pro on your website with a customised consent banner from a third-party vendor.
Having understood these benefits, let’s look into the steps involved in integrating both tools.
The Four Steps for Integrating Piwik Pro and Consent Manager CMP:
To guide you through synchronising user consent preferences captured via your custom “Consent Manager CMP” banner with the Piwik Pro suite, here’s an overview of the approach:
- Start by enabling consent in the admin panel and selecting the custom consent banner option for your Piwik Pro project.
- Determine and establish an implementation hierarchy, which I cover shortly.
- Implement the solution, conduct thorough testing, and ensure quality assurance.
- Deploy your changes to go live.
Whether you utilise Google Tag Manager or not, the approach outlined in this guide is universally applicable. Successful implementation hinges on correctly configuring the implementation hierarchy.
Now that you grasp the steps involved, let’s look deeper into the abovementioned steps.
Step 1: Admin Configuration Changes (Enabling Consent and Selecting a Custom Consent Banner Option)
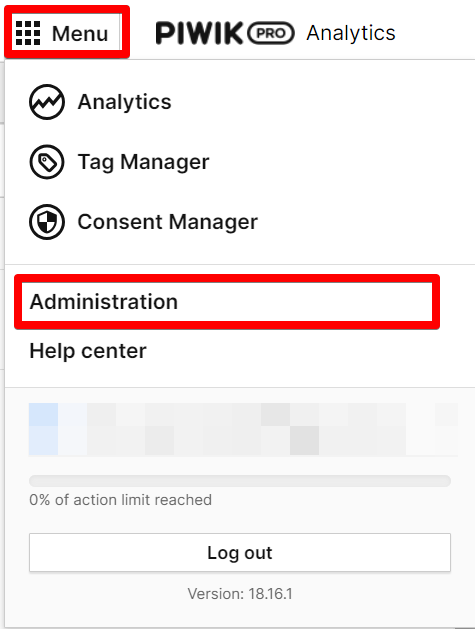
To begin, access the Piwik Pro “Administration” panel by clicking the menu hamburger icon and selecting “Administration.”
This action will open a view listing all projects (or “Sites”) associated with your account. Choose the relevant project and navigate to the “Privacy” tab. Ensure that the “Ask visitors for consent” option is activated. If it’s not already enabled, activate it.
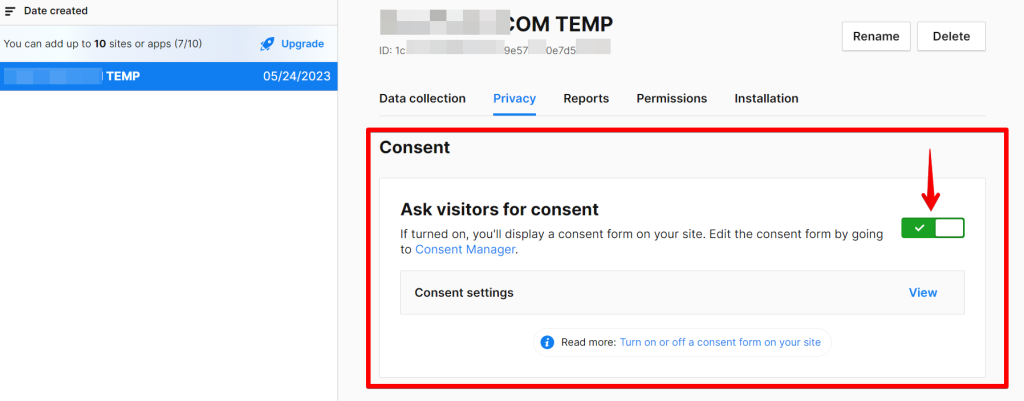
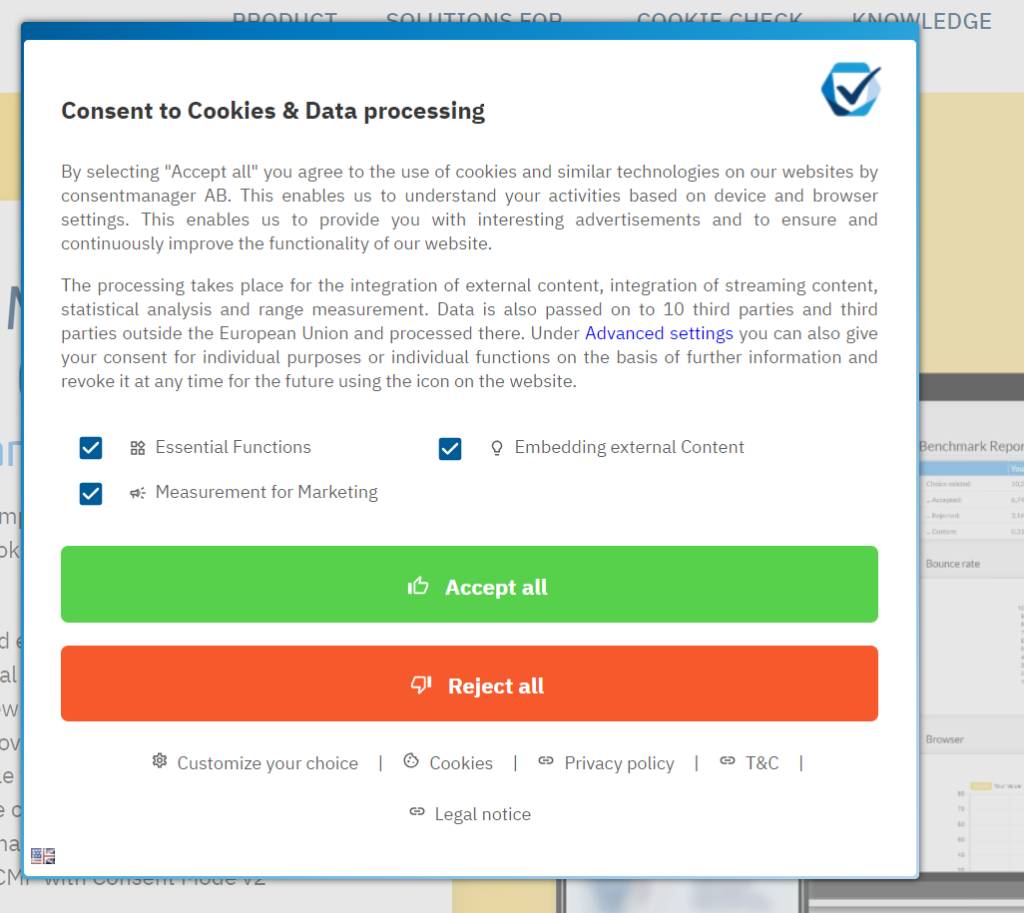
Once enabled, you’ll have to adjust your privacy settings according to your preferences in the consent settings. Finally, activate the “Use a custom consent form” option. This option seamlessly integrates the “Consent Manager” consent banner into your website.

Step 2: Implementation Hierarchy
Understanding the hierarchy of implementation is essential when integrating the Consent Manager consent banner with Piwik Pro, as it helps with the effectiveness of the code provided in this guide.
Below, I outline possible hierarchical approaches based on your technology stack and current method of implementing Piwik Pro.
Scenario Where You Implemented Piwik Pro and The Consent Manager script without Google Tag Manager (GTM):
For cases where you have not used Google Tag Manager to implement either the Consent Manager script or Piwik Pro tracking code, follow these steps to ensure smooth integration:
- Place the script for the Consent Manager CMP consent banner above the Piwik Pro tracking script.
- Immediately after you add the Piwik Pro tracking script, insert the JavaScript integration code provided in this guide.
The illustration below should help you visually understand what the hierarchical structure should look like for this scenario.
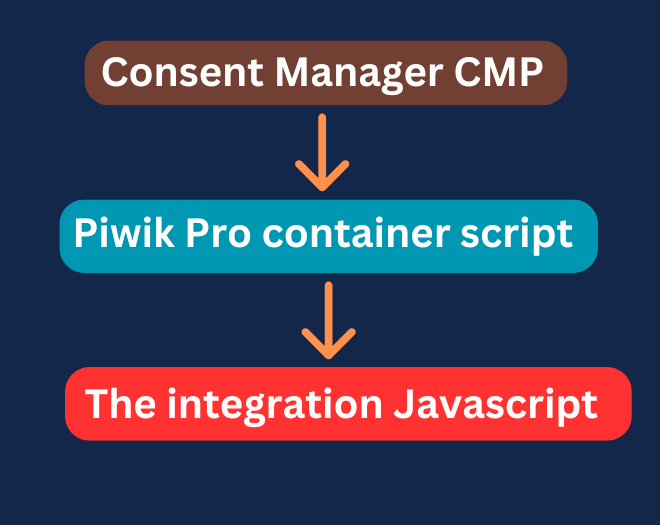
This sequence ensures seamless integration, enabling effective communication between your website’s visitor consent preferences through the Consent Manager consent banner and Piwik Pro.
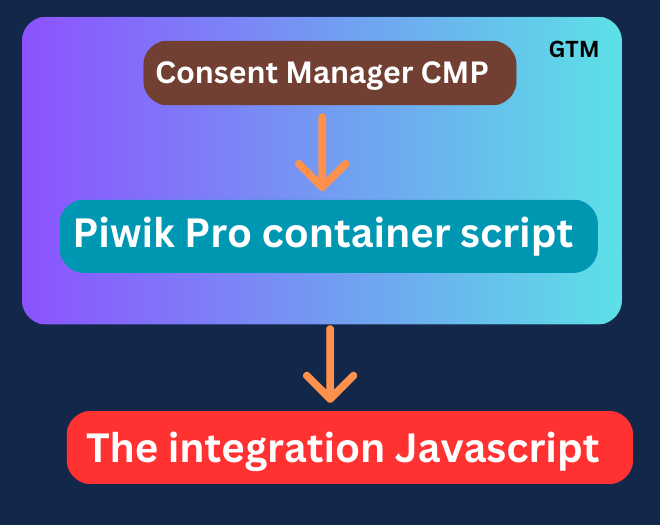
Scenario with Google Tag Manager (GTM) Involved In Your Setup:
If you have installed Consent Manager or/and Piwik Pro using Google Tag Manager, follow this hierarchy to ensure proper integration:
- Ensure the GTM container script gets placed at the top of your website’s code.
- Configure the Consent Manager script to fire before the Piwik Pro container script within GTM using tag sequencing or the tag priority feature.
- Immediately after the GTM container script, insert the JavaScript code provided in this guide.
- If Piwik Pro is directly implemented on your website without GTM, ensure it follows the GTM container script. Then, place the JavaScript code below the Piwik Pro tracking script.
Here is a visual explanation of the hierarchy where the “Consent Manager”‘s consent manager script and Piwik Pro config script got implemented inside Google Tag Manager.
Here is another visual illustration hierarchy for scenarios where only the “Consent Manager” consent banner is deployed on the website using Google Tag Manager.
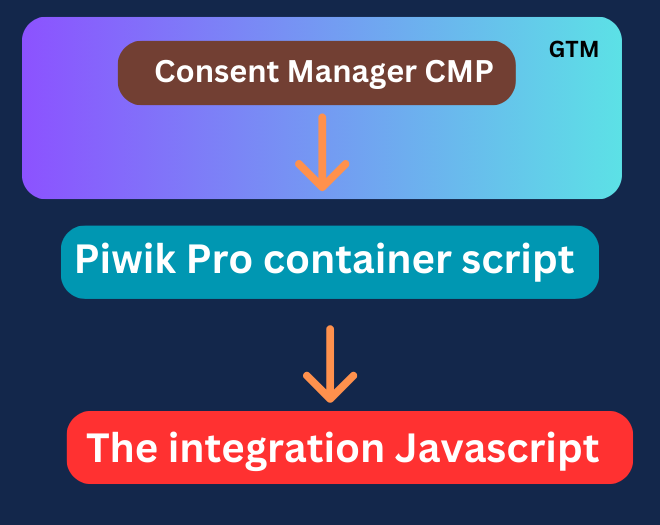
Choose the hierarchy that aligns with your setup to effectively manage data collection and privacy control on your website, ensuring seamless integration between Consent Manager CMP and Piwik Pro.
Step 3: Integrating Consent Manager CMP and Piwik Pro with Custom JavaScript Code
ChatGPT’s knowledge assisted in developing the JavaScript code I’ll share shortly. However, the code creation had some human effort, and It has undergone extensive testing and refinement to ensure flawless functionality, as detailed in the version I shared in this guide.
I also spent significant hours debugging and testing this JavaScript code in a controlled website environment.
The thorough testing and debugging efforts were aimed at guaranteeing the seamless integration of the Consent Manager CMP consent banner with Piwik Pro analytics on your website. The final code version presented below reflects these efforts.
Please ensure to replace the consent purposes IDs in the code with your own IDs from your Consent Manager CMP backend, as this is critical for the code to operate correctly.
Use the code below to integrate Piwik Pro seamlessly with the Consent Manager CMP.
<script>
// Define consentPurposeIDs mapping
var consentPurposeIDs = {
analytics: 'c54', //replace with the correct ID
ab_testing_and_personalization: 'c54', //replace with the correct ID
conversion_tracking: 'c54', //replace with the correct ID
remarketing: 'c52', //replace with the correct ID
marketing_automation: 'c52', //replace with the correct ID
user_feedback: 'c53', //replace with the correct ID
custom_consent: 'c55' //replace with the correct ID
};
// Initialize default settings
var settings = {
consents: {
analytics: { status: 0 },
ab_testing_and_personalization: { status: 0 },
custom_consent: { status: 0 },
user_feedback: { status: 0 },
marketing_automation: { status: 0 },
remarketing: { status: 0 },
conversion_tracking: { status: 0 }
}
};
// Function to map consent data to settings object
function mapConsentData(consentData) {
for (var key in consentPurposeIDs) {
var purposeID = consentPurposeIDs[key];
var consentStatus = consentData[purposeID] ? 1 : 0;
settings.consents[key].status = consentStatus;
}
}
// Function to get custom consent data and update settings
function getCustomConsentData(e, o) {
__cmp('getCMPData', null, function(result) {
var purposeConsents = result.purposeConsents;
console.log(purposeConsents);
mapConsentData(purposeConsents);
console.log(settings);
// Set compliance settings in Piwik PRO
if (typeof ppms !== 'undefined' && ppms.cm && ppms.cm.api) {
setComplianceSettings(settings);
getComplianceSettings();
}
});
}
// Function to handle consent actions with custom consent data
__cmp("addEventListener", ["consentapproved", getCustomConsentData, false], null);
__cmp("addEventListener", ["consentrejected", getCustomConsentData, false], null);
__cmp("addEventListener", ["consentcustom", getCustomConsentData, false], null);
// Functions to interact with Piwik PRO API
function setComplianceSettings(settings) {
ppms.cm.api(
'setComplianceSettings',
settings,
function () {
dataLayer.push({ 'event': 'Piwik_complianceSettingsSet' });
},
function (error) {
dataLayer.push({ 'event': 'Piwik_complianceSettingsError', 'errorMessage': error.message });
}
);
}
function getComplianceSettings() {
ppms.cm.api(
'getComplianceSettings',
function (settings) {
dataLayer.push({ 'event': 'Piwik_complianceSettingsUpdate', 'settings': settings });
},
function (error) {
dataLayer.push({ 'event': 'Piwik_complianceSettingsError', 'errorMessage': error.message });
}
);
}
// Initial execution to synchronize consent settings
getCustomConsentData();
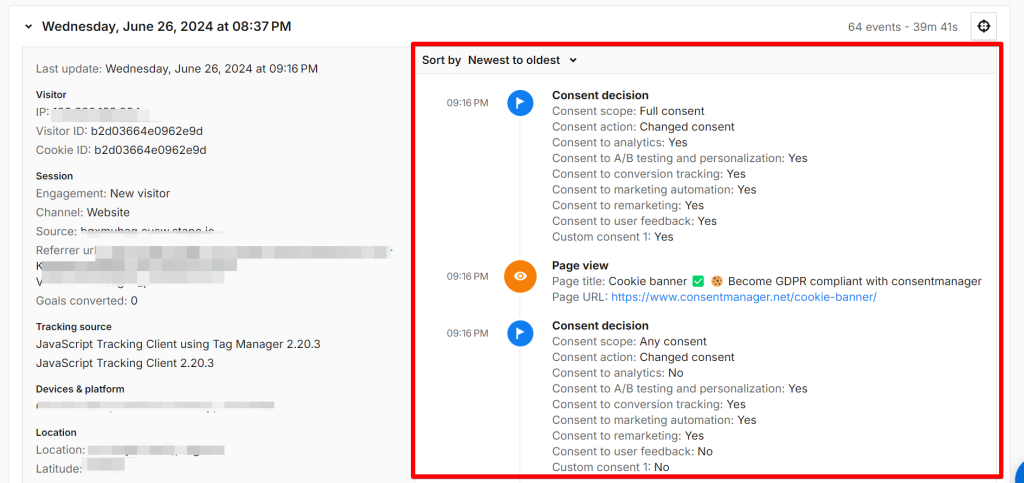
</script>After implementing the JavaScript code above, you should test your setup using Piwik Pro’s “Tracker Debugger,” a debugging feature I previously covered in my article about debugging and troubleshooting in Piwik Pro Analytics.
Step 4: Deploy Your Changes on the Live Website
Once you have implemented, tested, and quality-assured the solution, the final step is to deploy your configuration to your live website audience. Monitor its performance to ensure the successful synchronisation of consent preferences collected by the Consent Manager CMP consent banner with Piwik Pro suites.
Closing Remark
If you have any questions, encounter difficulties during the process, or need assistance with Piwik Pro, feel free to contact me via LinkedIn, email, or the contact form provided on the DumbData Contact Us page.