


If you’re already tracking internal site search action in Google Analytics or Piwik Pro and want to set up similar tracking in your Microsoft Clarity project, this article is for you.
Not only will we walk through how to track site searches in Microsoft Clarity, but you’ll also get to learn how to make the most of that data.
While analytics tools like Google Analytics and Piwik Pro let you report on search terms, they don’t offer an easy way to view session recordings of users who performed those searches unless you’ve connected either tool with Microsoft Clarity using the approach outlined here.
Without this integration, your ability to gain qualitative knowledge of the site search interactions collected in your Microsoft Clarity project, especially during user sessions where a site search activity occurred, is quite limited.
You may only have access to the session replay URL rather than actionable data that you can segment using other data points in your Clarity project.
For example, with search behavior captured in Clarity, you can go beyond basic recordings. You can filter site search sessions by device type or identify users who searched but didn’t convert.
This kind of segmentation unlocks a much richer understanding of your user journeys.
And that’s just the beginning. As we go further, I’ll cover more advanced use cases and explain how tracking site search behavior in your Microsoft Clarity project can help you improve your site’s search experience and make your content and products easier to find.
Let’s start by looking at a few key ways to implement site search tracking in your Microsoft Clarity project:
- Auto Events
- Custom Smart Events (Page Visits)
- API Events with Custom Tags
- Data Segments and Filters
Now, let’s go over each method in more detail, how to set them up, their advantages, and any trade-offs you should be aware of.
1. Auto Events
Let’s start with Auto Events, which is a type of Microsoft Clarity Smart Event (which I’ve covered in detail in this guide).
This method requires no setup.
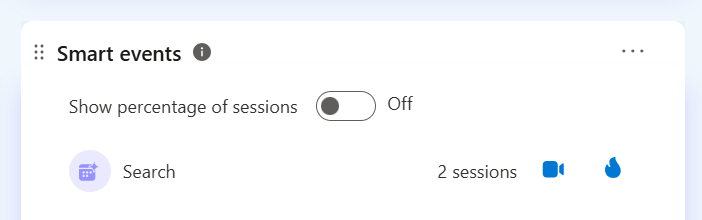
Microsoft Clarity automatically tracks certain user-click interactions on your website, including site search activity, and displays them in the Smart Events section of your Clarity dashboard.
While convenient, this method doesn’t give you control over how it collects data. Clarity determines what to track automatically, and although you can choose to ignore it, you cannot configure or customize it.
At first glance, it might seem like a helpful way to measure site search behavior, but there are a few important limitations:
Limited Accuracy: This method is often based on user clicks rather than actual site search activity. As a result, it may overlook significant search events.
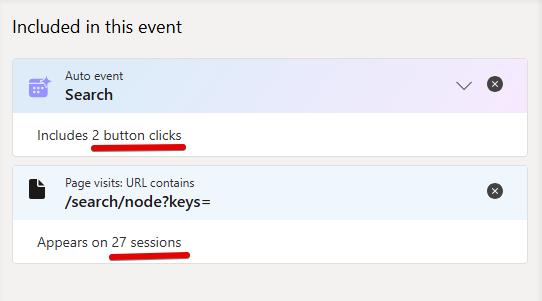
For instance, when I compared the number of visits to a site search results page with the number of Auto Event reports from Clarity, the Auto Events significantly underreported the actual volume, as shown in the image below.
No Search Term Visibility: You can’t segment users by specific search terms.
This means you lose the ability to spot trends, for example, identifying a spike in a particular search term and using that insight to improve content or product visibility.
Incompatible with Advanced Search Forms: If your site uses a complex search feature with additional filters or optional fields, Auto Events may not capture those interactions at all.
While this approach is retroactive, meaning Clarity has likely already begun collecting relevant internal-site search event data, it’s essential to be aware of its limitations.
Now that you understand this method, let’s move on to the next option.
2. Custom Smart Events (Page Visits)
This method also utilizes Microsoft Clarity’s Smart Events feature, but unlike Auto Events, it requires manual setup within the Microsoft Clarity UI.
So, you’ll need to take a few additional steps to configure it properly.
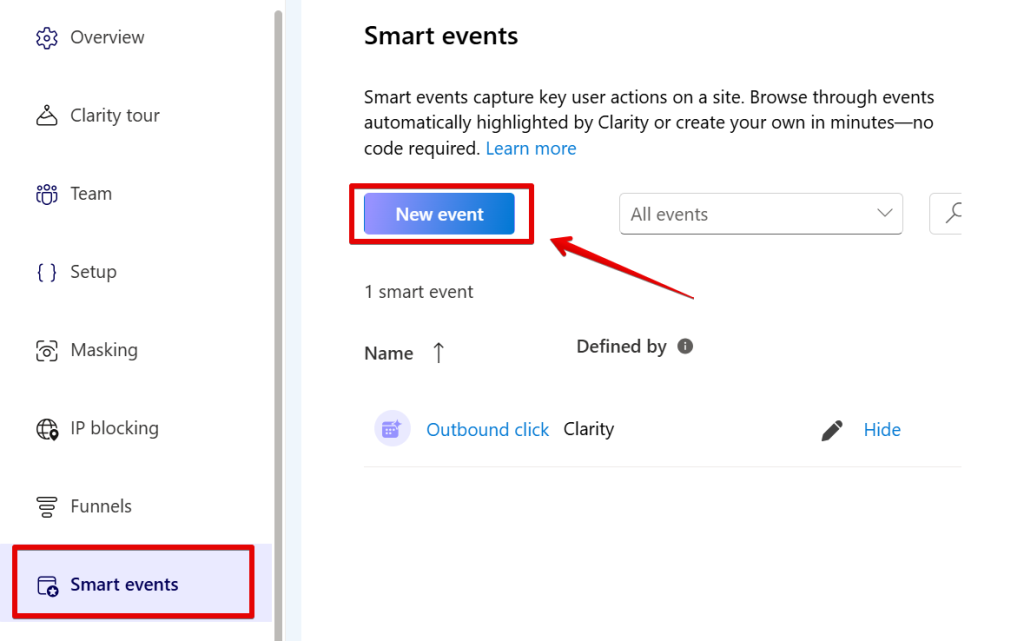
To get started, go to your Microsoft Clarity project and navigate to the Settings section. From the sidebar, select Smart Events.

In the Smart Events view, click the “New Event” button to create a custom event for your site search activity.
You’ll then be prompted to choose between existing auto events or starting from scratch. For this setup, select “Start from scratch” and proceed by clicking Next.
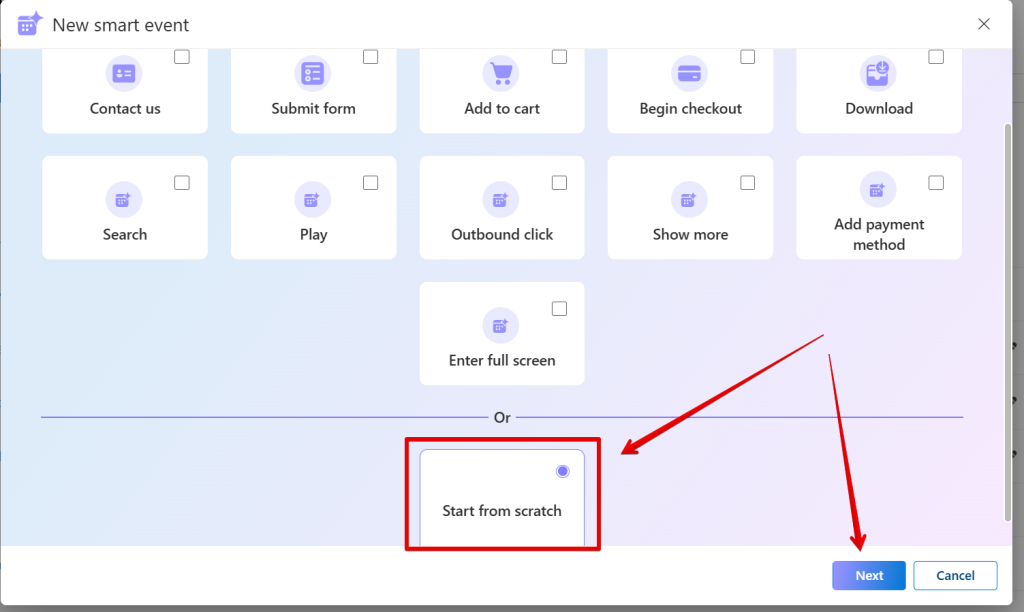
In the event creation window, choose the “Page Visits” option. This will display a list of recently recorded pages in your project, but for this, I’ll define a custom condition instead based on the site search result page URL pattern.
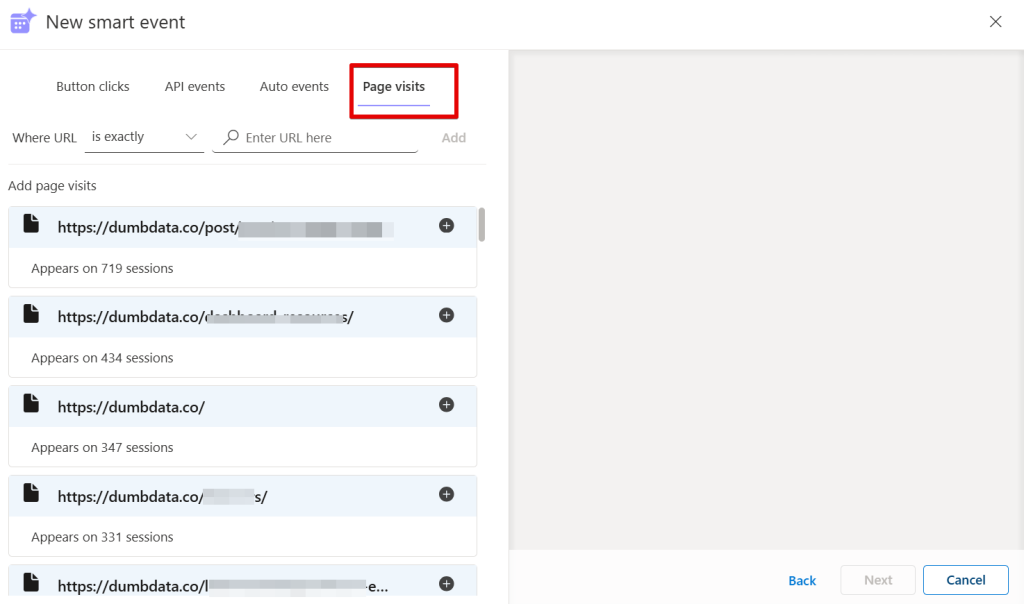
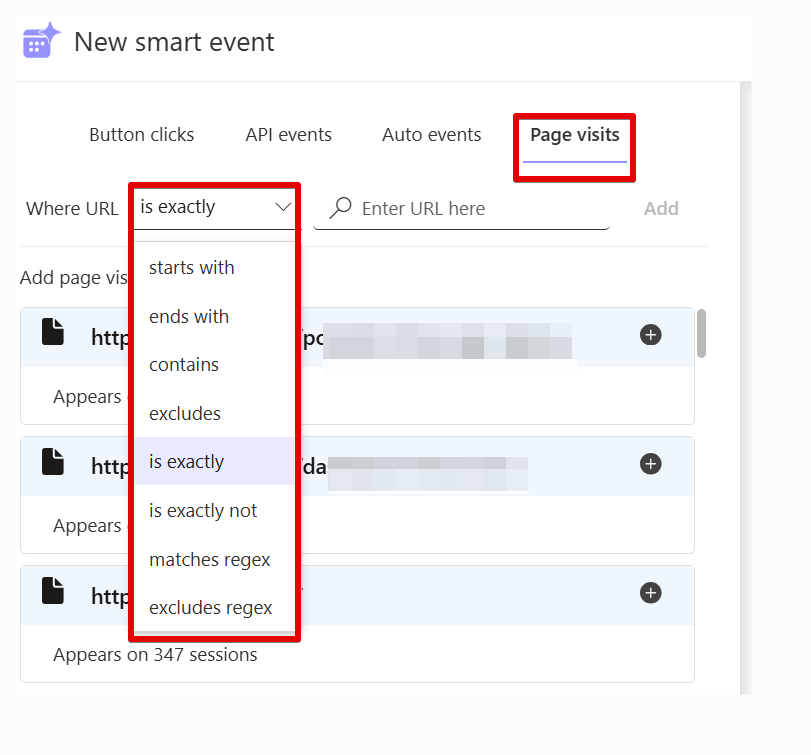
Use the event condition builder to specify the URL pattern of your search results page. In most cases, selecting “contains” will be sufficient. However, if your site uses complex URL structures, you can use the “matches regex” option for more flexibility.
For this guide, I’ll use the “contains” option and enter part of the URL used for search results on my website, such as “/search/node?keys=” or “?s=” and then click Add.
Yours can be different, though.
Once added, this new Page Visit Smart Event will appear in the list on the left, along with a summary of recent sessions where users visited the search results page.
Click Next, give your event a meaningful name (e.g., Site Search Visit), and then click Save to complete the setup.
From this point on, Clarity will begin recording every user session where the search results page is visited, treating it as a Smart Event.
This method is user-friendly and implemented entirely within the Clarity interface, but it does come with a few limitations:
- Not Retroactive: This setup only begins collecting data from the moment you create the Smart Event. It won’t capture past site search activity.
- May Record False Positives: Because it tracks page visits, any user who refreshes the search results page without performing a new search will still be logged as having triggered a search event.
- Limited Support for Complex URLs: If your site uses advanced or dynamically generated search URLs that don’t follow a consistent pattern, this method may not work well.
- No Search Term Segmentation: As with the Auto Events method I covered first, you won’t be able to filter users by the specific search terms they used, limiting deeper analysis into what people are actually looking for.
Despite these drawbacks, this approach still offers more control than Auto Events. Next, we’ll explore a method that gives you even more precision and flexibility.
3. API Events with Custom Tags
This approach is my recommended method, and it offers the most control and reliability for tracking internal site search activity.
It works with all types of search forms, whether simple or complex, but it does require implementation outside the Microsoft Clarity interface.
What does this method involve?
It combines two key components of Microsoft Clarity:
- API Events to track the actual search action.
- Custom Tags to capture the search term used by the visitor.
[IMAGE HERE]
At first glance, this might seem technical, but it’s actually clear to follow. Here’s how it works:
Step 1: Track the Site Search Action with an API Event
Microsoft Clarity allows you to also trigger Smart Events via their Client API, which is what is known as API Events, a type of Smart Events.
The code snippet for this might look like the following:
window.clarity("event", "<event name here>")You can rename the event to suit your needs, for example, something like “internal_site_search“.
To ensure this code runs only when a user performs a search, you can deploy it using a tag management system like Google Tag Manager. And triggering it when a site search is performed.
If you’re using Google Tag Manager, you can also simplify the process using ready-made custom tag templates.
Step 2: Use a Custom Tag to Capture the Search Term
Custom tags enable you to pass additional data about a page, and I’ll be innovative in how this feature gets utilized.
Specifically, I’ll use it to pass extra search-related data, such as the actual search term used, into Microsoft Clarity.
Popular GTM templates, such as the Luratic Clarity Events tag template created by Brais Calvo Vázquez and the Datola Team, support this functionality and offer advanced configuration options.
Another option is the Clarity Event Tag by Markus, which also lets you set custom tags and values.

If you’re not using a tag management system, you can implement both the API Event and the custom tag manually. A developer can add the code to your website to trigger when a search is submitted.
Example: Sending the Search Term with a Custom Tag
If you’re not using a GTM template, here’s a basic example of the custom tag code you can run:
window.clarity("set", "search_term", "<search term>")Make sure to replace the value parameter with a variable that dynamically pulls the search term at the time the user performs the search.
The advantage of using custom tags is that you’re not limited to the search term alone.
You can pass additional search-related contexts, like search category, filters used, or any other metadata that helps you analyze search behavior more deeply.
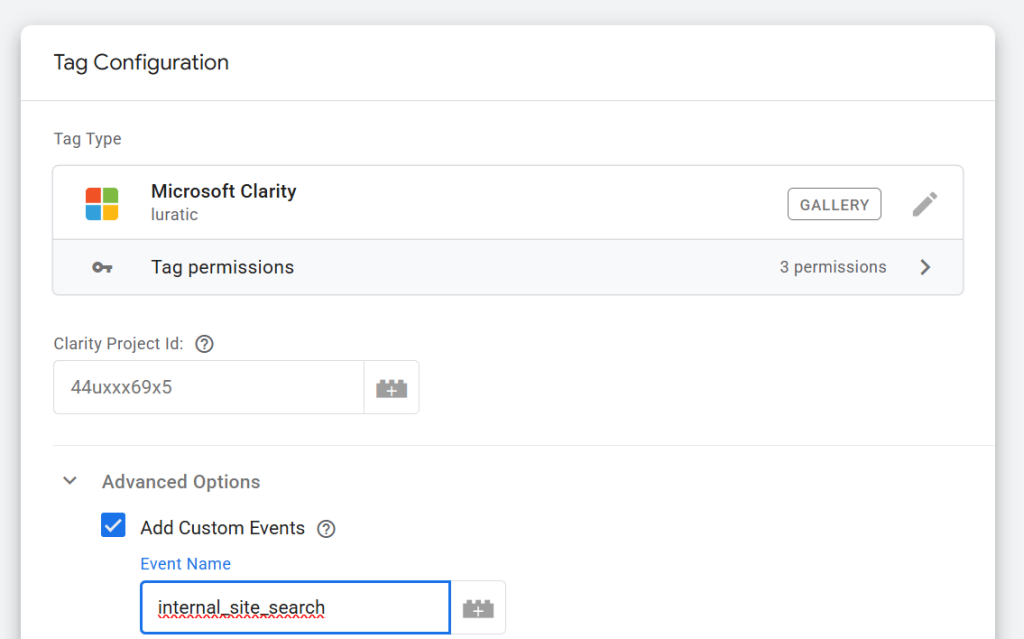
If you are using the Luratic tag template, your final setup should be similar to the one shown in the image below.
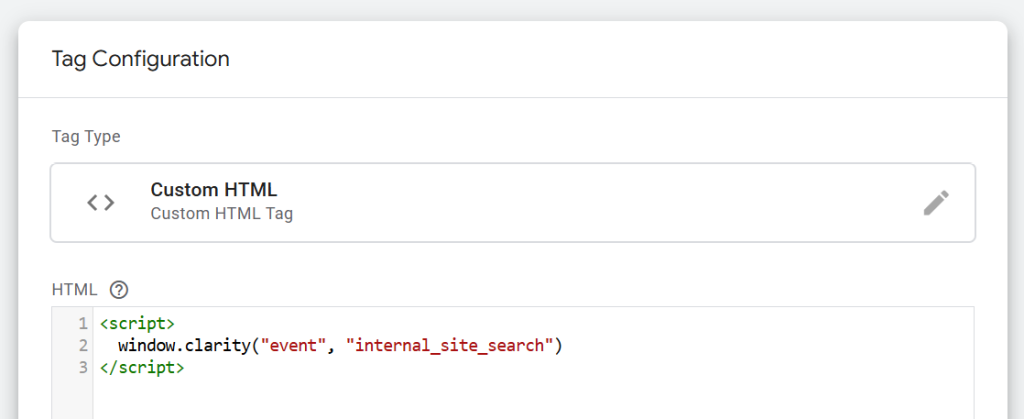
While if your preferred method is using the GTM custom HTML method, you should have a final setup like the one below.
Or something like this for the Clarity event tag.

Pros and Considerations:
By using this method, search events will only be triggered when an actual search is performed, assuming your implementation is executed correctly.
Additionally, you will have the ability to collect search-related data beyond just basic metrics.
However, unlike the Auto Event method, this approach begins to collect data only from the moment it is implemented.
Despite this limitation, this method lays the groundwork for gathering data points that can lead to much deeper insights.
When filtering by site search actions that include a specific keyword in the search query, it’s important to note that using custom tags may not work. This is because custom tags cannot utilize a “contains” filter condition for this type of analysis. Consequently, we should consider the next available option.
4. Data Segments and Filters
This method doesn’t require any setup outside of your Microsoft Clarity project.
Unlike the API Events and the Custom Tags approach, you won’t be using Smart Events here.
Instead, this method relies on Clarity’s built-in filtering features, which you can save as a reusable segment.
You’ll apply filters directly within Clarity when you’re reviewing visitor behavior that includes internal site searches.
So, how do you set this up?
Step-by-Step: Setting Up the Filter
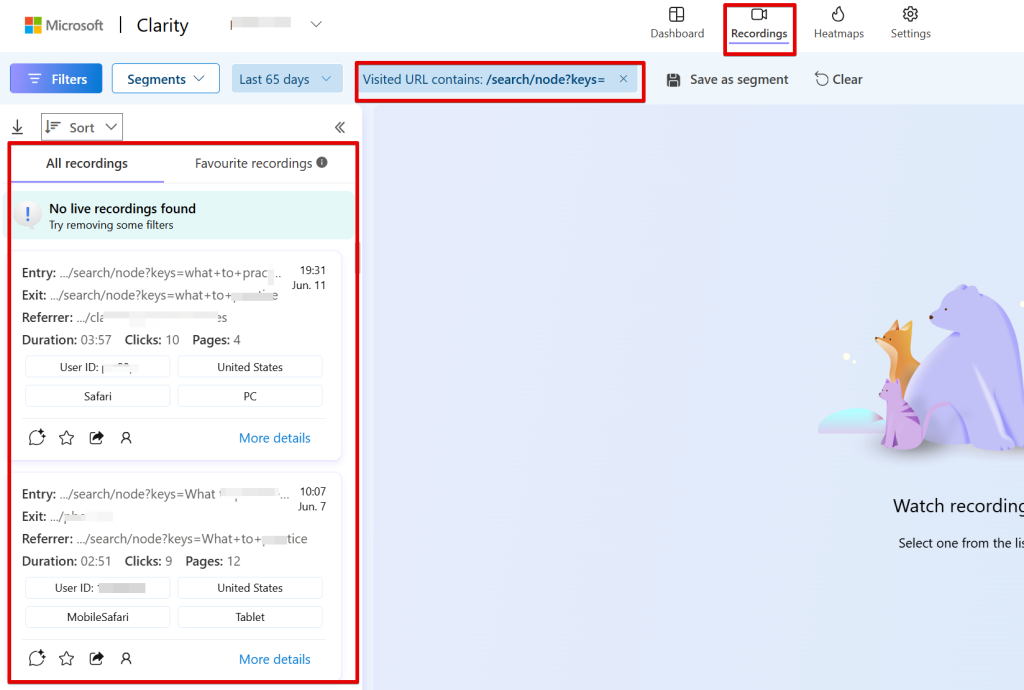
Start by clicking the “Filters” button on the Clarity dashboard.
Next, go to the Page filter section. Here, you’ll create a rule to segment visits to your site’s search results page. Use the condition “contains” or “matches regex” to define the URL pattern.
If you choose regex, make sure you’re comfortable writing regular expressions.
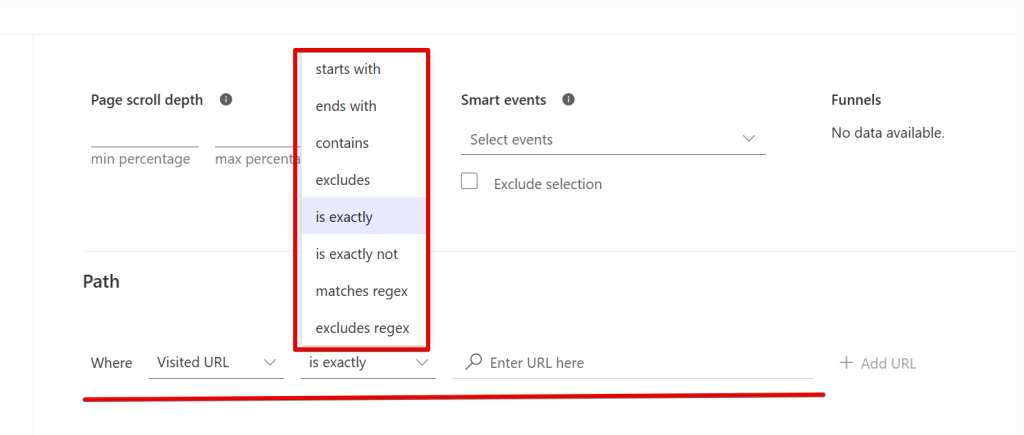
In this example, I’ll use the “contains” condition. Just like in the earlier method, enter the URL pattern of your search results page.
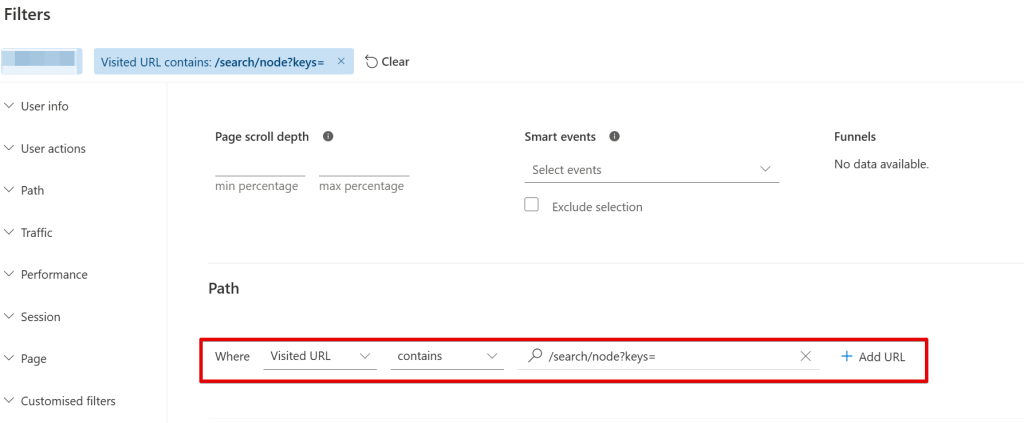
Make sure your pattern accounts for dynamic search terms in the URL; this is important to ensure the filter captures all relevant sessions.
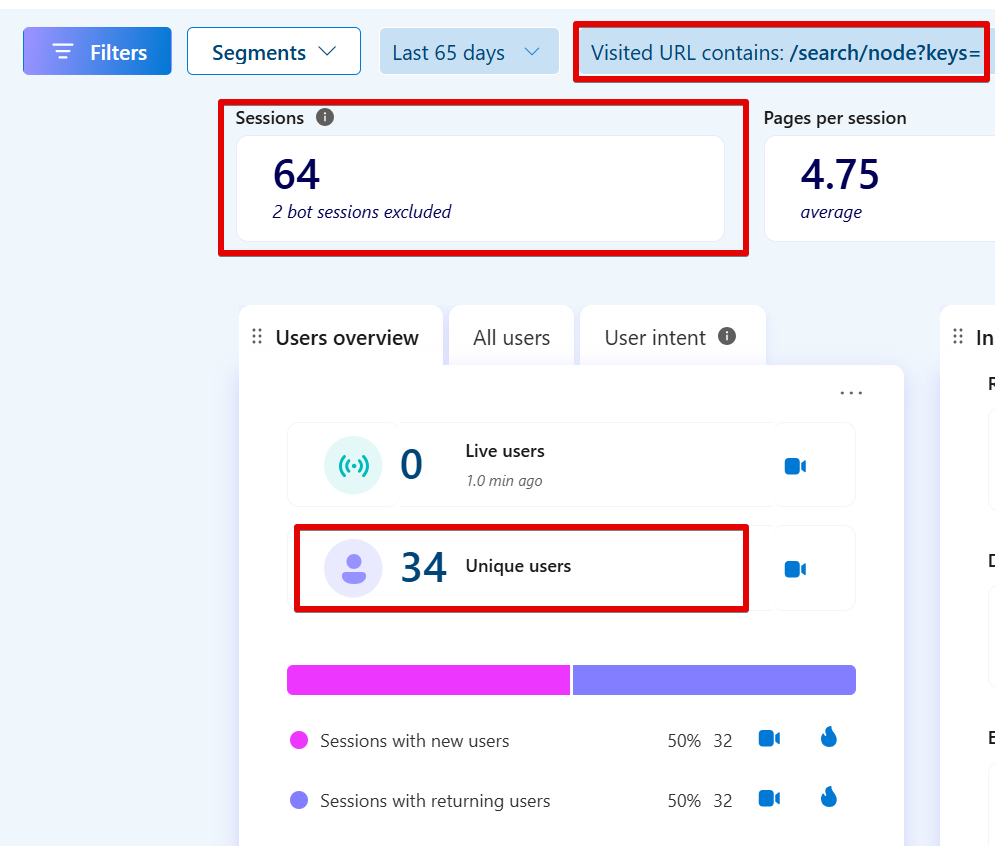
Once you’ve added the condition, apply the filter. Your dashboard will now show only the sessions where a search was performed and users who initiated the search.
You can apply the same filter to the Session Recordings and Heatmaps tabs for more detailed analysis.
Saving the Filter as a Segment
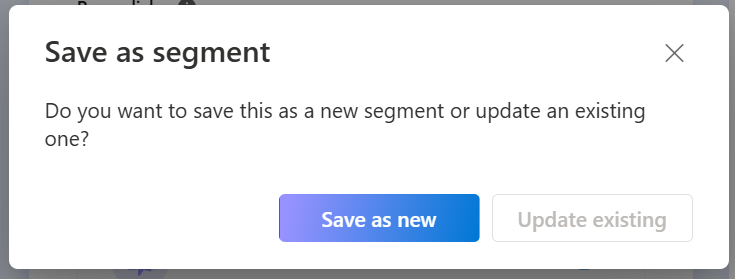
To make the filter reusable, click “Save as segment.”

A modal will appear, giving you two options: “Save as new” or “Update existing.” Choose “Save as new.”
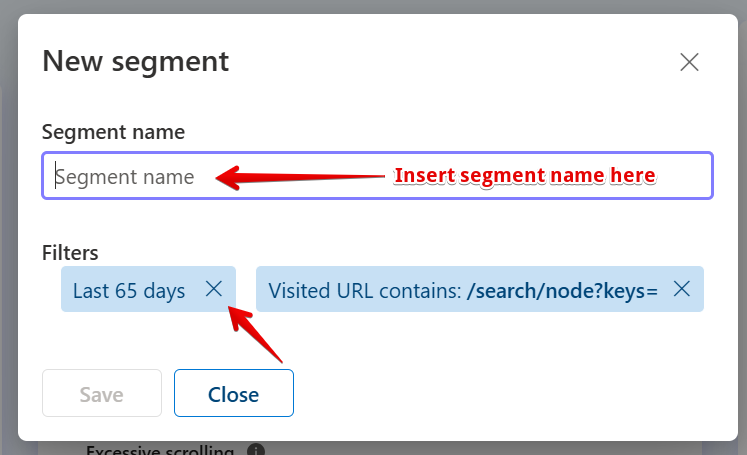
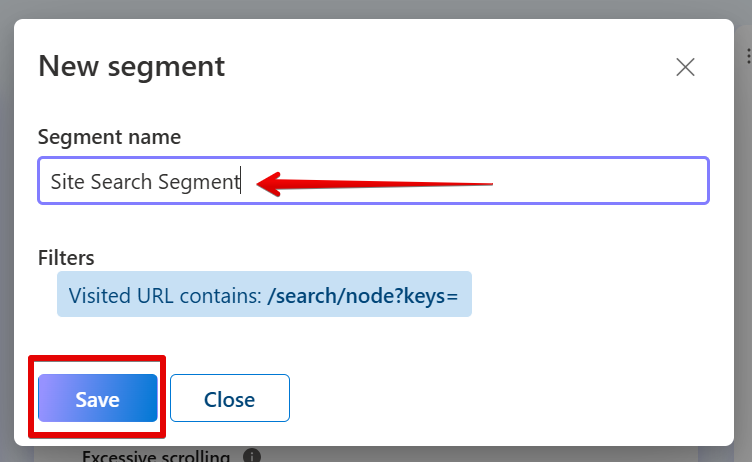
Give your segment a clear name. Also, remove the preselected date range by clicking the “X” beside the date. This ensures the segment can be applied to any date range you choose later without altering the segment.
Your final configuration should look something like this:
Key Things To Keep In Mind With This Method:
This method doesn’t collect any event data. It’s purely for analysis within Clarity but can be used for measuring site search activity.
That means you can still review historical site search behavior without having configured anything in advance.
However, there are scenarios where this method might be more worthwhile than the API Event with Custom Tag approach.
For example, if you’re trying to identify search activity for a specific keyword contained in a site search activity (and its possible variations), this method can be more flexible than API Events or Custom Tags.
Using the regex filter allows you to capture multiple keyword formats without needing to predefine them all in your implementation.
That said, regex can be tricky if you’re not familiar with it. You’ll need to understand regular expressions to get the most out of this approach.
Practical Use Cases of Site Search Data in Microsoft Clarity
Tracking internal site search activity in Microsoft Clarity can offer several valuable insights.
In this section, I’ll walk you through some practical ways this data can be used to improve user experience and gain deeper behavioral understanding.
1. Understanding Click Patterns on Search Results Pages
Tools like Google Analytics (GA4) or Piwik Pro can tell you that a search happened, but they often fall short when it comes to showing what users actually do on the search results page.
By collecting site search data in Microsoft Clarity, including the actual search terms, you can observe user behavior on results pages for popular queries.
This helps you understand whether the results are helpful, which elements users engage with most, and how intuitive the overall experience is. These insights can guide you in optimizing the layout and content of the results page if you own a customizable site search engine.
2. Gaining Qualitative Insights from Search Interactions
While traditional analytics platforms provide quantitative data (like counts and averages), Clarity excels at offering qualitative insights.
By watching session recordings of users who performed a search, you can explore how they interact with your site beyond the numbers. You can dig deeper using Clarity’s filters and segment tools, adding layers like rage clicks, dead clicks, or funnel behaviors to your analysis.
Heatmaps can also help you visualize click activity both on search results pages and on product or category pages that users land on after searching. For instance, you can check if the “Add to Cart” button is the most clicked element and compare behavior between users who searched and those who didn’t.
This gives you a richer understanding of what users are really doing and where the experience can be improved.
3. Using AI for Insight Summaries
Microsoft Clarity Copilot can save you time by automatically summarizing key insights from user sessions involving internal site searches.
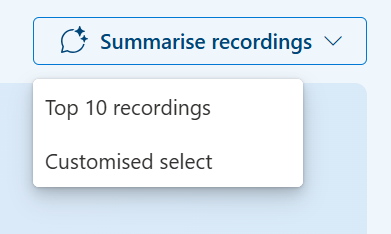
Before using this feature, you could niche down your segment to include site search with a certain search term that you care about.
While I won’t dive into all the strategic ways I use this feature here, some use cases are covered in my hands-on guide to the Microsoft Clarity Copilot.
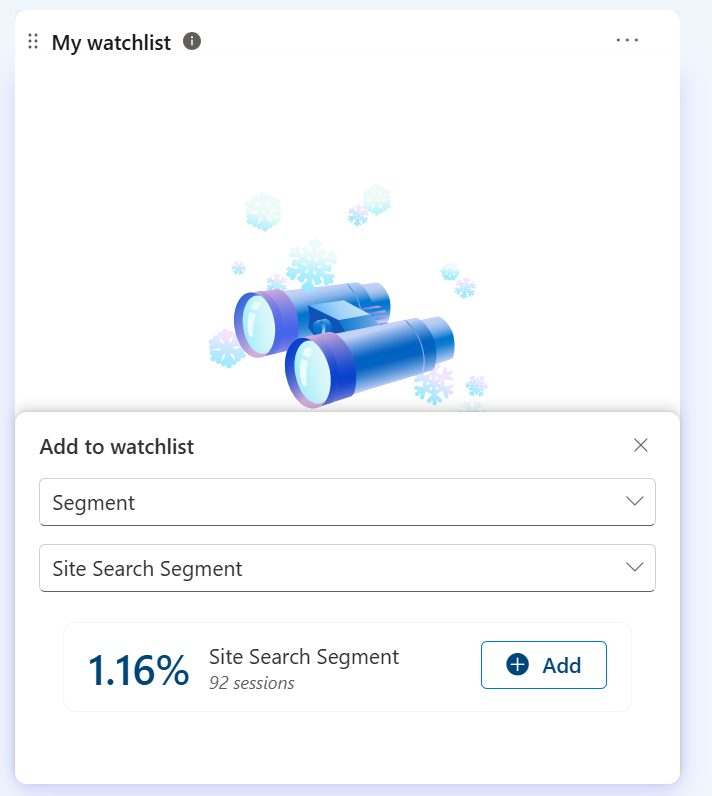
4. Monitoring Specific Search Terms
The My Watchlist feature in Clarity allows you to keep an eye on specific search queries. For example, if you’ve redesigned a page to make information more accessible and expect search usage for a certain term to drop, you can monitor that term to see if the change is having the desired effect.
You could use a segment (page URL visit or site search API Event) for either all internal-site search or site search where the search term contains a specific keyword or a group of keywords.
You could also use the site “search_term” custom tag to focus on a specific search term, or a group of exact search queries.
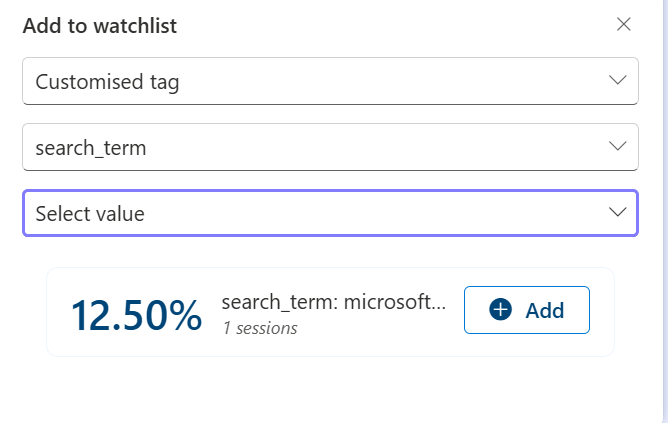
This is especially useful for UX testing and validating design improvements.
Important Notes on Site Search Tracking in Clarity
It’s worth noting that Microsoft Clarity doesn’t currently provide a dedicated report showing the total number of search events or a detailed breakdown of all search terms.
However, you can see how many sessions included at least one internal search. This alone can still be useful for understanding how users engage with your search element and whether your site makes it easy for them to find what they need.
A Look Ahead: What I’d Like to See in Clarity
If Microsoft Clarity doesn’t plan to introduce full site search tracking with search term reporting, I’d love to see a card that gives you the ability to report on custom tag values similar to how Clarity currently reports page URLs.
That way, if you’ve set up a custom tag to capture search terms (or any other user interaction), you could rank them by popularity, identify trends, and optimize accordingly.
Need help with your analytics and measurement? Feel free to reach out here using the DumbData contact us page form or the provided email address, and get
Happy measuring!


