

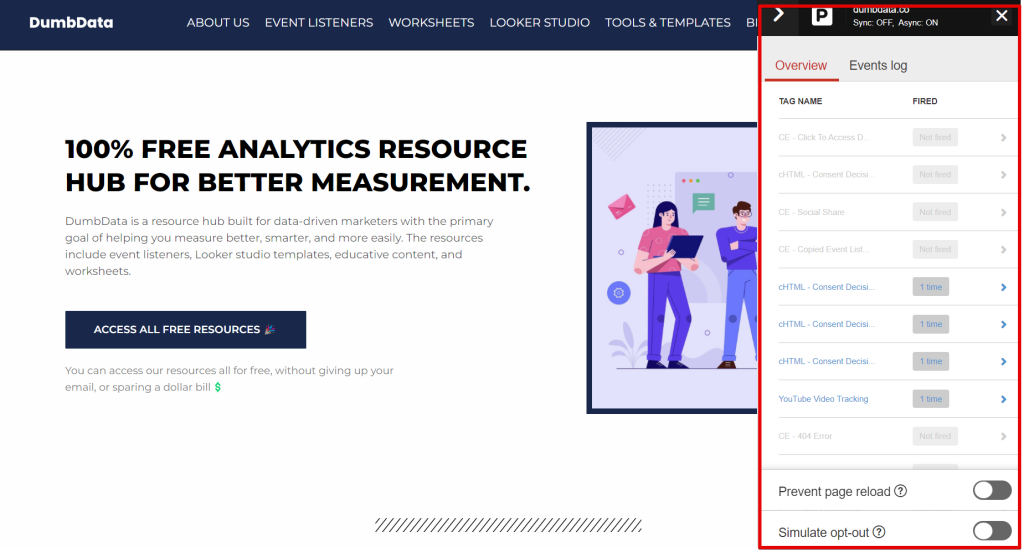
Piwik Pro has recently revamped its Debug Mode, transforming it from its previous design:
To a more refined and user-friendly interface:

In this guide, I’ll walk you through the new Piwik Pro Debug Mode, how to access it, and how to leverage it for effective debugging and troubleshooting.
Accessing The Piwik Pro Debug Mode
Previously, Debug Mode was accessible even outside the Piwik Pro Tag Manager.
However, with this update, it is now exclusively available within the Piwik Pro Tag Manager UI.
This feature is one of the essential ways to test your tracking setup before deploying it to live users, and it serves as a key tool for troubleshooting your Piwik Pro implementations.
To access the Piwik Pro Debug Mode, follow these steps:
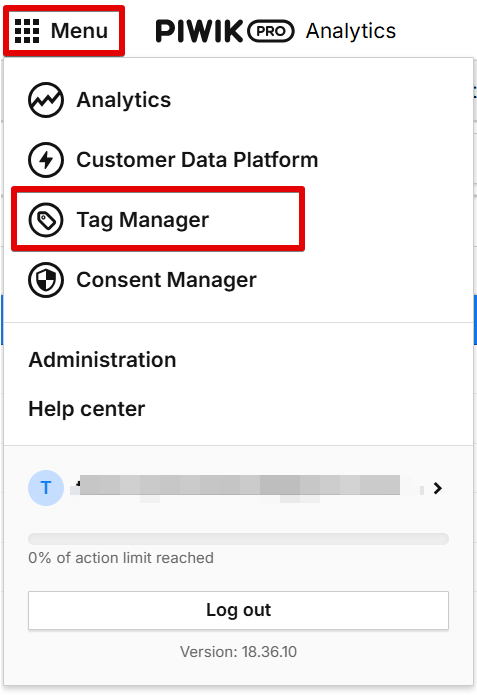
1. Open Piwik Pro Tag Manager by clicking on the menu icon and selecting “Tag Manager”.
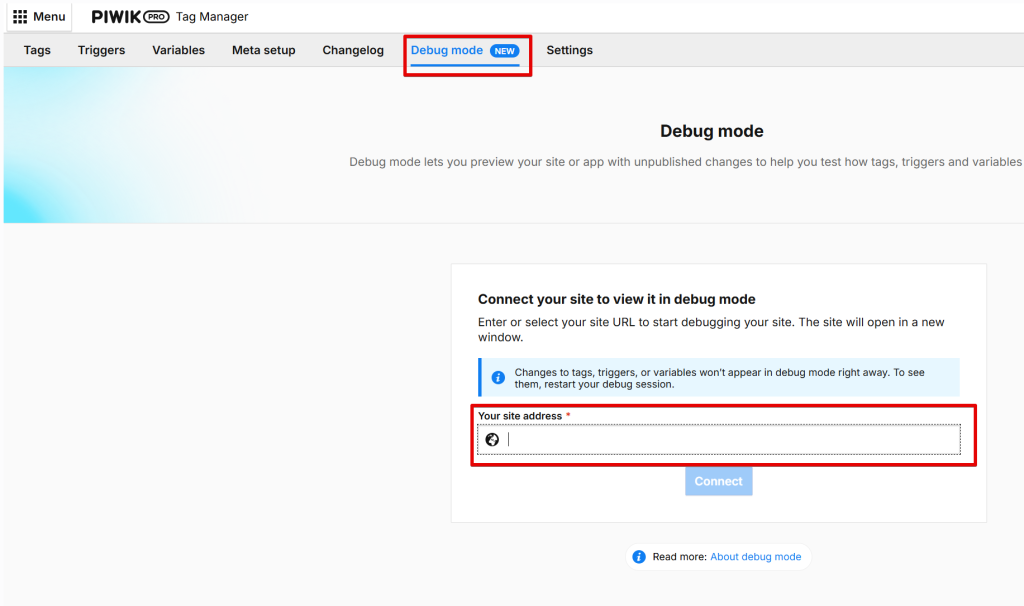
2. In the Tag Manager view, navigate to the Debug Mode tab, which now has its own dedicated section.
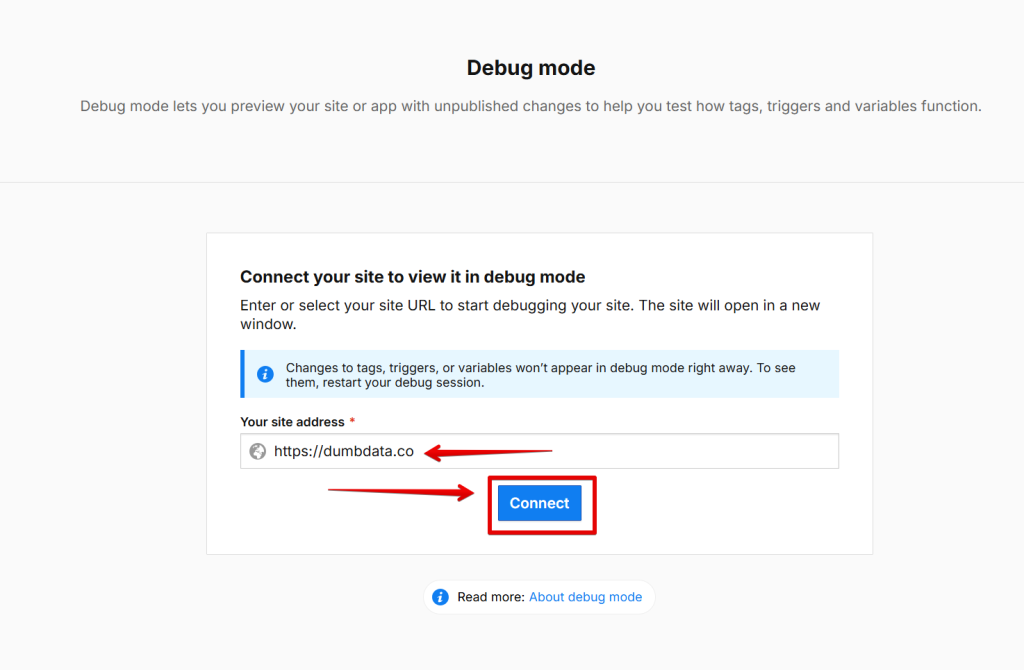
3. Enter or select your website URL to initiate the debugging session. The site will open in a new window.
Here are a few things to keep in mind:
- For Debug Mode to function, Piwik Pro and the Tag Manager module should be installed on your website.
- Once in a debug session, any modifications to tags, triggers, or variables won’t reflect in Debug Mode immediately. To apply changes, restart the debug session.
4. Click the “Connect” button to start the debugging session.
Once the debug session is active, a confirmation message with a green “Connected” status will appear at the bottom of your screen, as shown below:
The “Debug Mode” tab in the Piwik Pro tag manager UI should also indicate this with the green status.

Now, return to the Debug Mode panel for a detailed breakdown of your tracking activity.
Understanding the Piwik Pro Debug Mode Interface
Within Debug Mode, as you interact with your website on your browser, you will gain access to valuable insights into how your tracking setup functions as you do.
Tags Tab:
In the “Tags” tab, you can:
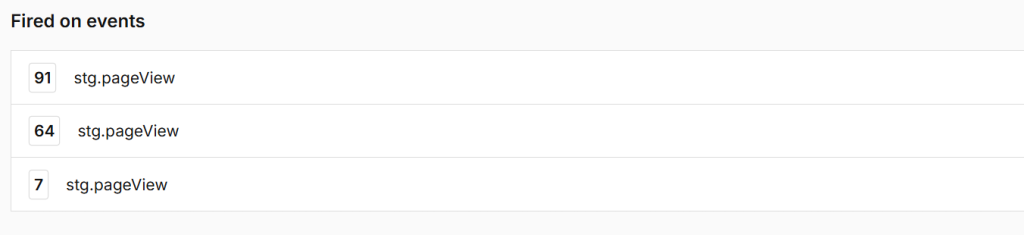
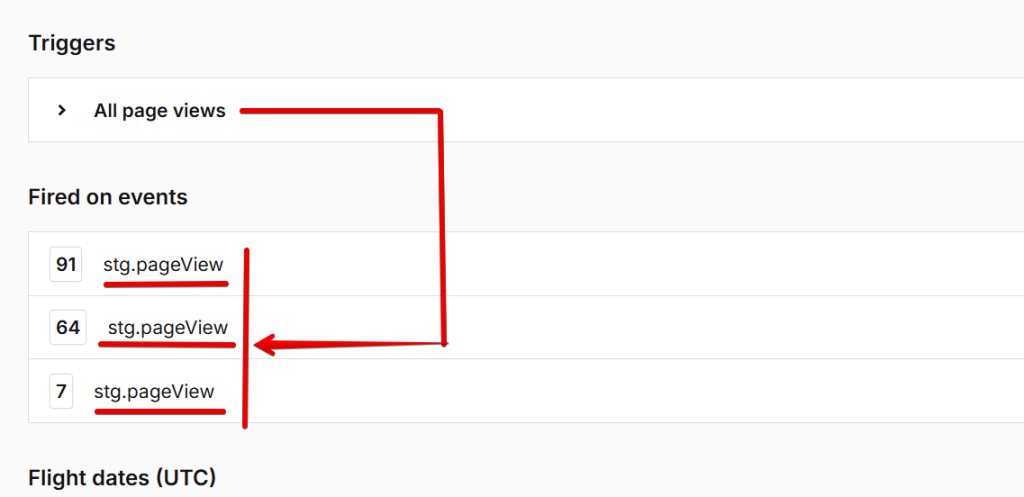
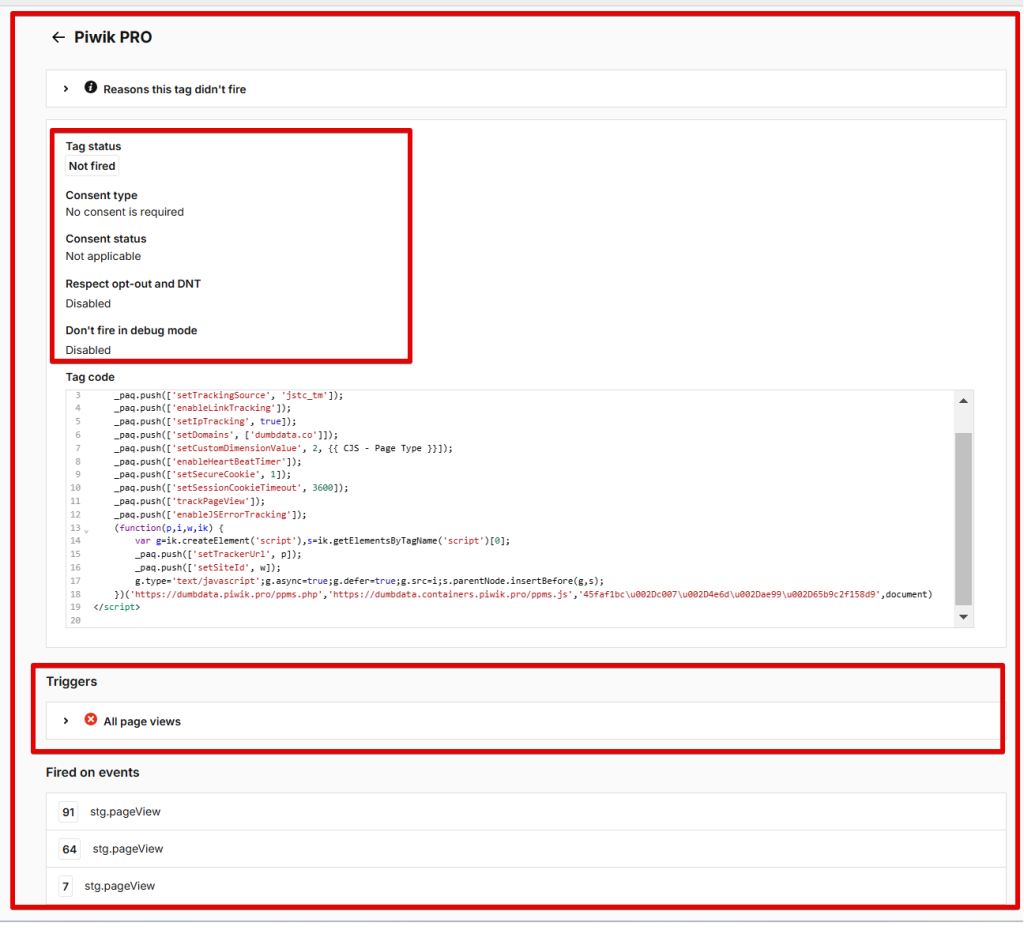
View which tags have fired and which have not.
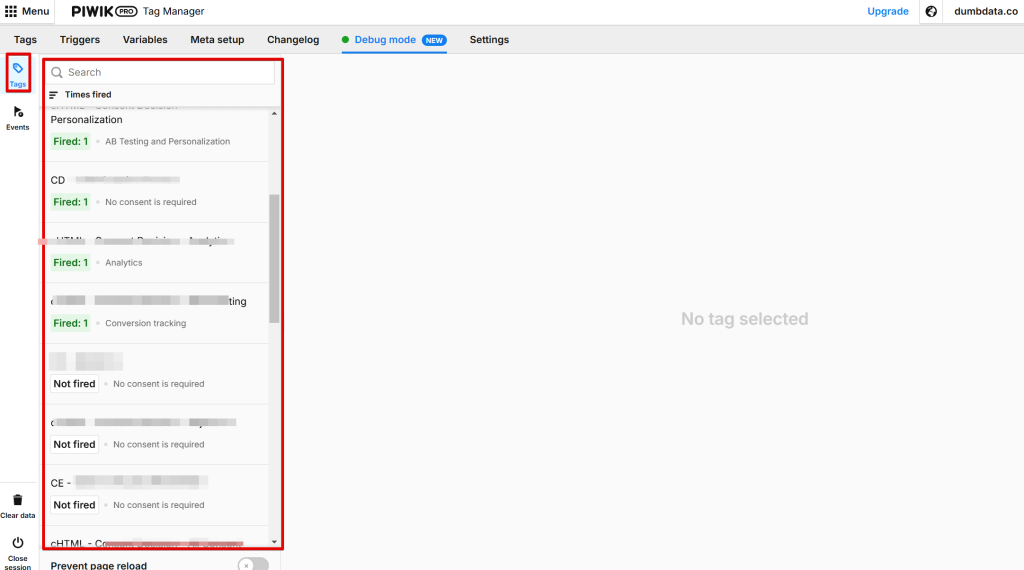
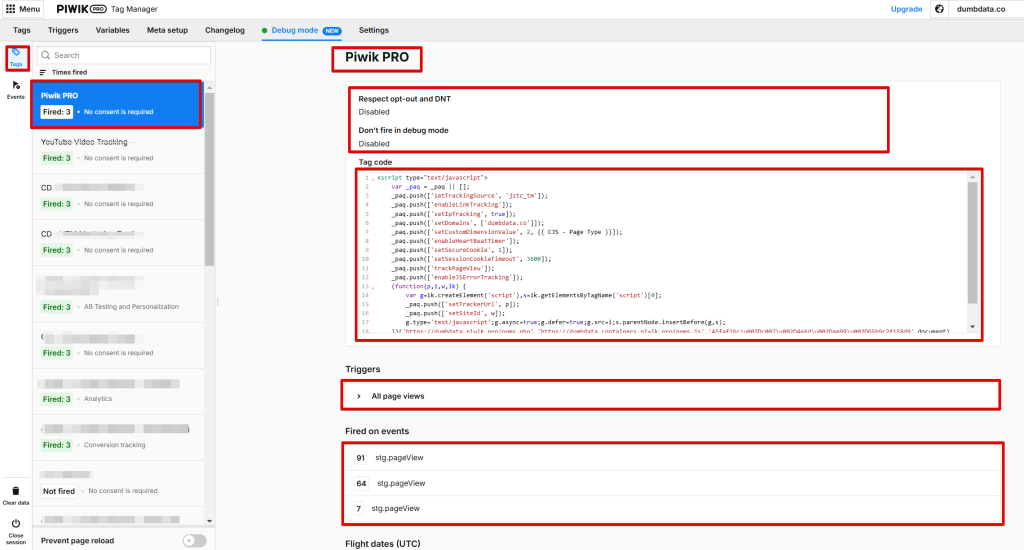
Check how many times a tag got fired during the debug session. Clicking on a tag provides more details, such as:
- The event(s) that triggered the tag.
- The hierarchy number for all dataLayer events executions.
- The tag configuration details and applied consent settings for the tag.
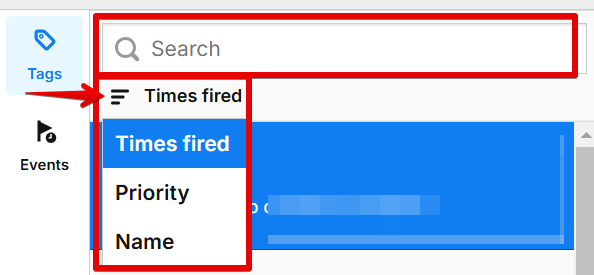
You’ll also be able to search and sort tags based on the following criteria:
- Times fired
- Priority
- Name
Additionally, clicking on an event will take you to the event tab and the exact dataLayer event the trigger responsible for the tag execution relies on.
If you’re using a click trigger, it will be represented as a Piwik Pro event named “stg.click”.
Similarly, a page view trigger executes on a “stg.pageView” event.
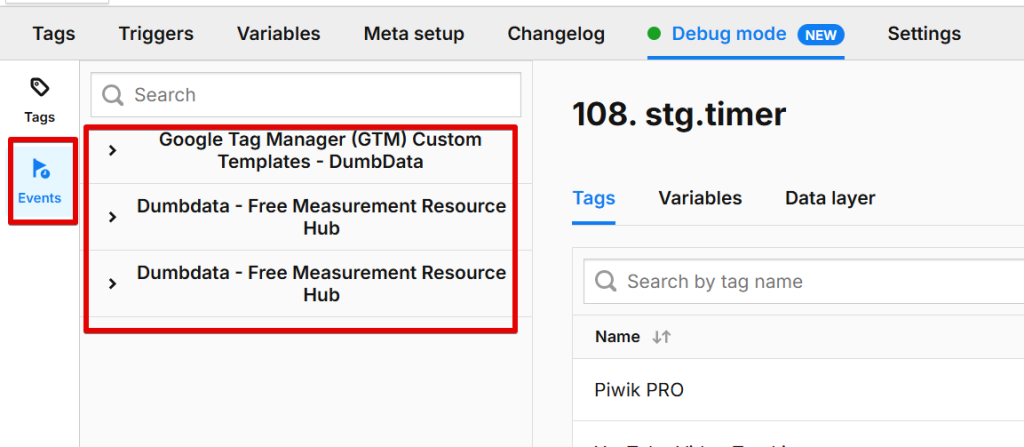
Events Tab: The DataLayer Events in Debug Mode
The “Events” tab displays the DataLayer events that have been triggered in the browser and on the page, along with their execution hierarchy.
This allows you to see the sequence of events as they occurred on the browser.
Clicking on a specific event opens a detailed view with three tabs: Tags, Variables, and DataLayer.
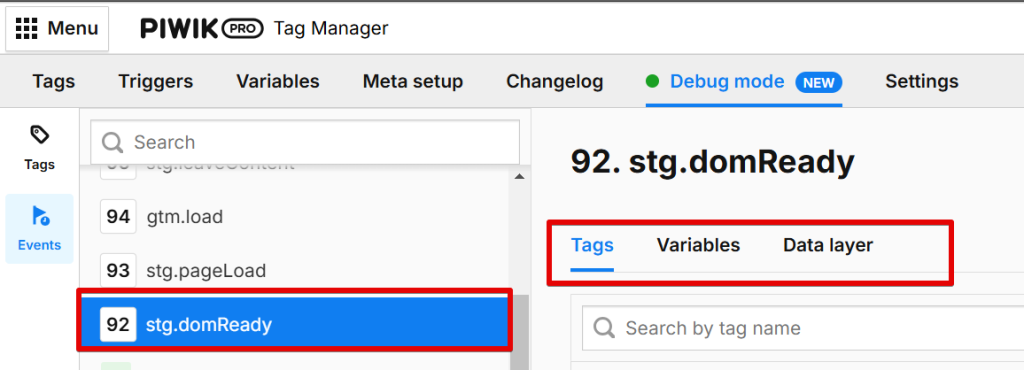
Each of these tabs provides crucial insights:
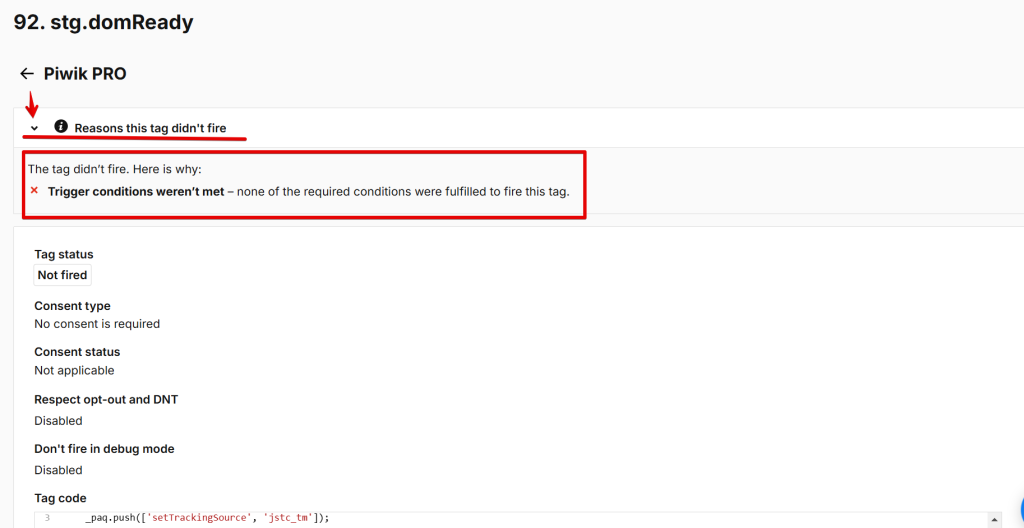
The Additional Tags Tab:
- Displays which tags fired or did not fire when the event occurred.
- Allows you to sort tags by name, priority, or status.
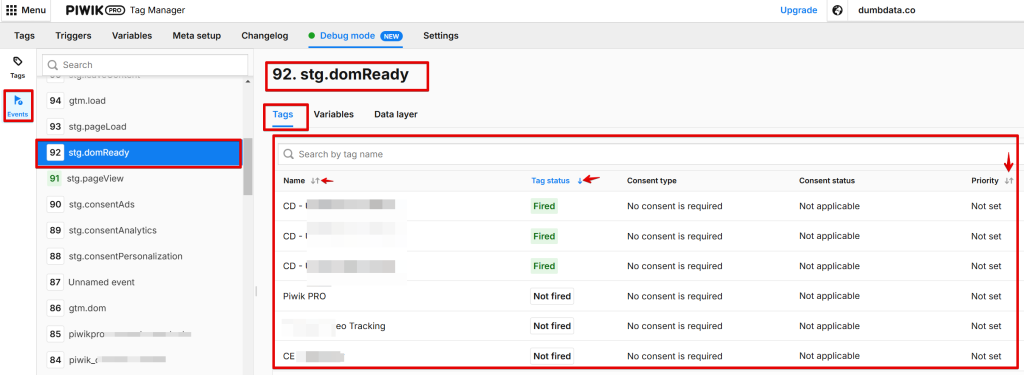
Clicking on a tag reveals additional details, such as:
- Execution status
- Consent type & status
- Other tag configurations
Scrolling further down in this view provides additional insights into:
- The trigger you’ve attached to the tag.
- Also, the tag’s code representation, where Piwik Pro Tag Manager translates even non-custom code tag template types and displays the raw code, even for event-based tags).
If a tag did not fire, you can expand the “Reasons this tag didn’t fire” section to understand why.
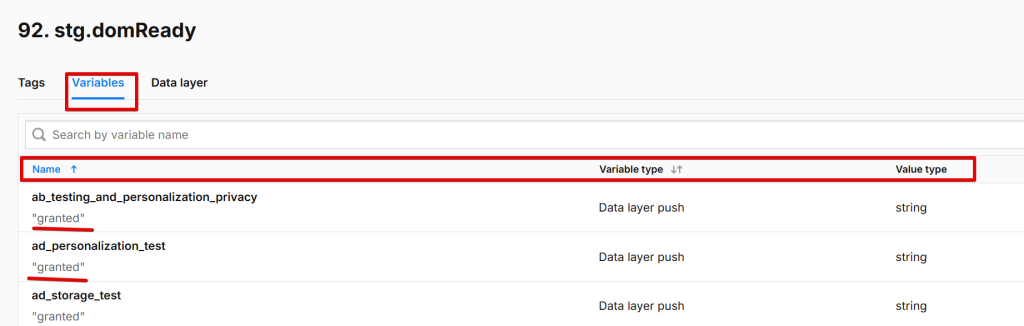
The Additional Variables Tab:
The Variables tab displays:
- The name and values of variables at the moment the DataLayer event occurred.
- Details about the variable type and value data type.
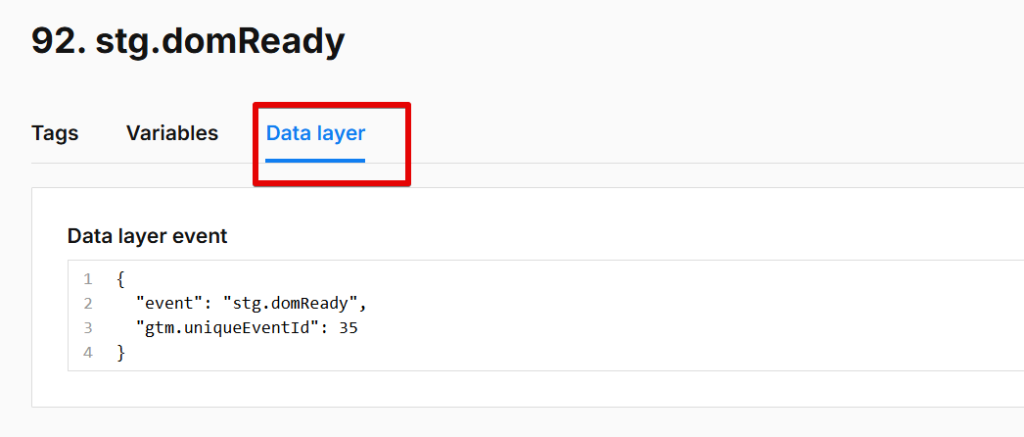
The Additional DataLayer Tab:
The DataLayer tab provides a raw schema representation of the DataLayer event, giving you a structured view of the event’s data.
Page Level Event Data Debugging:
One of the most useful features in the Events Tab is the ability to collapse pages that you do not want to include in your debugging session.

The Events Tab organises events under a collapsible accordion-style structure as you navigate from one page to another during a debug session.
This allows you to expand or collapse the recorded event data for each page.
This feature, which also exists in Google Tag Manager preview mode, can help you focus your investigation on pages most relevant to your debugging or troubleshooting goal.
Other Debug Mode Configurations:
The Piwik Pro Debug Mode in Piwik Pro comes with several additional features to enhance your debugging experience:
Clear Data: Clicking the “Clear Data” button (represented by a trash bin icon) will immediately erase all recorded event data and records showing tags that fired from the session.
Prevent Page Reload: Enabling the “Prevent Page Reload” option prevents the page from reloading when you click a link or submit a form that would typically cause a refresh.
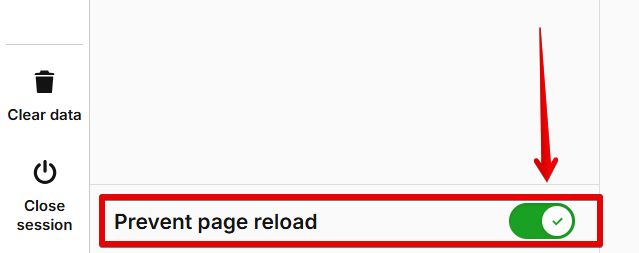
This feature was in the deprecated Piwik Pro debug mode UI, and it will be useful when debugging click tracking and form submission tracking in Piwik Pro.
Close Debug Session: Clicking the “Close Section“ button (represented by a switch icon) stops the active debugging session.
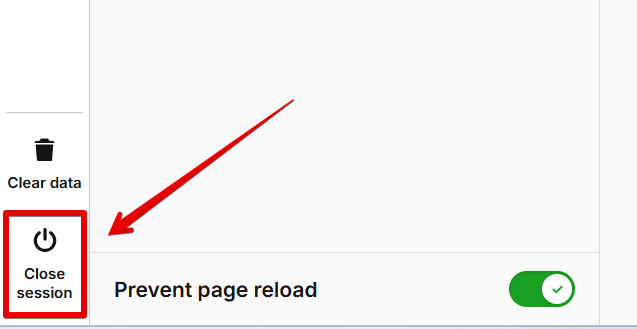
You can also close it from the webpage you are currently on.
Once closed, a notification will appear informing you that the session has ended. To resume debugging, you must start a new connection.

You’ll have to click “Start New Connection” to initiate a new Piwik Pro Debug Mode session.
Final Thoughts
The recent improvements to Piwik Pro’s Debug Mode are a welcome update, which should make debugging easier, more efficient, and less frustrating.
However, if Debug Mode isn’t working for you, here are some possible reasons:
- Piwik Pro isn’t installed on your website.
- The Piwik Pro Tag Manager module isn’t loaded (e.g. if you’ve only installed the Piwik Pro Analytics Suite or modified the container not to include the Tag Manager module).
- If you’re using server-side tagging without Piwik Pro’s client-side tracking, Debug Mode won’t work.
- Ad blockers may be preventing Piwik Pro from loading.
- A poor network connection could be causing issues.
- Browser extensions might be interfering with the Piwik Pro debug session.
- If you navigate between domains where Piwik Pro isn’t installed, Debug Mode will stop functioning.
- If you’re using a third-party consent management platform that blocks Piwik Pro, it won’t load properly.

I hope this guide has covered everything you need to know about the new Piwik Pro Debug Mode.
If you need help with your tracking setup or are facing a measurement challenge, please reach out via the DumbData Contact Page. Until then, happy debugging!