


This concise article will explore how to filter in Microsoft Clarity by UTM parameters exclusive to Google Analytics (GA4) and guide you on building a segment based on these filters. Additionally, you’ll learn about filtering by the vendor-neutral UTM parameters in your Clarity projects and discover how Microsoft Clarity processes UTM referrer changes during a session based on my testing.
If these topics pique your interest, let’s get the ball rolling.
The introduction of Google Analytics (GA4) brought specific UTM parameters that are currently still recognisable only to GA4:
- utm_source_platform: This parameter identifies the platform generating traffic to your site in some way different from the “utm_source”.
- utm_creative_format: This UTM parameter provides details about the creative involved, such as text, display, native, video, or search.
- utm_marketing_tactic: This parameter allows you to convey information about the marketing tactic or targeting criteria used, such as remarketing or prospecting.
Microsoft Clarity does not support filtering by the “utm_id,” which holds the campaign ID value, nor does it support the above-mentioned UTM parameters. The methodology described in this blog post will also help address how to work around this limitation.
Those with Microsoft Clarity installed will notice the absence of these specific UTM parameters in the traffic field options for your filter settings. In Clarity, you are restricted to filtering by assigned traffic source, medium, campaign, and channel to which it has assigned the user visits.
As a marketer, CRO specialist, or analyst, you may seek to understand how website visitors from specific marketing tactics interact with your site. Often, sites utilise the exclusive UTM parameters of Google Analytics to convey this detailed traffic context, which doesn’t get captured. Instead, Clarity recognises the more general utm_source, utm_medium, and utm_campaign parameters.
These details can be crucial for focusing on specific marketing strategies, answering UX questions, and more effectively evaluating page content relevance.
Apart from trying to understand how to do a UTM filter in your Clarity project, you might also want to make your project able to filter by these UTM parameters.
Well, you are lucky, as I’ll be showing the three options, which I will discuss along with guidance on filtering by the “utm_id.” But first, let’s quickly review how to filter by UTM parameter values in Microsoft Clarity.
Filtering by Traffic Source, Medium, Campaign, and Channel in Microsoft Clarity
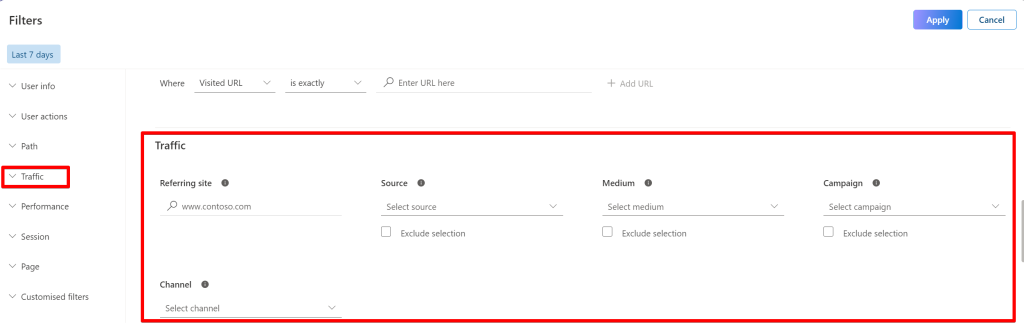
Filtering traffic in Microsoft Clarity is straightforward. To do so, click the “Filters” option to open the filter builder screen.

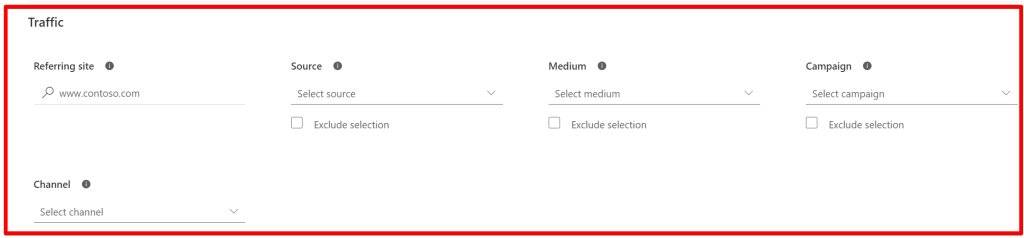
Then, proceed to the “Traffic” section, where you will find options to filter by the following criteria:
- Referring Site
- Source
- Medium
- Campaign Name
- Marketing Channel
Select the desired UTM parameter from the dropdown menu to filter by the specific traffic information you need.
It’s important to note that filtering is session-scoped. Microsoft Clarity captures and reports all UTM parameter values from a user’s session, even if those parameters change multiple times in that same visit, without restarting or duplicating the session.
Backing my statement with my conducted test
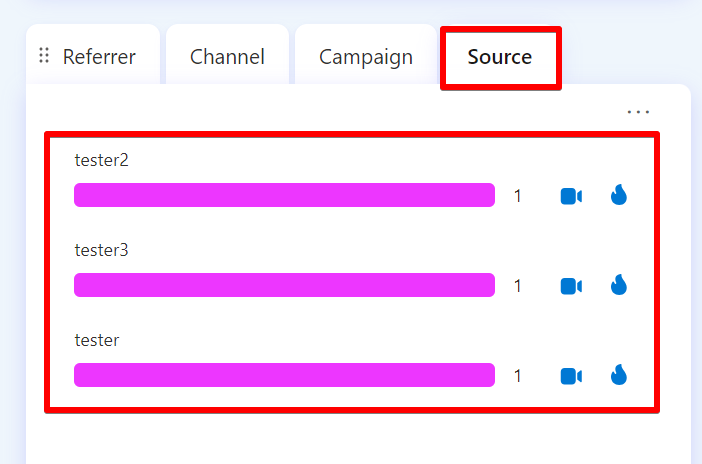
For example, in my test, I altered the value of my “utm_source” and other UTM parameters three times during a single session. Microsoft Clarity effectively reported all changes while still recognising it as a single session, as illustrated in the image below.

However, while you scroll to the traffic attribution card in the dashboard UI, it still indicates that each UTM source accounted for one session.
To create a segment for future reference, click the “Save as segment” option and follow the wizard to set one up in your Clarity project.

Filtering Using Unsupported UTM Parameters in Microsoft Clarity
There are three viable options for those needing to filter using UTM parameters that are not supported natively by Microsoft Clarity;
- utm_id
- utm_source_platform
- utm_marketing_tactic
- utm_creative_platform
Each method varies in complexity and ease of use, providing a seamless user experience. These methods include:
- Innovatively Using the Visited URL Option
- Adjusting How You Name Campaigns
- Using Custom Tags
Innovatively Using the Visited URL Option
This approach is exceptionally straightforward, and it requires no configuration changes.
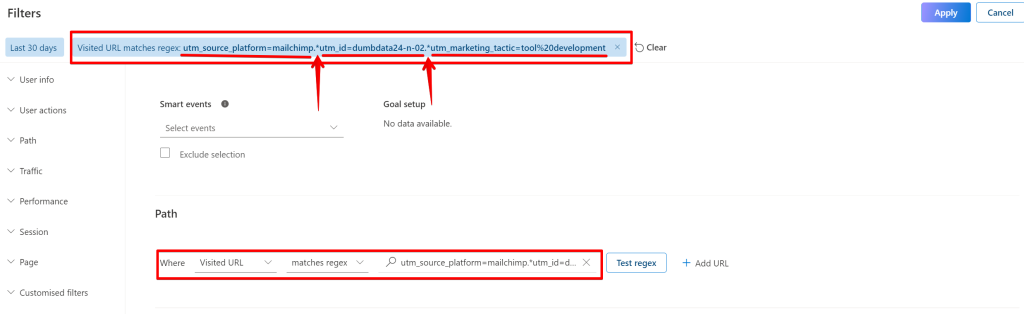
You can start by opening your filter view and navigating to the “Path” section.
Ensure you select “Visited URL” and set your condition rule to either “contains” or “matches regex” (the latter is recommended if you are comfortable with regex, as it offers greater flexibility).
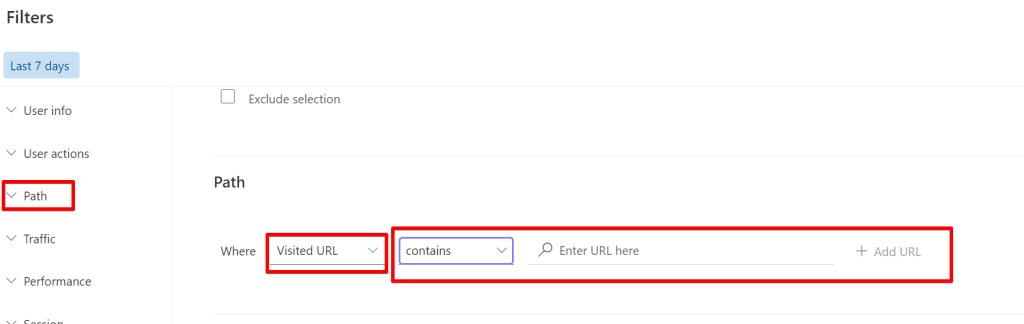
Next, identify the parameter you’d like to filter by and its corresponding value.
Here is an example, as shown in the image, where I filtered by “utm_marketing_tactic.”

You can apply the same method for:
- utm_id
- utm_creative_format
- utm_source_platform
For instance, filtering by “utm_marketing_tactic” allows Microsoft Clarity to display only data for users acquired using this specific marketing tactic.

Similarly, when I filtered by “utm_source_platform” to analyse performance specifically from “MailChimp” as the email marketing provider, it provided targeted insights.

Additional Note: If you want to gain new perspectives on using UTM tagging to measure your email marketing efforts using tools like Google Analytics (GA4) and Piwik Pro, you should read the blog post here.
When adding the value and the UTM parameter to filter by, ensure that you use the URL in its “Encoded” format for the filter to function correctly.

Using the “contains” condition, you can only filter by one UTM parameter. However, using regex allows you to filter by multiple unsupported UTM parameters in Microsoft Clarity.
However, remember that the UTM parameter’s order in the URL can also break your regex.

Although this process may seem easy, it can get messy. One good side of this approach is that it works retroactively, meaning you can apply filters to data already collected in your Clarity project.
Adjusting How You Name Campaigns
This method involves adjusting how you label the value of your UTM campaign parameter that holds the campaign name. Although it is not retroactive, it requires some internal organisational changes and may not offer sufficient flexibility when setting up this filter, as you will soon see.
Simply put, you need to modify how you name your campaigns to include information about the marketing tactic, among other details.
Implementing this method entails making structural adjustments that must be communicated within your organisation. Notably, the solution is not retroactive; filtering capabilities will only apply to data recorded in Microsoft Clarity from the day the changes are implemented onwards.
With this approach, you are limited to selecting only the complete UTM campaign name; you cannot isolate and filter campaigns based solely on specific characteristics, such as those for remarketing purposes.
Let’s now explore the third option.
Using Custom Tags
“Custom Tags” is a feature of Microsoft Clarity that I have previously explored in two articles.
You can refer to this guide for a detailed understanding of what “Custom Tags” entail within Microsoft Clarity.
Additionally, this article here helps reveal some innovative ways to utilise “Custom Tags” in your Clarity projects.
The method of using “Custom Tags” is not retroactive, but it does offer a user-friendly experience that does not require any regex knowledge.
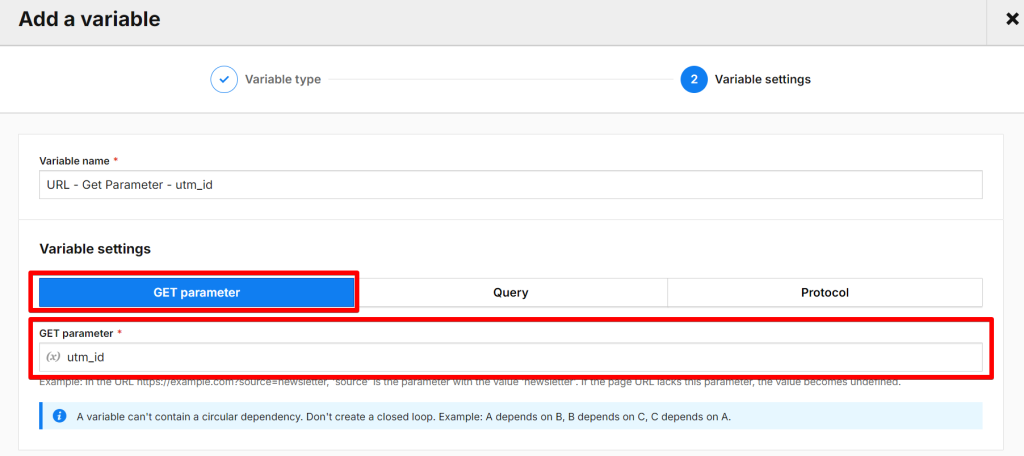
To use “Custom Tags,” start by navigating to a tag management system like Google Tag Manager or Piwik Pro Tag Manager. Here, create a variable to capture the values of “utm_source_platform,” “utm_marketing_tactic,” “utm_id”, and “utm_creative_format” whenever they are available in the URL.
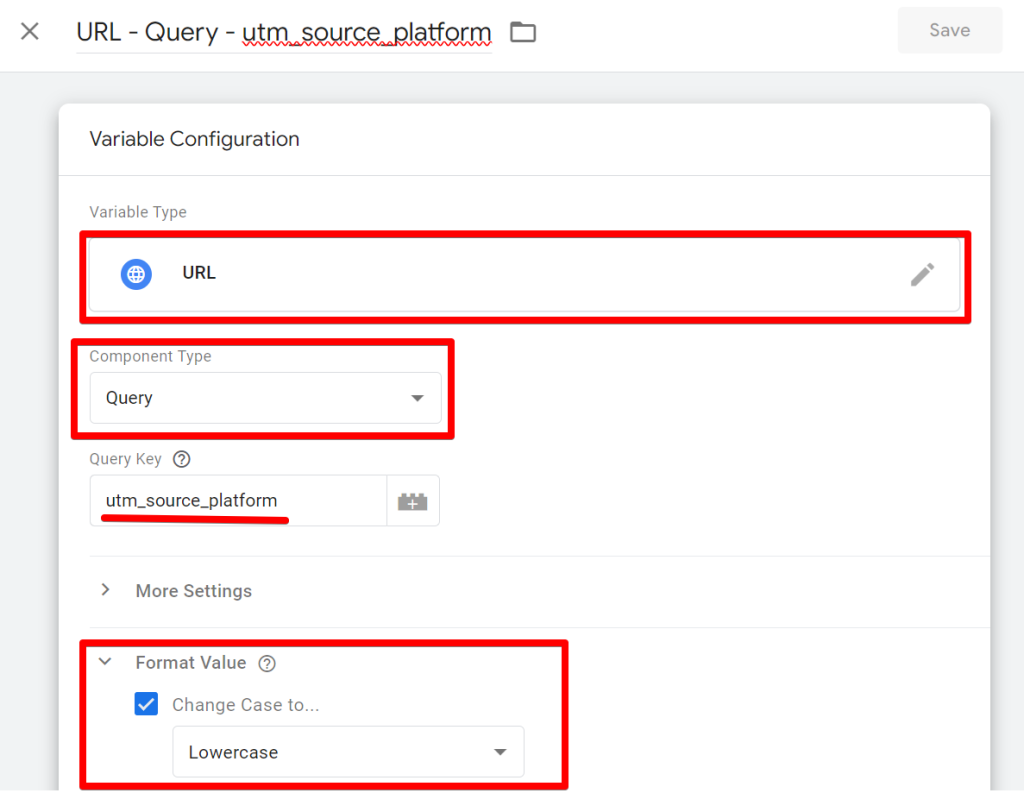
Here is what your setup should look like in Piwik Pro Tag Manager.
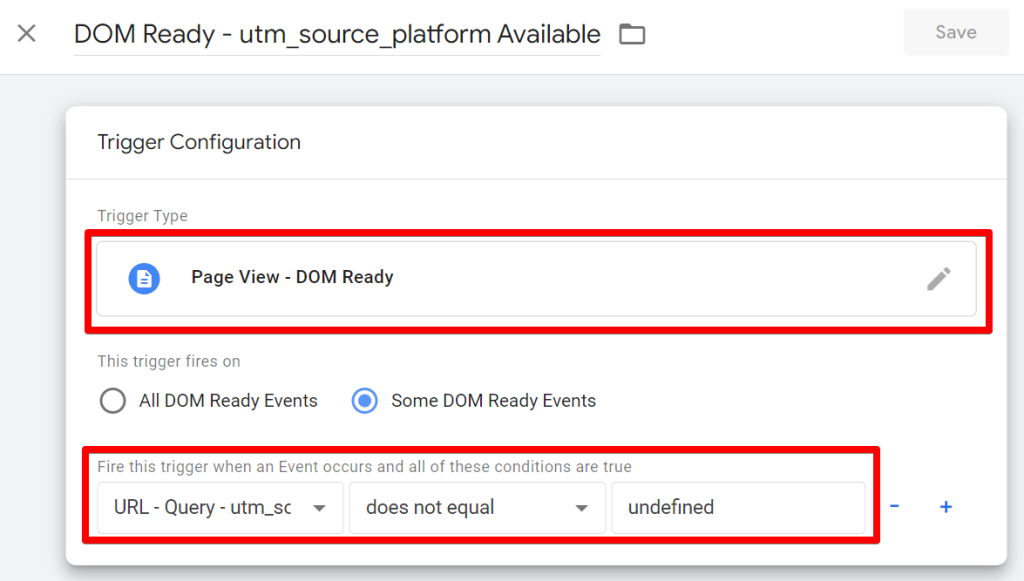
Next, set up a “DOM Ready” or “Window Loaded” trigger in your tag manager for situations where these variables are not undefined—that is, they hold a value and are present in the URL.
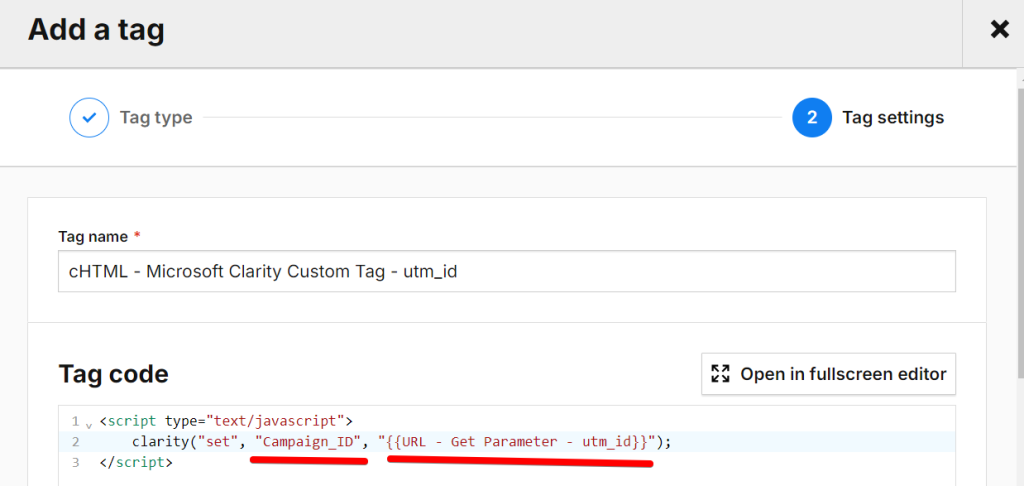
Then, create your tag in your tag manager (GTM or Piwik Pro) and configure it to execute when each UTM parameter is detected in the user’s browser URL using the established triggers.
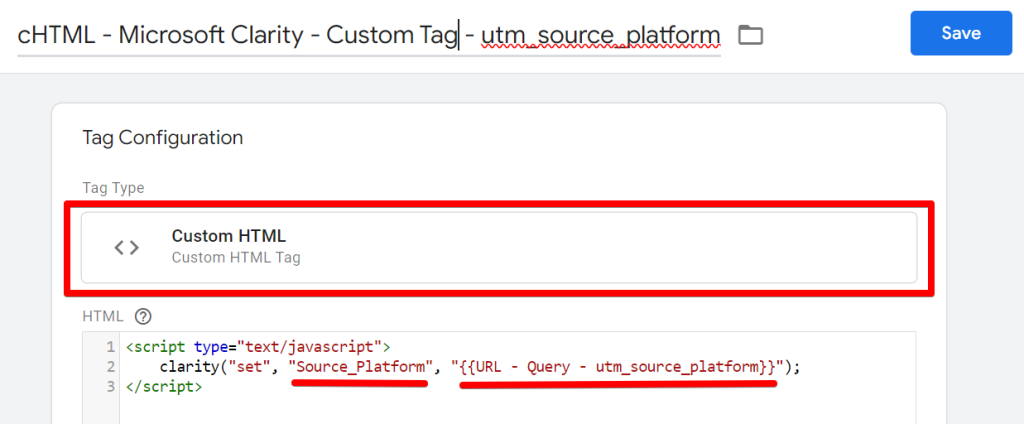
Here is what you should have in Piwik Pro Tag Manager.
Finally, test your setup thoroughly and then hit the publish button.
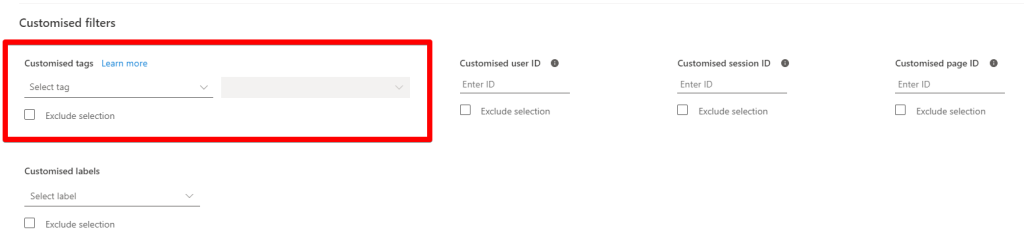
When you return to your Microsoft Clarity project, you can now filter using any of the UTM parameters that have been recorded as “custom tags” in a much cleaner and more efficient manner.
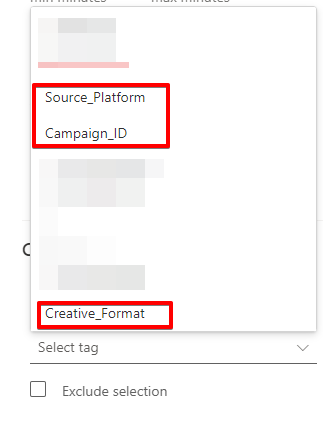
Conveniently select the UTM parameter and the value you want to filter by in your Clarity project.
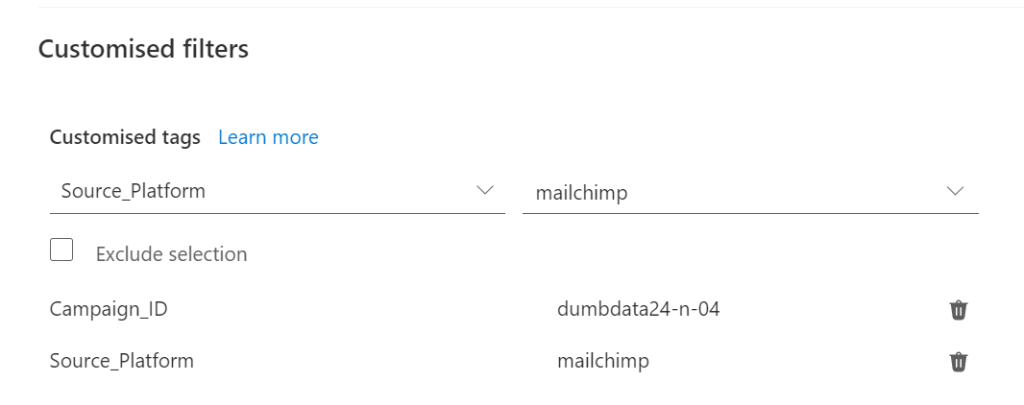
Helping you quickly find the information you need.

This approach is streamlined and precise, although not retroactive. It provides the flexibility to avoid complex regex setups when you need to filter by one or more values of a specific UTM parameter or mix your filter setup with other UTM parameters.
Saving Your Microsoft Clarity Filters as a Segment
While a filter is applied, you can click the “Save as segment” button to save it as a segment in your Clarity project.

The following screen offers you the option to either “Save as new” segment or “Update an existing” segment.
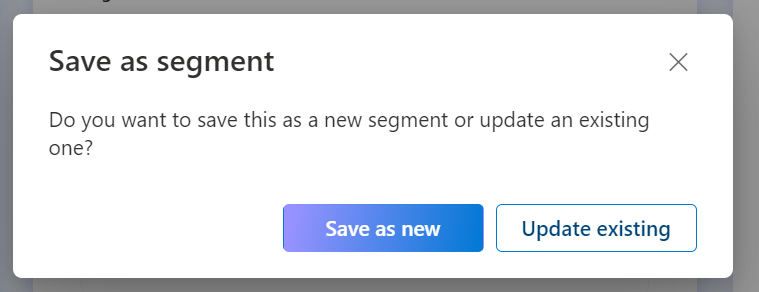
Depending on the option selected, the process is easy to follow through and complete the segment creation.
Using the Filter in Your Analysis
The filters you’ve applied can help you focus your analysis within the Microsoft Clarity dashboard UI, quickly accessing relevant insights in session recordings and heatmap data.
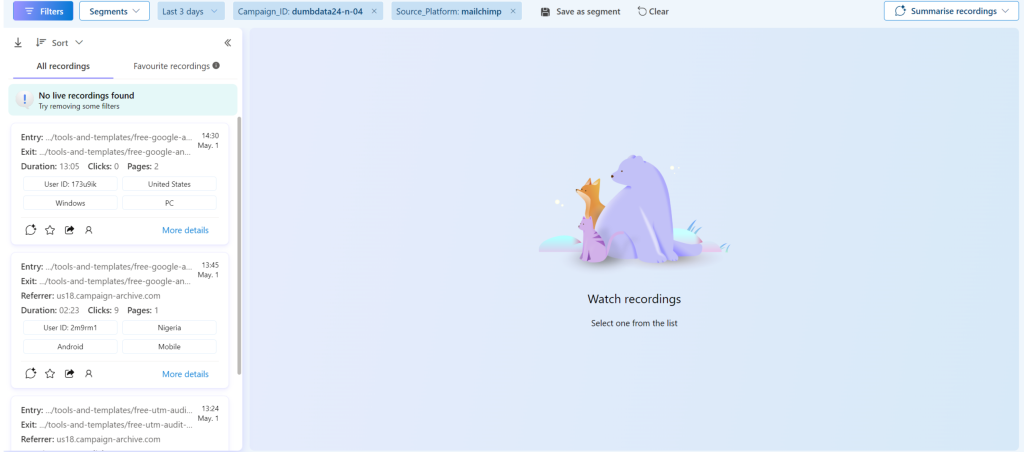
These filters’ utility is extensive, but going into all the specifics would extend this blog post considerably, so I will keep the discussion to their applicability.
Closing Thoughts
You have now learned about Microsoft Clarity’s capabilities for filtering by UTM parameters, including those not natively supported.
I am eager to hear what you found insightful in this guide and which approach you plan to adopt. Feel free to share your thoughts and feedback with me via LinkedIn. Until then, happy measuring!


